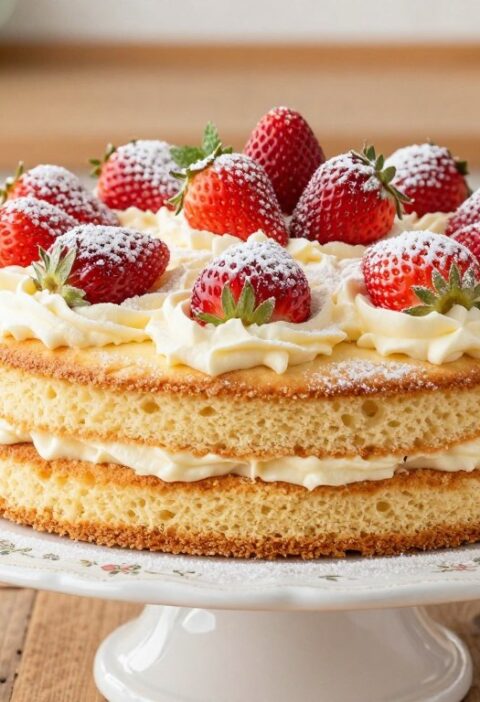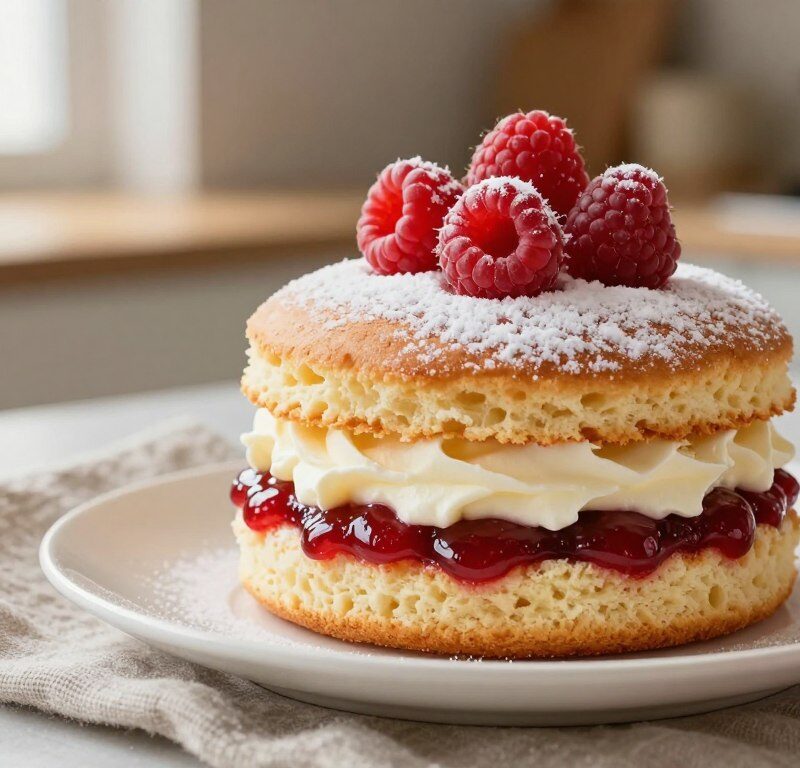
This charming mini victoria treat offers all the comforts of the classic sandwich cake in an elegant, single-portion form. It is light, airy and perfect for afternoon tea or a small celebration.
Follow a simple recipe and you will create soft sponge cakes filled with quality jam and cream. The method is straightforward, so even busy hosts can serve fresh bakes in under an hour.
Each little sponge cake captures the balanced sweetness of the traditional victoria sponge while making presentation effortless. These bites are ideal for parties and give consistent results every time.
Key Takeaways
- Easy-to-follow recipe yields individual portions quickly.
- Soft, fluffy sponge filled with jam and cream for classic flavour.
- Perfect for afternoon tea, parties and special occasions.
- Consistent results suitable for novice bakers.
- Small size makes serving and presentation simple.
Why You Will Love This Mary Berry Mini Victoria Sponge
Transform traditional baking into quick, elegant portions that charm guests and save you time. These small cakes bring the classic sandwich flavour to each plate without the fuss of a full bake.
The texture is light and airy, with a gentle sweetness that lets quality jam and cream shine. Using traditional British baking techniques, the bake time is short; individual tins need only 15-18 minutes in the oven, so you can finish the recipe in under an hour.
Perfect for afternoon tea or celebrations: these portions need minimal decorating yet look very refined. The jam cream filling pairs beautifully with the soft layers, giving a timeless taste in every bite.
- Quick baking: 15-18 minutes per batch saves time.
- Consistent results using simple methods.
- Ideal for elegant entertaining with minimal effort.
| Feature | Benefit | Approx. Time |
|---|---|---|
| Individual portions | Easy presentation for parties | 15-18 minutes |
| Jam and cream filling | Balanced, classic flavour | 5-10 minutes to assemble |
| Simple recipe | Reliable results for bakers of all levels | Under 60 minutes total |
Essential Ingredients for Your Sponge Cakes
Start with precise measures and room-temperature items to ensure even mixing and rise. Correct preparation of ingredients helps the batter come together smoothly and gives a consistent crumb.
Dry Ingredients
Combine 175 g self-raising flour with 1 teaspoon baking powder. Sift them together to remove lumps and to lighten the mixture.
Wet Ingredients
You will need 175 g unsalted butter, softened, and 175 g caster sugar. Cream these together until pale and fluffy.
- Add 3 large eggs one at a time, beating after each addition to form a stable emulsion.
- Stir in 1 teaspoon vanilla extract and 2 tablespoons milk to loosen the batter.
- Whip 200 ml double cream lightly for the filling and have a good-quality jam ready.
- Ensure all ingredients are at room temperature before you begin.
| Ingredient | Amount | Purpose |
|---|---|---|
| Unsalted butter | 175 g | Richness and tender crumb |
| Caster sugar | 175 g | Sweetness and aeration |
| Self-raising flour | 175 g | Structure and rise |
| Eggs | 3 large | Emulsion and leavening |
For a reliable recipe that follows these proportions, see the mary berry 3-egg victoria sponge for full method and tips.
Required Baking Equipment
Gathering the right tools before you start will make baking small, consistent cakes much easier.
Essential tins: For reliable shape and size, choose a 12-hole muffin tin or dedicated mini sandwich tins. A good tin gives even heat and neat edges.
Mixing kit: Use an electric mixer or a sturdy hand whisk to beat the butter and sugar until pale and fluffy. Sturdy mixing bowls keep ingredients organised as you work.
Filling and finishing: A palette knife or a spoon helps you fill the tins evenly and spread jam and cream without tearing the sponge.
Cooling tools: Transfer the cakes to a wire cooling rack as soon as they are ready. A proper rack allows steam to escape so the texture stays light.
- 12-hole muffin tin or mini sandwich tin for consistent results
- Electric mixer or hand whisk for aeration
- Mixing bowls to keep preparation tidy
- Palette knife or spoon for neat filling
- Wire cooling rack to finish the bake correctly
Preparing Your Oven and Tins
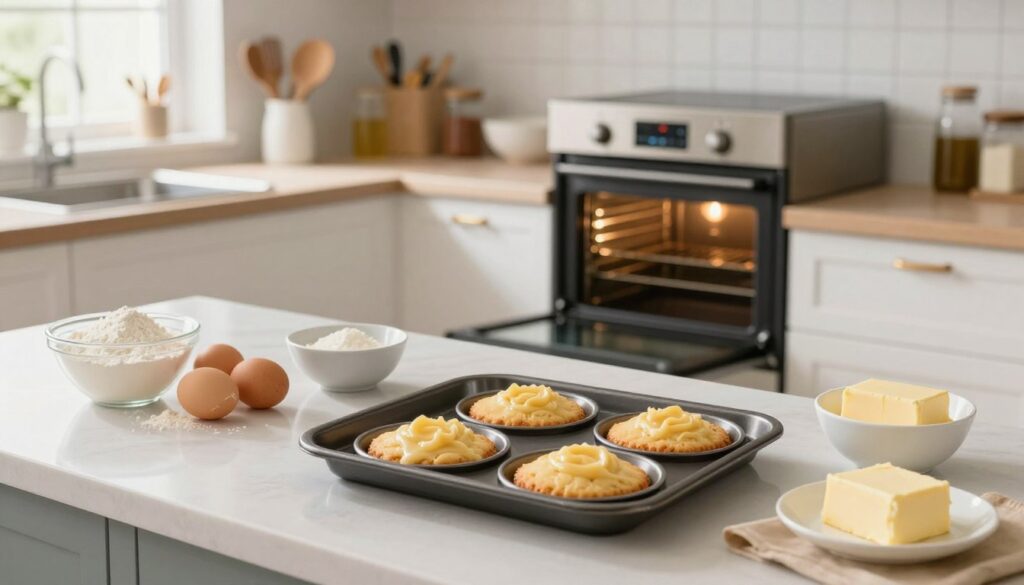
Set the stage for perfect bakes by getting the oven and tins ready before you mix the batter.
Preheat to 180°C, or 160°C if you are using a fan setting. Allow the oven to reach the correct temperature so heat is stable when the cakes go in.
Lightly grease each tin with a little butter or baking spray. A thin coat helps the sponge release cleanly and keeps edges intact.
Prepare all tins in advance so you can pour batter straight away. This protects the aeration in the batter and helps the cake rise evenly.
- Check the oven thermometer if you have one to confirm the temperature.
- Use two tins if you bake in batches to keep timing consistent.
- Place tins on the centre shelf for even baking and a golden finish.
Mixing the Perfect Batter
Start by preparing a light batter that traps air and gives each tiny cake a fine crumb.
Technique matters. Place the softened butter and caster sugar in a large bowl and beat until the mixture is pale and airy. This step creates the air pockets that lift the sponge as it bakes.
Techniques for Lightness
Add the eggs one at a time, mixing well after each addition. This keeps the batter stable and stops it from splitting.
Next, add vanilla extract and a splash of milk. Stir to loosen the mixture to a dropping consistency so it fills the tin evenly.
Fold in the flour and baking powder gently with a large spoon. Work carefully to avoid knocking out the air. A light, well-folded mixture gives a springy, even crumb every time.
- Use room-temperature butter and eggs for a smooth emulsion.
- Beat sugar and butter until pale to trap more air.
- Fold flour in with slow, deliberate strokes.
| Step | Action | Why it matters |
|---|---|---|
| Cream butter & sugar | Beat until pale | Traps air for lift |
| Add eggs | One at a time | Keeps batter stable |
| Flavour & loosen | Add vanilla extract and milk | Ensures even texture |
| Fold flour | Gently combine | Prevents loss of air |
Baking for a Springy Touch
Even heat and careful filling are the secrets to a light, springy finish. Spoon the batter evenly into the prepared tins, filling each about two-thirds full so the cakes have room to rise without spilling over.
Place your tins on the middle shelf of the oven. This position gives consistent heat around every cake and helps the tops colour evenly.
Techniques for Lightness
Bake for 15–18 minutes. Check that each cake is golden and feels springy to the touch when you press gently in the centre.
Remove the tins promptly at the end of the baking time. Turn the cakes out and let them cool completely on a wire rack. Cooling on a rack prevents soggy bases and keeps the texture airy.
- Spoon batter into tins to two-thirds full for even rise.
- Use the middle shelf to ensure uniform baking.
- Bake 15–18 minutes until golden and springy to the touch.
- Cool completely on a rack to set the crumb and make filling easier.
- That springy touch shows the cake structure is light and fully set.
Cooling and Preparing for Filling
Once the tins are empty, move each cake straight to a wire rack so air can circulate while they cool.
Remove the mini victoria sponges from the tins as soon as they are stable. Place them on the rack and leave them until they cool completely. This prevents steam building under the sponge and keeps the crumb light.
Do not try to slice warm cakes. If the cakes are still warm the cream will melt and the jam will run. Wait until the cakes cool completely and the centres feel firm to the touch.
“A proper cool on a wire rack keeps the base dry and makes filling far neater.”
- When cold, use a sharp knife to slice each cake in half for two even layers.
- Clean the mixing bowl thoroughly before whipping the cream so no residue affects the mixture.
- Allowing the cakes to cool on the rack stops the sponge from becoming soggy when you add jam and cream.
Adding the Jam and Cream
Assembling the cakes is where the classic flavours come together into a dainty, elegant treat.
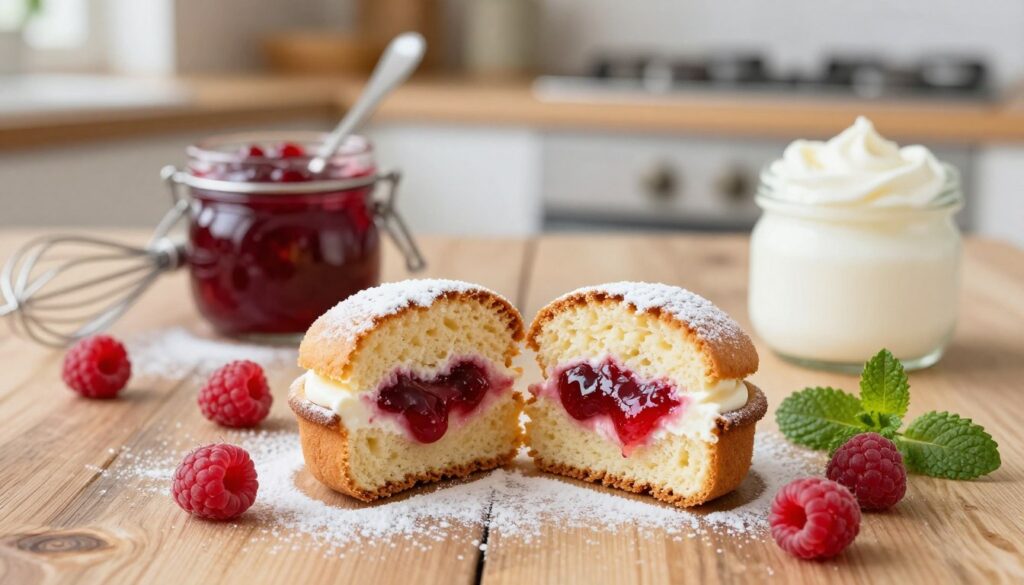
Start with the bottom half of each cooled sponge. Spread a generous layer of high-quality jam so the flavour sits clearly in every bite.
Next, spoon or pipe lightly whipped cream over the jam. Aim for an even layer that reaches the edges to create the traditional sandwich look.
Gently place the top half of the sponge onto the cream and press down very lightly. This keeps the filling neat and avoids squashing the crumb.
Use a small palette knife to smooth any cream that peeks from the sides. A clean edge makes the cakes look professional.
- Spread jam on the bottom half for vibrant flavour.
- Pipe or spoon cream to create a classic sandwich finish.
- Dust each top with a light coating of icing sugar for a polished look.
Troubleshooting Common Baking Issues
A few simple checks can turn a wobble or a dry crumb into a perfect little cake. These quick fixes focus on timing, temperature and technique so your next batch looks and tastes great.
Dry Sponge
If the sponge turns out dry, try reducing the bake time by a minute or two. A shorter oven session often keeps moisture locked in.
Tip: Check at the earlier end of the minutes range and test with a skewer; remove when a few crumbs cling.
Uneven Sizes
Uneven cakes usually come from inconsistent batter portions. Weigh the batter as you fill each tin to get identical results.
Using a small scoop or scales makes every sponge look professional and cuts down on wasted batches.
Collapsed Cakes
Most collapsed cakes happen when the oven door is opened too soon. Avoid early peeks to keep the rise steady.
If the centre falls, check that your butter was properly softened and that the mixture was not overworked.
- If cream filling is runny, whip to soft peaks before assembling.
- Ensure ingredients such as butter and eggs are at room temperature for a stable mixture.
| Issue | Likely cause | Quick fix |
|---|---|---|
| Dry crumb | Overbaking | Reduce oven time by 1–2 minutes |
| Uneven size | Unequal batter | Weigh portions per tin |
| Collapsed centre | Early oven opening | Do not open oven until near end of time |
“Small adjustments to time and technique make the biggest difference in baking.”
Creative Variations and Customisations
A few simple swaps—plain flour plus baking powder, dairy-free butter, or a yoghurt-cream mix—open up many options. Use plain flour with 1 teaspoon of baking powder in place of self-raising flour for a controlled rise.
Try flavour swaps: spread seedless jam for a smooth finish, or replace jam with lemon curd for a bright, citrusy note. For a richer option, add a chocolate drizzle over the top.
For lighter fillings, fold a spoonful of Greek yogurt into whipped cream. This keeps the filling tangy yet still silky. To cater for allergies, dairy-free butter and cream alternatives work well and keep texture intact.
- Use plain flour + baking powder to adjust rise precisely.
- Mix Greek yogurt with cream for a lighter, tangy filling.
- Choose seedless jam or lemon curd for cleaner spreading.
- Swap to dairy-free butter/cream for dietary needs.
- Finish with chocolate drizzle or a dusting of caster sugar.
| Variation | Ingredients to swap | Result |
|---|---|---|
| Lemon twist | Lemon curd instead of jam | Bright, zesty flavour |
| Lighter filling | Greek yogurt + whipped cream | Tangy, less rich cream |
| Dairy-free | Dairy-free butter & cream | Allergy-friendly texture |
| Decadent finish | Chocolate drizzle + caster sugar | Indulgent, café-style cakes |
Serving Suggestions and Storage Tips
Serve these delicate cakes at room temperature to let the flavour of the jam and cream open up. If refrigerated, allow chilled cakes to sit out for 20 minutes before serving so butter and cream soften and textures return.
Best eaten the same day when fresh cream is at its lightest. If you must store filled cakes, keep them in the fridge for up to 24 hours and avoid freezing once jam cream has been added.
Serving at Room Temperature
Arrange cakes on a platter and dust with a light sprinkle of icing sugar just before serving. Offer a pot of hot tea or a dish of fresh berries to cut through the sugar and complement the jam.
Storing Filled Cakes
Unfilled sponges can be stored in an airtight container for up to 2 days, making assembly the day you need them simple and fast. For filled cakes, refrigeration preserves the cream but will slightly firm the texture.
- Eat filled cakes the same day for peak flavour and texture.
- Refrigerate filled cakes for up to 24 hours; bring to room temperature before serving.
- Keep unfilled sponges airtight for up to 2 days for easy prep.
“A brief rest at room temperature revives the cream and brings out the vanilla and jam notes.”
| Item | Storage | Notes |
|---|---|---|
| Filled cakes | Refrigerate up to 24 hours | Allow 20 minutes at room temperature before serving |
| Unfilled sponges | Airtight container, 48 hours | Keep cool and dry; fill on day of serving |
| Leftover slices | Fridge, 24 hours | Do not freeze once cream is added |
| Serving | Room temperature | Dust with icing sugar and serve with tea or berries |
Conclusion
Mastering the creaming of butter and sugar is the step that lifts this recipe. Get that right and the sponge will be light, airy and ready for a neat jam and cream sandwich.
Bake for the recommended minutes and test for a gentle springy touch before cooling. This ensures the cakes are golden, moist and cooked through.
Follow this recipe, add a splash of vanilla extract if you like, and finish with a light dusting of icing sugar. The result is classic victoria sponge-style treats that impress at afternoon tea.
FAQ
How long does it take to bake these mini sponge cakes?
What are the essential dry and wet ingredients?
Can I use self-raising flour instead of plain flour?
How do I get a springy texture?
What tins and equipment do I need?
How should I prepare the oven and tins?
How do I prevent cakes from collapsing?
Why did my sponge turn out dry?
How do I get even-sized mini cakes?
When should I add jam and cream?
Can I make the jam and cream in advance?
Any ideas for creative variations?
How should I serve and store these cakes?
Mary Berry Mini Victoria Sponge
This charming mini victoria treat offers all the comforts of the classic sandwich cake in an elegant, single-portion form. It is light, airy and perfect for afternoon tea or a small celebration.
Ingredients
- 175 g unsalted butter, softened
- 175 g caster sugar
- 3 large eggs
- 1 teaspoon vanilla extract
- 2 tablespoons milk
- 175 g self-raising flour
- 1 teaspoon baking powder
- 200 ml double cream
- Quality jam
Method
- Preheat the oven to 180°C (160°C fan) and lightly grease a 12-hole muffin tin or mini sandwich tins.
- In a large bowl, cream together the softened butter and caster sugar until pale and fluffy.
- Add the eggs one at a time, beating well after each addition.
- Stir in the vanilla extract and milk to loosen the batter.
- Sift together the self-raising flour and baking powder, then fold into the mixture gently.
- Spoon the batter into the prepared tins, filling each about two-thirds full.
- Bake for 15-18 minutes until golden and springy to the touch.
- Remove from the oven and let cool on a wire rack.
- Once cooled, slice each sponge in half horizontally.
- Spread a layer of jam on the bottom half and pipe or spoon whipped cream over the jam.
- Place the top half of the sponge back on and dust with icing sugar before serving.