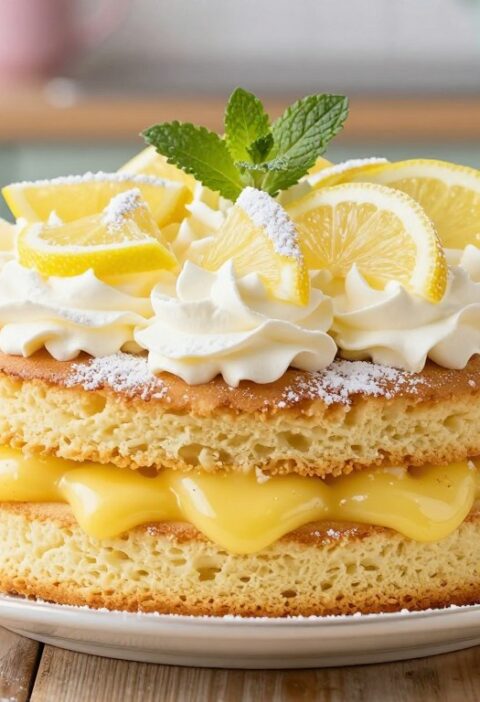
This classic British sponge cake is a larger take on a beloved teatime staple. It uses an all-in-one method that keeps the process simple and reliable for home bakers. The result is a soft, buttery crumb that stays moist and light.
Perfect for afternoon tea, this recipe makes a splendid centrepiece for celebrations. Fans of the traditional victoria sponge or a modern victoria sponge cake will find it ideal for layering with jam, cream or buttercream. The instructions are crafted to give consistent results even for first-time bakers.
Why it works: measured ingredients and straightforward steps mean less guesswork. The texture suits stacking and filling, so you can create elegant, light cakes that please a crowd.
Key Takeaways
- The recipe is a reliable British-style all-in-one sponge for teatime.
- It yields a soft, buttery, moist crumb ideal for layering.
- Designed for consistent results, even for less experienced bakers.
- Works well as a victoria sponge or modern victoria sponge cake base.
- Perfect for celebrations and traditional afternoon tea.
Why Choose the Mary Berry 9 Inch Sponge Cake
A larger sponge transforms a simple teatime treat into a show-stopping centrepiece for any gathering.
The appeal of the larger sponge lies in its size and texture. You keep that classic, airy crumb while serving more guests with fewer bakes.
The Appeal of the Larger Sponge
Using high-quality butter and sugar makes every slice rich and satisfying. This version keeps the lightness of a victoria sponge but gives a grander presence on the table.
Perfect for Gatherings
For birthdays, teatime or casual get-togethers, this cake feeds a crowd and still looks elegant when layered with jam or buttercream.
“A reliable sponge frees you to enjoy the company, not worry about the dessert.”
- Feeds more people without changing technique.
- Versatile fillings: jam, fresh fruit or decadent buttercream.
- Consistent results make hosting stress-free.
Essential Ingredients for Your Sponge
The secret to a light victoria sponge starts with precise, quality ingredients. The right balance creates the soft crumb and golden crust you want.
Core ingredients: use exactly 350g self-raising flour, 350g softened unsalted butter and 350g caster sugar. Add 6 large eggs and 2 tsp baking powder to lift the mixture.
Tip: bring eggs and butter to room temperature before you begin. Softened butter blends evenly and helps the batter trap air for a fine texture.
“Using top-quality staples makes a noticeable difference to flavour and structure.”
| Ingredient | Weight/Amount | Role | Notes |
|---|---|---|---|
| Self-raising flour | 350g | Structure | Use British self-raising for best results |
| Unsalted butter | 350g | Richness | Soften to room temperature |
| Caster sugar | 350g | Sweetness & crust | Fine texture helps aeration |
| Eggs & baking powder | 6 large eggs; 2 tsp | Leavening & binding | Essential for a light rise |
These simple ingredients make this mary berry recipe accessible to bakers of all levels. Pair the baked layers with jam and buttercream for a classic finish.
Preparing Your Kitchen and Tins
Set up your workspace and tins before you mix — it saves time and prevents last-minute panics. A calm, tidy kitchen helps you focus on technique and timing.
Lining Your Tins Correctly
Preheat the oven to 170°C (150°C fan) so heat is steady when the batter goes in. This temperature gives an even rise for larger layers.
Grease and line two 9-inch round tins with baking parchment. Ensure the base and sides are covered to stop the sponge from sticking.

- Place tins in the centre of the oven to prevent uneven browning at the edges.
- Use a wire rack once baked — the rack allows air to circulate and cool the layers fast.
- Gather equipment (measuring scales, spatula, tins, parchment) before you begin to keep the baking flow smooth.
A well-prepared tin helps the sponge release cleanly and keeps layers level. That makes assembling a layered cake much easier and neater.
“Preparation is the small step that protects the structure and look of your finished cakes.”
The All-in-One Mixing Method
Start the all-in-one method by tipping every measured ingredient into a single large bowl.
Measure your self-raising flour, caster sugar, softened butter, eggs and a tsp baking powder into the bowl with a splash of milk. Use an electric hand mixer or stand mixer and beat on a medium speed for 2–3 minutes.
The aim is a smooth, pale and creamy batter that drops slowly from a spoon. This soft, drop consistency helps the final sponge rise light and even when baking.
- Speed: set the mixer so it incorporates air without splashing.
- Timing: beat 2–3 minutes for the right texture.
- Handle with care: ensure flour and sugar are fully mixed but avoid overbeating.
This efficient recipe saves time while delivering the reliable results home bakers expect from mary berry recipes. Once mixed, divide the batter between lined tins and bake as directed for classic layers ready to fill with jam or buttercream.
“A light batter is the start of a show-stopping layered cake.”
Baking Your Sponge to Perfection
An even bake comes down to temperature, timing and small handling choices that protect the crumb.
Divide the mixture evenly between your two tins and smooth the surface gently. This helps the cakes rise to the same height and bake uniformly.
Bake in the centre of the oven at 170°C for 35–40 minutes. Look for a golden top that springs back when touched.
- Check readiness with a skewer — it should come out clean.
- Using room temperature eggs and butter helps the batter emulsify properly.
- Avoid opening the oven door during the first part of baking to stop the sponge from sinking.
When the time is up, the sponges should be pulling away slightly from the sides of the tin. If so, they are ready to cool.
“A steady oven and gentle handling produce consistent cakes every time.”
| Step | Action | Timing / Indicator |
|---|---|---|
| Divide mixture | Even split between two lined tins | Ensure level surfaces before baking |
| Bake | Place tins in centre of oven at 170°C | 35–40 minutes until golden and springy |
| Check | Insert skewer into centre | Skewer emerges clean = done |
| Finish | Cakes pull away from tin sides | Remove and cool on a wire rack |
Cooling and Preparing the Cake
Let the freshly baked layers rest in their tins for 10 minutes. This brief pause firms the crumb and makes the sponge easier to turn out without tearing.
Run a sharp knife gently around the edge if the cake looks stuck before you invert the tins. Then lift each layer onto a wire rack to cool completely.
While the cakes cool, make the filling. Beat unsalted butter in a clean bowl until creamy. Gradually add icing sugar, a splash of milk and a little vanilla. Use a mixer or by hand for a smooth buttercream.
Ensure the sponges are at room temperature before you add any cream or buttercream. Heat will melt the filling and you’ll lose structure and shine.
“Cooling properly makes the final assembly clean and stress-free.”
| Step | Action | Time / Tip |
|---|---|---|
| In tins | Rest layers | 10 minutes to set the crumb |
| Turn out | Use a knife around edges | Be gentle to avoid cracks |
| Cool | Place on wire rack | Cool completely before filling |
| Prepare filling | Beat butter with icing sugar | Use mixer or hand; add milk to loosen |
Use the cooling minutes to wipe down utensils and clean the mixing bowl. Once the sponges are cool, they are ready to be layered with jam, whipped cream or buttercream.
Assembling Your Mary Berry 9 Inch Sponge Cake
Assemble the layers with a steady hand to keep the finish neat and professional.
Place one cooled sponge on a cake stand or plate. Spread a generous layer of buttercream then add a thin layer of jam. Use the back of a spoon to keep the jam even.
Carefully set the second layer on top, aligning it so the edges match. Press gently by hand to bed the layers together without squashing the batter inside.
- Use an offset spatula or knife to smooth the top and sides.
- Finish with a light dusting of icing sugar for a classic look.
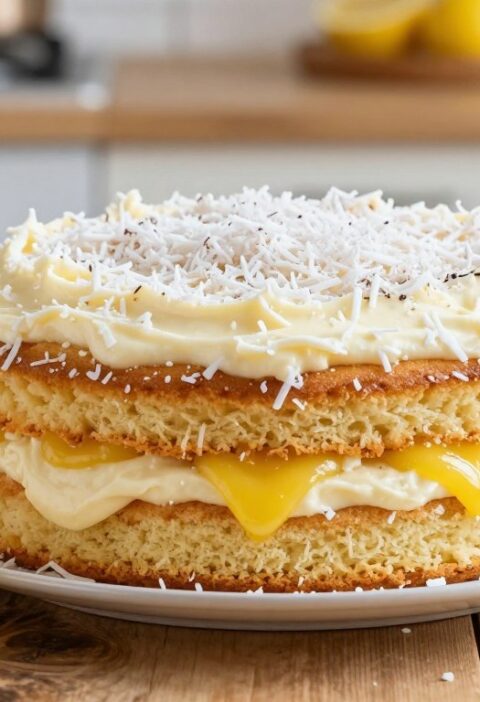
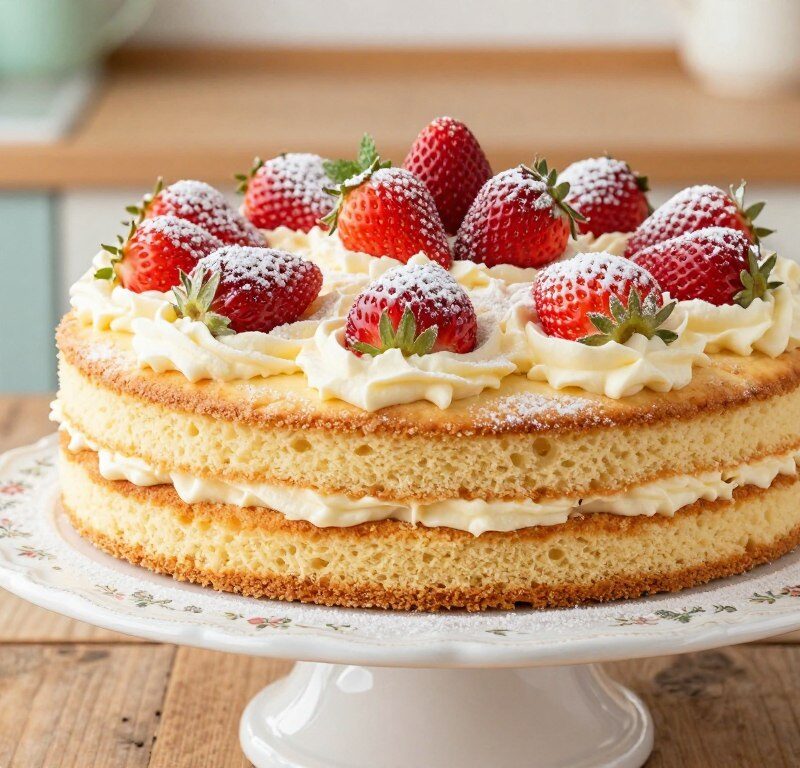
- Or substitute fresh whipped cream and sliced strawberries for a lighter finish.
Tip: work once the cakes cool completely. Chilled fillings and a clean wire rack make turning and serving easier.
“The assembly is the final step where you can showcase your baking skills.”
Creative Variations and Flavour Ideas
A few clever additions bring fresh aroma and texture to a timeless teatime bake.
Adding Citrus Zest
Fold finely grated lemon or orange zest into the batter for a bright lift.
This pairs well with a smear of jam or a light whipped cream finish.
Adding Citrus Zest
Tip: Use the outer coloured zest only — avoid the white pith.
Add 1–2 teaspoons to the mix so the flavour is clear but not overpowering.
Incorporating Chocolate Chips
Stir 75–100g of chocolate chips into the batter for texture and streaks of gooey chocolate.
Serve with chocolate buttercream or a thin layer of ganache on top.
Using Fruit Preserves
Choose high-quality jam or preserves for the filling.
A tart raspberry or apricot jam complements the buttery crumb and caster sugar sweetness.
“A simple twist can turn a familiar recipe into something exciting for every tea.”
| Variation | Key Addition | Best Finish |
|---|---|---|
| Citrus | Lemon/orange zest (1–2 tsp) | Whipped cream or light icing |
| Chocolate | 75–100g chocolate chips | Chocolate buttercream or ganache |
| Fruit-filled | High-quality jam between layers | Dusting of icing sugar or fresh fruit |
Experiment with extracts such as almond or a hint of vanilla to customise the flavour.
These small changes keep baking fresh and let you adapt the recipe for any celebration.
Storage and Reheating Advice
Simple storage rules will keep your tea-time bake tasting as if it were just made.
Store your sponge at room temperature in an airtight container to keep moisture and texture. This will maintain freshness for up to three days.
If the layers are filled with fresh cream or buttercream, place the assembled cakes in the fridge. Keep them refrigerated for no more than two days to stay safe and tasty.
For longer storage, freeze unfrosted layers. Wrap each layer tightly in cling film and place in a sealed tin or freezer bag. They keep well for up to two months.

To restore that just-baked feel, reheat a slice briefly. Microwave for about 10 seconds or warm in the oven at 150°C for 5 minutes. Always check the internal temperature before serving.
- Allow refrigerated cakes to come to room temperature before serving for best texture.
- Handle layers gently when frozen or thawing to avoid crumbs.
“Proper storage is the key to enjoying your baking efforts over several days.”
Conclusion
This classic recipe wraps simple technique and reliable results into one rewarding bake. It guides you from measured ingredients to a light, even sponge cake that suits any afternoon tea.
Follow the method and you will produce a victoria sponge cake with jam and buttercream that looks and tastes impressive. Use the right sugar, flour and eggs, and mind your oven and minutes for consistent results.
We hope this cake recipe helps you enjoy baking and sharing. Weigh ingredients accurately, handle the batter gently, and finish with a dusting of icing sugar on top.
FAQ
What size tin do I need for this sponge?
Can I use self-raising flour instead of plain flour and baking powder?
What temperature and rack position should I use in the oven?
How long will the sponge take to bake?
Do I need a mixer or can I use a hand whisk?
How do I prevent the sponge from collapsing?
What’s the best way to cool the cakes?
How should I fill and assemble the sponge?
Can I add flavours like citrus, chocolate or fruit preserves?
How should I store the cake and how long will it keep?
Any tips for achieving a fine crumb and even texture?
Can I make this recipe in one deep tin instead of two layers?
How do I reheat slices without drying them out?
Mary Berry 9 Inch Sponge Cake
This classic British sponge cake is a larger take on a beloved teatime staple. It uses an all-in-one method that keeps the process simple and reliable for home bakers. The result is a soft, buttery crumb that stays moist and light.
Ingredients
- 350g self-raising flour
- 350g softened unsalted butter
- 350g caster sugar
- 6 large eggs
- 2 tsp baking powder
- splash of milk
Method
- Preheat the oven to 170°C (150°C fan) and grease and line two 9-inch round tins with baking parchment.
- In a large bowl, combine the self-raising flour, caster sugar, softened butter, eggs, and baking powder.
- Use an electric mixer to beat the mixture on medium speed for 2-3 minutes until smooth and creamy.
- Divide the batter evenly between the prepared tins and smooth the surface.
- Bake in the center of the oven for 35-40 minutes until golden and springy to the touch.
- Let the cakes cool in their tins for 10 minutes before turning them out onto a wire rack to cool completely.
- Prepare the filling by beating unsalted butter until creamy, then gradually add icing sugar and a splash of milk until smooth.
- Once the cakes are cool, spread a layer of buttercream on one sponge, add a thin layer of jam, and place the second sponge on top.
- Smooth the top and sides with an offset spatula or knife, and dust with icing sugar to finish.