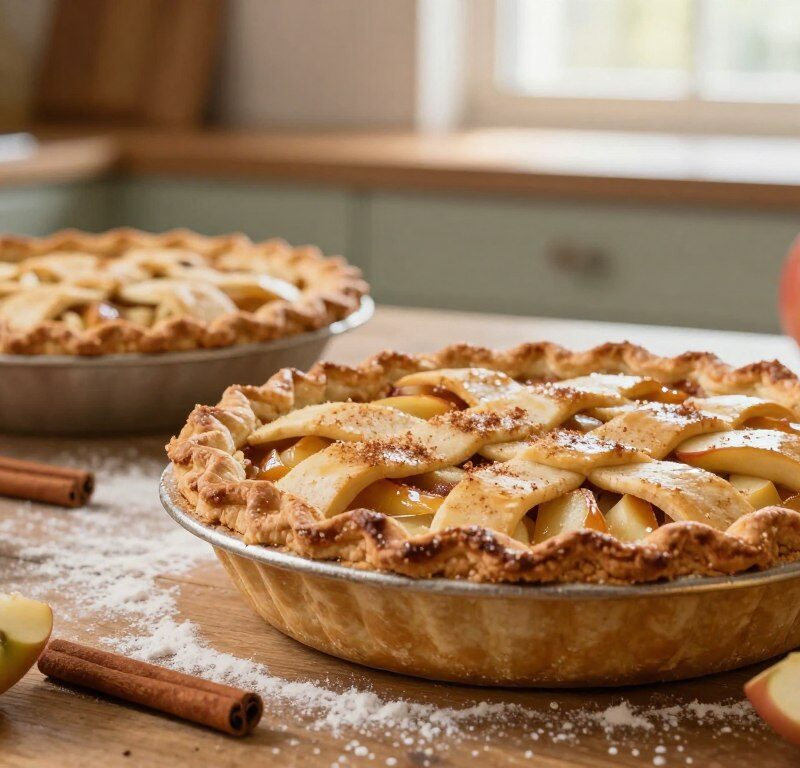
This beloved British classic arrives at the table with warm, familiar flavours and a flaky, crumbly crust. The preparation time is brief — about 15 minutes — making it ideal for cooks who want comfort without fuss.
The recipe mary berry has stood the test of time in the berry baking bible, offering reliable technique for bakers of all levels. Follow the simple steps and you will achieve soft, spiced fruit encased in golden pastry.
Whether you are a novice or more practiced, these instructions demystify traditional methods and build confidence. The guidebook of berry baking sets out foundational tips that make every attempt taste memorable.
Key Takeaways
- Quick to prepare: roughly 15 minutes prep time.
- Reliable results: the recipe delivers classic flavour and texture.
- Suitable for all levels: clear steps for novices and pros.
- Foundational techniques: learn methods from the baking bible.
- Comforting dessert: a staple for British teatime and gatherings.
Why We Love the Classic Mary Berry Apple Pie
This recipe from the berry baking bible wins hearts for its simple, rustic character. Home cooks praise the method because it creates a crumbly texture that stands apart from standard double-crust bakes.
Reliability is a key reason people return to this pie recipe. The instructions are clear and forgiving, so results stay consistent even for beginners.
Fans of the mary berry baking approach value the way the baking bible simplifies tricky steps. Small touches — like a hint of orange zest in other recipes — show how subtle flavours lift the whole dish.
- Crumbly, rustic finish: perfect for sharing without fuss.
- Stress-free serving: tidy slices are optional, which makes it ideal for relaxed gatherings.
- Great learning recipe: other recipes in the collection reveal useful technique and nuance.
Essential Ingredients for Your Baking Success
Good results begin at the shopping list: pick produce and fats with care. Small choices make a big difference when you want a flaky, crumbly finish and a soft fruit centre.
Selecting the Best Apples
Choose cooking apples that break down well. Bramley varieties are often recommended because they become tender and saucy during baking.
Tip: Aim for two medium-sized apples per person, and peel and slice evenly so the filling cooks uniformly.
Understanding Baking Fats
White baking vegetable fat (commonly Trex in the UK) gives this pastry its signature crumbly texture. It behaves differently to butter and keeps the pastry light.
- Ensure you have enough flour and sugar to balance structure and sweetness.
- Use a 900ml dish or a 23cm tin so the fruit and pastry cook evenly.
- High-quality vegetable fat in these recipes preserves the crumbly finish expected of this traditional bake.
Mastering the Perfect Pastry Dough
A crisp, faultless pastry begins with careful rubbing and precise timing. Use measured ingredients and cool hands to create a dough that rolls smoothly and holds its shape.

Chilling and Resting the Dough
Start by combining 350g of plain flour with 175g of hard block fat in a large bowl. Rub the two together until the mixture resembles fine breadcrumbs.
Gradually add two tablespoons cold water, stir, then add another two tablespoons cold water. Mix just until the dough begins to hold together firmly — do not overwork it.
Wrap the pastry in cling film and chill for 30 minutes. Resting lets the fats firm up so the dough is easy to handle and less likely to shrink when baked.
When ready to roll, lightly flour your work surface. This prevents sticking and helps you roll the pastry thin enough for a delicate fruit tart without tearing.
- Tip: Keep everything cool — warm hands speed melting and ruin the crumbly texture.
- Handle gently: Less kneading keeps the pastry flaky and light.
Preparing the Spiced Apple Filling
Begin by peeling, coring and slicing the fruit into thick, even pieces. Place half the slices in the base of your baking dish, arranging them so they sit snugly without gaps.
Sprinkle the measured sugar over the fruit. Tuck four whole cloves among the slices to give a subtle, warming aroma as the filling cooks.
Add a tablespoon of water — this helps the filling become succulent and soft during baking. Ensure the remaining slices are spread evenly so the pie recipe cooks at the same rate across the dish.
- Use firm, good-quality apples; the texture of the slices affects the final result.
- Preheat your oven to 220°C so the pastry starts to crisp immediately.
- This recipe mary and other similar recipes rely on careful fruit prep for best cooking results.
Assembling and Decorating Your Pie
Neat finishing makes all the difference: take your time when fitting the pastry so the bake looks as good as it tastes. Prepare a clean, floured work surface and a dry bowl for any odds and ends of dough.
Rolling techniques
Roll your pastry out on a lightly floured surface until it will comfortably cover the dish. Fold it into a fan shape to lift the pastry without stretching.
Unfold the fan over the tin and ease the pastry into place. Press the edges down firmly to seal the filling and avoid gaps.
Creating decorative shapes
Use any leftover pastry to cut leaves or simple shapes. Brush these with milk and arrange them on the top.
A few decorative pieces add charm and help the top pie brown evenly.
Managing steam holes
Use a small knife to cut a steam hole in the centre. This lets moisture escape and keeps the pastry crisp rather than soggy.
Finally, brush the entire top with milk and lightly sift sugar over it. The milk-and-sugar mixture gives a golden, crunchy finish that looks professional when baked.
Baking Guidelines for a Golden Finish
A short blast of high heat, followed by a steady lower temperature, gives the best finish. Preheat the oven to 220°C and slide the pie onto a preheated baking sheet. Bake at 220°C for 15 minutes to set the pastry and help it rise.

After 15 minutes, reduce the temperature to 180°C (Gas 4) and continue baking for a further 30–35 minutes. If the top begins to brown too quickly, tent foil over the top for the final 15 minutes.
Keep an eye on the edges as these brown first; protect them with foil if needed. Ensure the steam hole in the centre stays clear so the fruit slices soften and excess water drains away.
- Place the pie on a hot baking sheet so the base crisps and stops sogginess.
- The initial 220°C stage helps puff pastry; 180°C (Gas 4) finishes the cooking of the apples without burning the top.
- Managing oven temperature carefully lets the sugar on the top pie crust caramelise without burning the delicate pastry.
Expert Tips for Handling Pastry and Fruit
A few simple habits in the kitchen make pastry and fruit much easier to pair successfully. Keep things cool, work quickly and plan short pauses so the fat stays firm and the dough behaves.
Troubleshooting Common Pastry Issues
Chilled fat is your safety net. If the vegetable fat softens while you work, pop the dough back in the fridge for 10–15 minutes. That pause often stops tearing and reduces shrinkage when baked.
“If your pastry breaks during transfer, use a piece of cling film to support the dough — a trick often used for a delicate tart.”
If whole cloves seem too subtle, try ground cloves or increase to six for a stronger hit. Alternatively, swap cloves for cinnamon to change the spice profile without upsetting balance.
- Uniform slices: Slice the fruit evenly so everything cooks at the same rate.
- Support the dough: Use cling film to lift and transfer fragile pastry confidently.
- Fridge fixes: Too soft to work? Chill again to firm the fat before rolling.
Practice matters. Even experienced bakers meet challenges with crumbly pastry. With time and a few deliberate habits the results will stabilise and improve.
Serving Suggestions for the Perfect Dessert
For a warm finish, lift generous portions straight from the dish onto plates. Because this bake has no pastry base, spooning gives the best texture and keeps the topping intact.
Make it indulgent: serve warm with a large dollop of double cream or a scoop of vanilla ice cream. Many traditional recipes also pair well with custard to balance the spiced fruit.
Keep it rustic: this pie recipe is meant to look a little untidy in the dish. Using a big serving spoon helps you portion evenly and keeps the crunchy sugar top where it belongs.
- Serve while still warm to enjoy the contrast between crunchy topping and tender apple filling.
- Use a large spoon to distribute portions straight from the baking dish for relaxed, homely presentation.
Conclusion
Savour the small rituals—timing, temperature and a cool rest—that turn effort into comfort.
Follow this recipe mary berry and you will produce a reliable apple pie that nods to tradition. The clear steps in the recipe make the method easy to repeat.
Use guidance from the mary berry baking notes in the berry baking bible and the wider baking bible to build skill. Regular practice in the kitchen improves handling and timing.
Enjoy exploring other berry baking ideas and recipes. With a little patience, every bake saves you time and grows your confidence for the next one.
FAQ
What are the best apple varieties for this classic recipe?
Can I use a different fat in the pastry?
How long should I chill the pastry before rolling?
What’s the easiest way to stop the filling turning watery?
How do I make sure the top pastry browns evenly?
How many steam holes should I cut and where?
What oven temperature and time give a golden finish?
How can I prevent a soggy base?
Any tips for decorative pastry shapes?
Can I prepare the pie ahead of time?
Mary Berry Apple Pie
This beloved British classic arrives at the table with warm, familiar flavours and a flaky, crumbly crust. The preparation time is brief — about 15 minutes — making it ideal for cooks who want comfort without fuss.
Ingredients
- 350g plain flour
- 175g hard block vegetable fat
- 2 tablespoons cold water
- 2 medium Bramley apples
- Sugar to taste
- 4 whole cloves
- 1 tablespoon water
- Milk for brushing
- Sugar for sprinkling
Method
- Preheat your oven to 220°C.
- In a large bowl, combine the plain flour and hard block fat, rubbing them together until the mixture resembles fine breadcrumbs.
- Gradually add two tablespoons of cold water, mixing until the dough begins to hold together. Do not overwork it.
- Wrap the pastry in cling film and chill for 30 minutes.
- Peel, core, and slice the apples into thick, even pieces.
- Place half the apple slices in the base of your baking dish, sprinkle sugar over the fruit, and tuck the whole cloves among the slices.
- Add a tablespoon of water to help the filling become succulent during baking.
- Roll out the chilled pastry on a lightly floured surface until it covers the dish comfortably.
- Fold the pastry into a fan shape to lift it without stretching, then unfold it over the tin and press the edges down firmly.
- Cut a steam hole in the center of the pastry to let moisture escape.
- Brush the top with milk and sprinkle sugar over it for a golden finish.
- Bake at 220°C for 15 minutes, then reduce the temperature to 180°C and continue baking for 30–35 minutes.