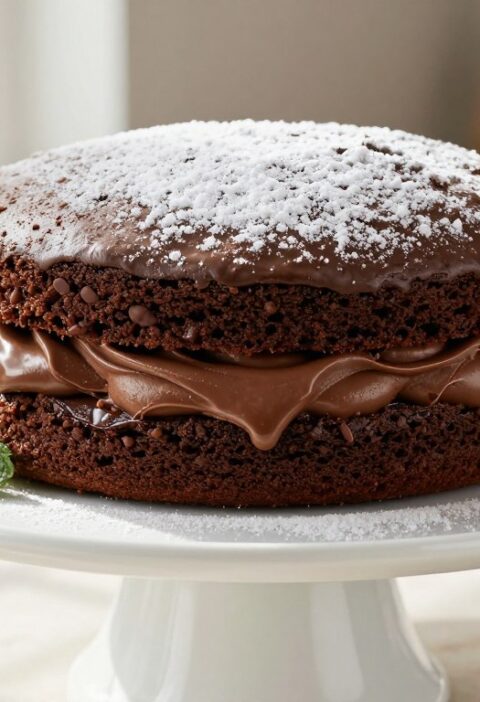
Recreate an iconic British treat with a simple, reliable method that brings classic flavours to your kitchen. This festive sponge balances a light crumb with a glossy chocolate top for a memorable afternoon tea.
Whether you are a seasoned baker or trying this for the first time, the step-by-step approach makes the process clear. We will show how to bake the sponge, prepare a silky ganache and assemble the layers so the result looks as impressive as it tastes.
Follow the recipe closely and you will master the texture and flavour. The technique is forgiving and ideal for celebrations or a cosy teatime treat.
Key Takeaways
- Easy to follow: clear steps for bakers of all levels.
- Balanced flavours: light sponge meets rich chocolate ganache.
- Festive favourite: perfect for afternoon tea or special occasions.
- Impressive finish: straightforward assembly gives a pro look.
- Reliable result: technique focuses on texture and consistency.
The History of the Classic Tunis Cake
From ancient battlefields to 1970s factories, the story behind the dessert is surprising.
Some historians link the name back to Carthage and its wars with Rome. Victorious soldiers are said to have celebrated with cake and wine, and that festive spirit may have inspired the name.
In the United Kingdom this treat became widely known when McVities mass-produced it during the 1970s. That move brought the recipe into many homes and made the dessert a familiar festive favourite.
The recipe itself is flexible. The famous baker often suggests a lemon zest sponge for a bright lift, but you can adapt flavours to taste. The signature chocolate topping truly defines the dessert, giving rich contrast to the light base.
- Origins: Possible ancient link to Carthage.
- Modern rise: Mass production by McVities in the 1970s.
- Adaptable: Variations include citrus-scented sponge and different ganache toppings.
| Era | Feature | Impact | Notes |
|---|---|---|---|
| Ancient (legend) | Commemorative sweet | Cultural story linking pastry to victory | Possibly inspired the name |
| 1970s | Mass-produced by McVities | Wider public availability | Helped standardise the recipe |
| Modern home baking | Variations like lemon sponge | Personalised flavours | Signature chocolate topping remains key |
Essential Ingredients for Your Mary Berry Tunis Cake
Gathering the right supplies makes baking this traditional dessert straightforward and stress-free.
Sponge basics
For the sponge you will need 225g softened butter, 225g of caster sugar and 225g self-raising flour to give the correct texture.
Add 70g of ground almonds to give a nutty depth that lifts the crumb.
Beat in 4 large free-range eggs and the finely grated zest of 1 lemon for a light, fragrant base.
Ganache and decoration components
For a glossy topping, have 300ml double cream and 400g good-quality chocolate ready, broken into even pieces.
You will also need 200g natural marzipan plus red and green gel colouring to shape holly decorations.
- Tip: Weigh ingredients precisely for a consistent sponge.
- Tip: Use high-quality chocolate for a better ganache finish.
Preparing Your Deep Cake Tin
Getting your tin ready correctly sets the stage for even rising and neat edges. Use a 20cm deep cake tin for this recipe to get the right height for the ganache and filling.
Lining the Tin
Select a high-quality 20cm deep cake tin to ensure the sponge rises evenly. A correct choice reduces the chance of uneven baking and gives a better final appearance.
Carefully line the base and sides with baking paper, ensuring the paper extends above the rim. This extra height supports the batter as it rises and helps you lift the cake out cleanly.
Check the tin level surface before adding batter. A level base lets the mixture spread evenly and helps you achieve a professional-looking finish once the chocolate is added.
- Tip: Secure the paper so it stays in place during tin baking.
- Tip: Proper tin baking technique prevents sticking and keeps clean edges for the final chocolate layer on the cake.
Mixing the Perfect Sponge Batter
Prepare your mixing station and a sturdy bowl before you combine the ingredients.
Combine the butter, caster sugar, flour, ground almonds, eggs and lemon zest in a large bowl hand-held mixer or a freestanding electric mixer.
Use a sturdy bowl and beat the mixture on high speed for one minute until the batter looks pale and whippy. This aerates the mix and helps a level surface in the tin as it bakes.
- Beat in the eggs one at a time. If the eggs lemon zest mix looks like it might curdle, add a spoonful of flour to stabilise the batter.
- Once smooth, spoon the batter into the prepared tin.
- Use a palette knife to create a tin level surface so the sponge rises evenly in the oven.
This process only takes a few minutes, but make sure the ground almonds and caster sugar are fully incorporated for an even crumb.
| Step | Action | Why it matters |
|---|---|---|
| 1 | Weigh and soft butter, caster sugar | Ensures consistent texture |
| 2 | Beat in eggs one at a time | Prevents curdling and keeps batter stable |
| 3 | Spoon into tin and level surface | Helps even rise and neat finish |
Baking Techniques for a Moist Sponge
A steady oven and small adjustments are the secret to a sponge that stays moist and evenly coloured.
Temperature Control
Preheat the oven to 180°C or 160°C for a fan oven. This gives the sponge a gentle, even rise and helps lock moisture into the crumb.
Avoid opening the door during the first 45 minutes of baking. Sudden temperature drops can make the batter sink and leave a dense centre.
Preventing Top Browning
Bake the sponge for 45 minutes, then check the top. If it looks brown too quickly, place a loose tent of foil over the top to prevent top browning and continue for another 15 minutes.
Use a skewer to test the centre. When it comes out clean, the cake is done and ready to cool.
- Tip: Check colour at 45 minutes, then decide on foil.
- Tip: Keep oven door closed to maintain steady heat.
| Stage | Action | Why it matters |
|---|---|---|
| Preheat | 180°C / 160°C fan | Ensures even rise and moist crumb |
| Mid-bake check | 45 minutes then inspect top | Spot early browning and adjust |
| Finish | Tent with foil and bake 15 more minutes | Prevents top browning while finishing inside |
Cooling and Setting the Cake
A patient cool-down inside the tin protects the sponge and prepares it for the ganache. To get the best finish, leave cool the cake completely before doing anything else.
Do not remove the bake while it is still warm. Taking the cake out too soon risks cracks or a broken edge. Keep the tin on a rack until the centre reaches room temperature.
Once it is cool, put aside set the tin in a safe spot while you make the topping. Use a sturdy completely tin wire rack so air circulates under the base.
A proper cooling stage is a crucial part of tin baking. The airflow from a completely tin wire rack stops the base turning soggy and helps the structure settle. This step ensures the cake will take the weight of the chocolate topping without slipping or sinking.

Crafting the Rich Chocolate Ganache
Begin by softening the cream over low heat so it nears the bubbling point without boiling. Use a small pan and watch the surface; tiny bubbles at the edge tell you it is almost ready.
Achieving a Glossy Finish
Remove from the heat the moment the cream trembles. This step stops excess heat from damaging the chocolate.
Now add chocolate to the cream in three batches. Stir gently with a spatula until the mixture is smooth and glossy.
“Remove heat from the pan before you add chocolate to avoid separation of the cocoa butter.”
It is vital to leave cool the ganache until it thickens slightly. The right consistency should be pourable but not runny.
- Heat cream until it just starts to bubble.
- Remove heat, then add chocolate and stir until glossy.
- Put aside the mixture and aside set it until cool enough to pour over the cake.
Creating Decorative Marzipan Holly
Crafting tiny marzipan holly gives the finished cake a handmade, seasonal look.
Leaves: Colour 175g of marzipan green. Use a leaf shaped cutter to stamp 20 neat leaves. Mark veins lightly with a knife. Drape each leaf over a rolling pin to dry so they curl slightly and look natural.
Berries: Colour the remaining marzipan red. Roll this into 30 small, uniform balls that mimic fresh holly berries. Keep sizes consistent for a tidy finish.
Drying is crucial. Allow leaves and balls to dry thoroughly before arranging on the ganache. This prevents smudging and keeps decoration safe during display.
- Use a leaf shaped cutter for even shapes.
- Lay leaves on a curved surface to shape.
- Roll the balls gently for smooth surfaces.
| Item | Quantity | Method |
|---|---|---|
| Green marzipan | 175g (20 leaves) | Cut with leaf shaped cutter, mark veins, dry on rolling pin |
| Remaining marzipan red | Enough for 30 balls | Roll into uniform balls, dry thoroughly |
| Final finish | 20 leaves & 30 balls | Arrange on top of ganache once set |
Assembling the Final Masterpiece
Take a calm, steady approach when you pour and decorate — the result rewards patience.
Pour the cooled ganache over the top of the sponge while it is still in the tin. Use a small offset spatula to nudge the glossy chocolate so it covers the surface evenly and reaches the edges.
Let the topping set at room temperature until it firms slightly. The ganache should hold its shape but remain glossy. Once the chocolate layer has set, you can put aside the whole bake and aside set it in a cool room to finish firming up.
Carefully lift the tin and peel away the baking paper to reveal a clean, sharp line between sponge and ganache. Take care with the base so the edge stays neat.
Arrange the prepared marzipan holly leaves and red berries in a wreath around the chocolate edge. The contrast between the dark, glossy chocolate and the vibrant marzipan makes this cake a true showstopper for the holiday table.
When fully firm, put aside set the finished tray on a serving plate and slice with a warm knife for neat portions. Share and enjoy with a little extra cream on the side if you like.

Expert Tips for Success
Smart preparation is the shortcut to a consistent, bakery-quality sponge at home. Keep your butter, eggs and other ingredients at room temperature to help the batter emulsify and rise evenly.
If you use a deep cake tin, wrap the outside with damp newspaper or a baking strip. This helps the edges bake at the same rate as the centre and prevents doming or cracking.
You can swap the lemon zest for vanilla extract if you prefer a milder flavour. The change keeps the sponge familiar while still pairing well with rich cream and glossy chocolate.
When shaping marzipan, dust your hands lightly with icing sugar to stop sticking. Work quickly so the paste stays soft, then allow pieces to dry before placing them on the set topping.
“Precision with flour, sugar and ground almonds gives the most reliable results.”
- Tip: Measure flour, sugar and ground almonds accurately for a dependable outcome.
- Tip: Small habits in baking save time and reduce waste.
Conclusion
Let the cake rest so the ganache settles and the flavours marry. A short pause gives a glossy finish and a firm slice every time.
Mastering this bake is rewarding: a rich chocolate top sits on a light, buttery sponge. Balance cream and chocolate carefully to create that truffle-like ganache that defines the treat.
Use quality ingredients, especially real butter and good chocolate, and follow the steps in this recipe for best results. Share your holly-decorated masterpiece with friends and family and enjoy the praise.
FAQ
What size deep cake tin should I use?
How do I line the tin to prevent sticking?
Can I use ground almonds instead of some flour?
How long should I beat the eggs and sugar for the sponge?
What temperature should the oven be for a moist sponge?
How can I prevent the top browning too quickly?
When should I remove the cake from the tin?
How do I make a glossy chocolate ganache?
Can I flavour the sponge with lemon?
How do I make and shape decorative marzipan holly?
What is the best way to level the cake surface?
How do I stop the ganache from sliding off a warm cake?
Can I freeze the sponge or the finished cake?
What type of chocolate works best for ganache?
Any tips for preventing a dense batter?
Mary Berry Tunis Cake
Recreate an iconic British treat with a simple, reliable method that brings classic flavours to your kitchen. This festive sponge balances a light crumb with a glossy chocolate top for a memorable afternoon tea.
Ingredients
- 225g softened butter
- 225g caster sugar
- 225g self-raising flour
- 70g ground almonds
- 4 large free-range eggs
- finely grated zest of 1 lemon
- 300ml double cream
- 400g good-quality chocolate
- 200g natural marzipan
- red gel colouring
- green gel colouring
Method
- Preheat the oven to 180°C or 160°C for a fan oven.
- Prepare a 20cm deep cake tin by lining the base and sides with baking paper.
- In a large bowl, combine the softened butter, caster sugar, self-raising flour, ground almonds, eggs, and lemon zest.
- Beat the mixture on high speed for one minute until pale and whippy.
- Spoon the batter into the prepared tin and level the surface with a palette knife.
- Bake for 45 minutes, then check the top. If it browns too quickly, cover with foil and bake for an additional 15 minutes.
- Once baked, let the cake cool in the tin until it reaches room temperature.
- For the ganache, heat the double cream in a small pan until it nears boiling, then remove from heat.
- Add the chopped chocolate in three batches, stirring until smooth and glossy.
- Allow the ganache to cool until it thickens slightly.
- Craft marzipan holly by coloring 175g of marzipan green and rolling it out to cut 20 leaves. Color the remaining marzipan red for 30 berries.
- Pour the cooled ganache over the sponge while still in the tin, using a spatula to spread it evenly.
- Let the ganache set at room temperature until firm.
- Carefully remove the cake from the tin and peel away the baking paper.
- Arrange the marzipan holly leaves and berries on top of the ganache.