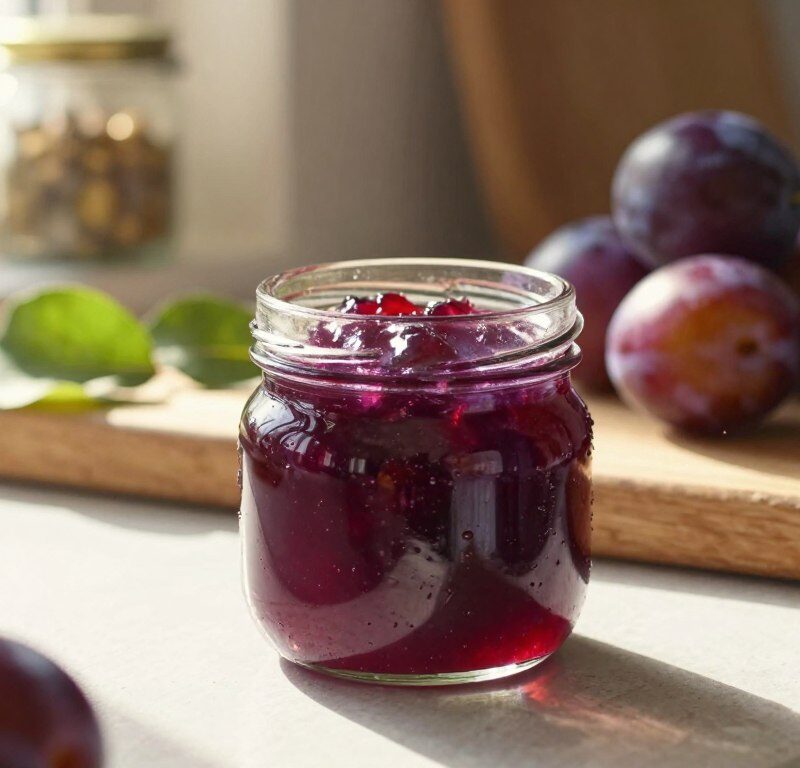
This classic homemade preserve brings the sweet-tart notes of ripe plums to your breakfast table. It uses simple ingredients — fresh fruit, granulated sugar and a splash of lemon juice — to make a glossy, spoonable spread.
The method is straightforward and takes around 30–40 minutes on the stove to reach the right set. The result is a rich, deep purple spread that lifts morning toast and makes a lovely filling for bakes.
Whether you are new to home canning or confident in the kitchen, this guide will help you produce jars of flavourful plum jam that taste far better than most shop-bought versions.
Key Takeaways
- Uses simple, high-quality fruit and sugar for best flavour.
- Cooking time is roughly 30–40 minutes to achieve perfect set.
- Suitable for beginners and experienced cooks alike.
- Great on warm toast or as a versatile baking filling.
- Yields glossy, deep-coloured jars that preserve fresh taste.
Why You Will Love This Mary Berry Plum Jam Recipe
This quick preserve comes together in under an hour, so you can turn ripe plums into jars the same day. The method relies on the natural pectin in the fruit, giving a smooth, spoonable set without additives.
The flavour is rich and balanced. Ripe plums bring natural sweetness with a gentle tart edge that makes this plum jam stand out. Using fresh fruit also keeps the colour vibrant and the taste authentic.
Perfect for busy kitchens, the whole process needs only a short time on the stove, so you’ll have spreads ready in minutes rather than hours.
- Natural setting: plums supply pectin for a reliable set.
- Outstanding flavour: deep, fruity notes that lift toast and bakes.
- Fast and simple: a fuss-free recipe suited to weekday cooks.
- Versatile: use as a topping, filling or dessert accompaniment.
Essential Ingredients for Your Preserve
Good ingredients make a reliable, flavoursome jam. Use fresh fruit and stick to the classic ratios for consistent results. The standard measure for this method is 1 kg of ripe plums, 750 g of granulated sugar and 100 ml of water.
Selecting the Best Plums
Choose ripe but firm plums. Firmness keeps the flesh intact while ripeness gives colour and taste.
Plums are naturally high in pectin, so you will usually achieve a good set without added pectin. Aim for fruit that smells sweet and yields slightly to gentle pressure.
The Role of Sugar
Granulated sugar both sweetens and preserves. This recipe uses 750 g to balance the 1 kg of fruit.
Start cooking the fruit with 100 ml of water to soften skins before you add the sugar. A splash of lemon juice helps the pectin form a firm setting and brightens the flavour.
- Ratio: 1 kg plums : 750 g granulated sugar : 100 ml water.
- No added pectin needed: the natural pectin in ripe fruit is sufficient.
Necessary Kitchen Equipment
Gathering the right tools makes the cooking and potting stages far easier and safer. A large, heavy-bottomed pan is essential to spread heat evenly and stop the granulated sugar from scorching during the boil.
Use a sturdy wooden spoon for stirring. It helps you feel when the sugar has dissolved and prevents hot splashes.
Weighing scales are vital to measure the fruit and sugar accurately so the jam will set. A ladle makes neat transfer into sterilised jars and keeps rims clean.
- Large heavy-bottomed pan to hold 1 kg of plums and 750 g sugar.
- Sturdy wooden spoon for thorough stirring.
- Weighing scales, ladle, sharp knife and chopping board.
- Small plate chilled in the freezer to test the setting point.
- Optional jam thermometer for precise temperature checks.
“Clean, dry equipment keeps your preserve safe and looking its best.”
Tip: For more ideas on using your finished spread, see the plum jam serving suggestions and bakes.
Preparing Your Fresh Plums
Before you slice, wash each plum under cold running water to remove dirt and any waxy coating.
Preparing the fruit carefully now saves time at the stove later. Use about 1 kg of plums and check each one for bruises or soft spots.
Removing the Stones
Cut each plum in half and prise out the stone, making sure no hard pits remain in the fruit.
Roughly chop the pitted pieces; smaller pieces soften faster when placed in the pan with 100 ml of water.
Cook the fruit gently for 10–15 minutes until the skins are tender and the juices begin to flow.
Tip: A potato masher helps break the fruit slightly to release more juice and build a smoother consistency.
Stir in a little lemon juice at this stage to brighten flavour and aid the setting process.

Cooking the Fruit Mixture
Once the fruit has softened and released its juice, you are ready to add the sugar and begin the slow melding of flavours.
Tip: Add the sugar to the pan and stir gently over low heat until every grain has dissolved. This prevents crystallisation and keeps the texture silky.
Keep the pan heat low during this phase. Stir frequently with a wooden spoon so the fruit does not stick and burn. Add a splash of lemon juice now to brighten the flavour and help pectin do its job.
Be patient. Wait until the sugar is fully liquid in the mixture before you raise the heat. Once dissolved, increase the heat to bring the pan to a rapid, rolling boil for the next stage.
- Once plums are soft, add sugar and stir over low heat.
- Ensure sugar fully incorporates into the fruit mixture to avoid a gritty finish.
- Consistent stirring prevents sticking; the lemon balances sweetness and aids setting.
“This stage builds the deep, rich flavour that makes home preserves stand out.”
Achieving the Perfect Rolling Boil
Raise the heat to high so the pan reaches a true rolling boil. This vigorous boil should bubble hard and steadily for about 10 minutes.
Why it matters: the intense boil activates the natural pectin in the fruit and drives off excess water. The result is a thicker, glossier mixture that will reach the right setting once cooled.
What to watch for: the colour will deepen and the texture will look shiny and denser. Keep a close eye on the pan to prevent boil-overs or scorching on the base.
Maintain consistent high heat during this phase. Do not lower the temperature too soon, as the setting process depends on steady evaporation and agitation of the mixture.
“A controlled, vigorous boil concentrates flavour and gives the preserve a stable, long-lasting structure.”
| Action | Duration | Result |
|---|---|---|
| Increase heat to high | Immediate | Transforms syrup into a rapid boil |
| Vigorous rolling boil | Approx. 10 minutes | Pectin activates; mixture thickens and glosses |
| Watch pan closely | Throughout | Prevents burning and boil-over |
Testing for the Setting Point
Before you pot the preserve, confirm the setting point so jars hold that glossy, spreadable texture. A quick test on a chilled plate tells you if the mixture is jam ready or needs a little longer on the heat.
The Chilled Plate Method
Remove the pan from the heat and place a small spoonful onto a plate chilled in the freezer. Wait about five minutes so the sample cools and firms slightly.
Identifying the Wrinkle
After the minutes test, push your finger across the surface of the spoonful. If the jam wrinkles and the wrinkle stays in place, the jam set is confirmed and the jam reached the desired point.
Adjusting the Boil
If the sample is still runny, return the pan to the boil for another 2–5 minutes. Repeat the test set process until a clear wrinkle forms. This keeps you from overcooking the fruit while achieving a professional finish.
“The chilled plate and wrinkle test is the simplest, most reliable way to know your preserve is jam ready.”
Safety tip: Be cautious during the minutes test — the spoonful and pan will be very hot. Once the jam set is confirmed, skim the foam and pot into sterilised jars.
Skimming and Potting the Jam
After you stop the heat, take a moment to skim away any froth so the preserve looks clear and glossy. Use a clean metal spoon and work gently across the surface to remove scum.
Let the mixture rest in the pan for about 15 minutes. This pause lets fruit pieces settle and distributes them evenly through each jar.
When you are ready, ladle the hot jam carefully into sterilised jars. Leave a little headspace at the top to help create a good vacuum seal.

- Use a jam funnel to fill jars cleanly and avoid spills.
- Wipe rims so lids sit flat—any residue can stop a proper seal.
- Tighten lids while jars are still warm to assist sealing.
“A neat potting stage keeps your preserves looking as good as they taste.”
Store filled jars in a cool, dark place. Proper skimming and careful potting mean your homemade plum jam will stay fresh and delicious for months to come.
Sterilising Your Glass Jars
Properly sterilised glassware keeps your preserve safe and extends its cupboard life.
Start by washing your jars in hot, soapy water and rinse them well. Place the wet jars upside down on a baking tray.
Oven sterilisation: preheat to 120°C (250°F) and heat the jars for 10–15 minutes so they are completely dry and bacteria-free.
Preparing lids and timing
Put metal lids in a heatproof bowl and cover with boiling water. Drain and leave to dry on clean kitchen paper.
- Remove jars with oven gloves and fill immediately with hot fruit mixture to help form a good seal.
- Ensure no standing water remains; damp jars can compromise the seal and shorten shelf life.
- Following this method helps your jam keep its colour, flavour and bright lemon notes.
“Dry, hot jars and scalded lids give the best chance of a lasting vacuum seal.”
| Step | Action | Time |
|---|---|---|
| Wash | Hot soapy water, rinse well | 3–5 minutes |
| Oven sterilise | Place upside-down on tray at 120°C | 10–15 minutes |
| Lids | Cover in boiling water, drain to dry | 2–3 minutes |
Storing Your Homemade Preserve
A cool, dark cupboard is the best home for sealed preserves to keep colour and flavour steady.
Store your sealed jars in a cool, dark place such as a pantry or kitchen cupboard. Properly processed jars will keep for up to 1 year without losing much quality.
Always label each jar with the date made. This helps you rotate stock and use older batches first.
Once opened, keep the jar in the fridge and use within 4 weeks for the best texture and taste. High sugar content acts as a natural preservative and helps the spread remain safe for long storage.
If you see any mould or detect an off-smell after opening, discard the contents to be safe. Avoid storing jars near radiators or windows where heat or sunlight can shorten shelf life.
| Action | Tip | Duration |
|---|---|---|
| Sealed jars | Keep in a cool, dark place | Up to 1 year |
| Opened jar | Refrigerate after opening | Use within 4 weeks |
| Label jars | Write date and contents | Rotate stock easily |
| Check before use | Discard if mouldy or off-smell | Immediate |
“Neat labelling and cool storage keep your homemade preserves tasting their best.”
Creative Ways to Serve Plum Jam
A dollop of this glossy spread adds instant colour and flavour to simple dishes and special treats. Keep a jar handy and you’ll find it lifts breakfasts, afternoon tea and sweet bakes with very little effort.
Breakfast Pairings
Serve your homemade jam on warm, buttered toast or English muffins for a quick, satisfying start to the day. Swirl a spoonful into plain Greek yogurt or porridge to add fruity brightness.
Try it with a cup of strong tea and a slice of toast for a classic UK morning, or spoon it over pancakes for a weekend treat.
Baking and Dessert Ideas
Use the thick, glossy fruit spread as a filling for jam tarts, thumbprint cookies or a Victoria sponge. It also makes a fine glaze for roasted meats when mixed with a little lemon and the pan juices.
For cream tea: spread generously inside freshly baked scones and top with clotted cream for a traditional serving that never fails to please.
- Spread on warm buttered toast or muffins.
- Fill shortbread thumbprints or jam tarts.
- Swirl into yogurt or porridge for extra fruit flavour.
- Pair with soft cheeses on a cheeseboard.
- Use as a glaze or sweet component in savoury dishes.
“Keep a jar in the cupboard — it’s handy for quick snacks and elegant desserts alike.”
| Serving | Use | Why it works |
|---|---|---|
| Breakfast toast | Spread warm on buttered toast | Sweet-tart contrast brightens the bread |
| Cream tea | Scone filling with clotted cream | Traditional pairing that highlights fruit and cream |
| Baking | Filling for cakes and cookies | Gives moistness and fruity depth to bakes |
| Savoury glaze | Mix with lemon and pan juices | Adds a caramelised, fruity layer to meats |
Expert Tips for Success
Preventing sugar scorch and testing for set are the two details that lift home preserves to a professional finish.
Always use a heavy-bottomed pan to spread heat evenly and stop the granulated sugar from burning. Stir gently until every grain dissolves before you raise the heat; this avoids crystallisation and gives a smooth texture.
The chilled plate wrinkle test is the most reliable way to check the setting point of 105°C/220°F. Put a spoonful on a cold plate, wait a few minutes and push your finger; a lasting wrinkle means the jam set is ready.
If the mixture is too runny, return the pan to a rolling boil for a few more minutes and repeat the minutes test. Fresh, ripe plums bring natural pectin so you rarely need added pectin.
- Add a small knob of butter at the end to clear foam and give a glossy finish.
- Sterilise jars thoroughly and store sealed jars in a dark place for up to 1 year.
- Keep a clean spoon for skimming; the preserve will thicken further as it cools in the jar.
“Take your time with the pan heat and the test set — patience pays off in texture and flavour.”
Conclusion
Sealing warm jars correctly ensures the deep flavour and texture stay with you for months. This simple jam recipe rewards time spent with ripe plums and a good measure of sugar.
Follow the clear steps: prepare the fruit, dissolve the sugar, and test the setting point on a chilled plate. Trust the natural pectin in the fruit to help you reach the jam set and know when it is jam ready.
Use the spread on toast, in bakes or as a gift. A splash of lemon or extra juice can lift the flavour at potting time, and a steady eye on the pan avoids scorch.
Enjoy your homemade jars, store them cool and dark, and have fun trying small variations next season. Thank you for following the guide and good luck with your next batch.
FAQ
What is the ideal fruit-to-sugar ratio for this plum preserve?
How do I know the mixture has reached the setting point?
How long should I boil the fruit before adding sugar?
Can I add lemon juice or pectin to help set the preserve?
What is a rolling boil and why is it important?
How long should I test the jam on the chilled plate?
What if my jam doesn’t set after boiling for a long time?
How do I remove stones from plums efficiently?
Do I need to skim the jam while it cooks?
How should I sterilise glass jars for storing the preserve?
How long can I store unopened jars and where should I keep them?
Can I use frozen fruit to make this preserve?
What are simple serving ideas for this preserve?
Any tips to avoid crystallisation or spoilage?
Mary Berry Plum Jam Recipe
This classic homemade preserve brings the sweet-tart notes of ripe plums to your breakfast table. It uses simple ingredients — fresh fruit, granulated sugar and a splash of lemon juice — to make a glossy, spoonable spread.
Ingredients
- 1 kg ripe plums
- 750 g granulated sugar
- 100 ml water
- Splash of lemon juice
Method
- Wash each plum under cold running water to remove dirt and wax.
- Cut each plum in half and remove the stone, then roughly chop the pieces.
- Cook the chopped plums in a large, heavy-bottomed pan with 100 ml of water for 10-15 minutes until the skins are tender.
- Stir in a splash of lemon juice to brighten the flavor.
- Add 750 g of granulated sugar to the softened fruit and stir over low heat until the sugar has completely dissolved.
- Once the sugar is dissolved, increase the heat to bring the mixture to a rapid, rolling boil for about 10 minutes.
- To test for setting point, place a spoonful of the mixture on a chilled plate and let it cool for a minute. Push with your finger; if it wrinkles, it's ready.
- If the mixture is still runny, return it to the boil for another 2-5 minutes and repeat the test.
- Once set, skim off any froth and ladle the hot jam into sterilised jars, leaving a little headspace.
- Seal the jars while warm and store in a cool, dark place.