This classic British treat blends deep chocolate and bold coffee into an elegant dessert.
The Mary Berry Mocha Cake offers a soft, moist sponge that feels special yet is easy to make.
Preparation typically takes about 50–60 minutes, so it suits both last-minute gatherings and planned teas.
The balance of chocolate and coffee gives a richer profile than a plain sponge. Bakers will find the method reliable and forgiving.
Expect a refined finish and consistent results when you follow the steps in this recipe.
Key Takeaways
- Combines strong coffee aroma with deep chocolate for a grown-up flavour.
- Ready in around 50–60 minutes, ideal for afternoon tea or celebrations.
- Produces a moist, soft sponge that stands up well to simple decoration.
- Designed for reliable results, suitable for home bakers of varied skill.
- A classic British-style dessert that impresses guests with minimal fuss.
The Allure of the Mary Berry Mocha Cake
The union of espresso and cocoa lifts a simple sponge into something distinctly grown-up and comforting. This blend proves why coffee can emphasise deep chocolate notes without masking the sponge’s tenderness.
Mary Berry has long argued that a little brewed coffee sharpens chocolate’s flavour. The result is a soft, tender sponge that depends on good butter and fresh eggs for structure.
- Classic recipes deliver elegant presentation with straightforward steps.
- Many home bakers prefer this style because it rewards simple, confident baking.
- The mocha profile pairs perfectly with a fresh cup of coffee, making it ideal for tea or a small celebration.
- Understanding how coffee enhances cocoa explains why this cake remains a British favourite.
Essential Ingredients for Your Sponge
Gathering the right ingredients makes all the difference when building a tender, coffee‑tinged sponge.
Dry Ingredients
Start by sifting 200 g self-raising flour with 2 tbsp cocoa powder to remove lumps. Add 1 tsp baking powder and 1 tsp baking soda for lift.
Wet Ingredients
Cream 200 g soft butter with 200 g caster sugar until pale and fluffy. Add 4 large eggs, one at a time, to keep the batter stable and well emulsified.
- Dissolve 1 tbsp instant coffee in 2 tbsp hot water and fold it into the mix for a clear coffee note.
- Use plain water only where the recipe asks; the hot water helps bloom the coffee and cocoa powder.
- Always grease and line your tins to prevent sticking during baking.
Pro tip: weigh ingredients precisely and use room‑temperature eggs for best results. For a full set of recipes that use these techniques, see the all‑in‑one chocolate cake.
Preparing the Cake Mixture
Start with the oven at 180°C; this simple step sets the tone for an even bake and a steady rise.
In a large mixing bowl, beat 200 g soft butter with 200 g caster sugar until pale and very fluffy.
Gradually add the eggs, beating well after each addition to keep the batter smooth and stable.
- Stir 1 tsp instant coffee into 2 tbsp hot water, then fold this into the mixture with a splash of vanilla.
- Gently fold in 200 g self-raising flour and 2 tbsp cocoa powder. Add 2 tbsp milk if the batter needs loosening.
“A well-mixed batter gives a reliable rise and a moist crumb every time.”
Divide the batter evenly between two prepared tins, level the tops and place them in the preheated 180c oven.
Bake for 20–25 minutes until the sponge springs back when touched. Watch the bake minutes closely to avoid a dry sponge.

Baking to Perfection
A steady oven and careful timing are the secrets to giving your sponge a reliable, even rise.
Achieving the Perfect Rise
Place the prepared tins in the centre of the oven 180c. Use the fan setting if your appliance needs it for even heat distribution.
Set a timer and watch the bake minutes closely. Bake for about 20–25 minutes until the top is golden and the sponge shrinks slightly from the tin.
When the top springs back on light touch the cake is ready. Remove from the oven and let the tins rest for a few minutes.
Turn each tin out onto a wire rack. Allow the sponges to cool completely on the wire rack before you attempt to frost them.
- Tip: using prepared tins helps the sponge release cleanly and keeps the cake structure intact.
- Tip: check by pressing the top lightly — it should spring back.
| Stage | Action | Timing |
|---|---|---|
| Preheat | Set oven to 180c (fan if needed) | Before baking |
| Bake | Place tins centrally and monitor | 20–25 minutes |
| Rest & Cool | Rest in tin, then turn onto wire rack | Cool completely before frosting |
Crafting the Mocha Frosting
A smooth, aerated icing makes every forkful feel richer and more satisfying.
To create the mocha frosting, beat 100 g of softened butter with 200 g of icing sugar in a clean mixing bowl. Work at medium speed until pale and light.
Stir in 1 tbsp of cocoa powder and add 1 tsp instant coffee dissolved in 1 tbsp hot water. Mix briefly so the coffee blooms and the flavours marry.
Fold in 50 g of melted dark chocolate and continue beating. Aim for a glossy, spreadable mixture that holds soft peaks.
Ensure the butter is at room temperature before you start; this helps avoid lumps. Beat a little longer if needed — perfectly aerated icing makes the difference.
The coffee and chocolate combination gives a rich, creamy contrast to the lighter sponge and makes the final cake memorable.
| Step | Ingredient | Note |
|---|---|---|
| Cream | 100 g butter + 200 g icing sugar | Beat until pale and fluffy in a clean bowl |
| Flavour | 1 tbsp cocoa powder + 1 tsp instant coffee | Dissolve coffee in 1 tbsp hot water first |
| Finish | 50 g melted dark chocolate | Beat until smooth, glossy and spreadable |
| Tip | Room-temperature butter | Prevents lumps and improves aeration |
Assembling and Decorating Your Masterpiece
Assembling is where texture and presentation meet — take a few measured steps for the best finish.
Layering Techniques
Place one sponge layer on your serving plate. Spread a generous amount of mocha frosting over the top so each bite has flavour.
Carefully position the second sponge layer directly on top, checking alignment for a neat edge. A gentle press helps the layers settle without squeezing out the filling.

Smoothing the Finish
Use an offset spatula to spread the remaining frosting evenly over the top and sides. Work in short strokes to create a polished surface.
If the sponges have been allowed to cool completely on the wire rack, the icing will stick better and you will avoid slipping or tearing the sponge.
Adding Garnishes
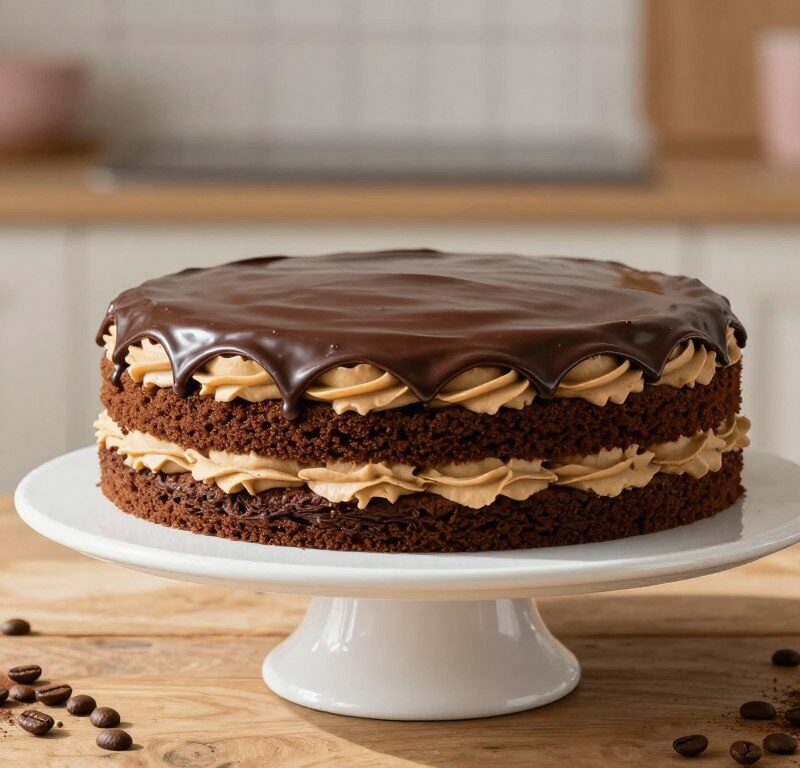
Finish with a few chocolate curls or a scatter of coffee beans across the top for a classic look.
- Tip: a light dusting of icing sugar lifts the contrast against dark chocolate.
- Tip: reserve a little frosting to pipe a neat border if you want more definition.
Customising Your Recipe
A few simple swaps let you tailor this classic sponge to different tastes and dietary needs.
For a lighter texture, substitute half the butter with Greek yogurt. This keeps the bake time and the tins the same but yields a softer crumb.
If you need a self-raising flour substitute, use 200 g plain flour plus 2 tsp baking powder (flour tsp baking). This maintains rise without changing the method.
Swap caster sugar for light brown sugar to add subtle caramel notes that lift the coffee and chocolate profile. Fold in orange zest or dark chocolate chips for extra flavour.
If you lack instant coffee, use 1 tbsp strong brewed espresso. Alternatively, dissolve tsp instant coffee in a tbsp hot water to bloom flavour before adding to the batter.
“Always keep ingredients at room temperature so the batter emulsifies correctly.”
| Swap | Use | Effect |
|---|---|---|
| Half butter | Greek yogurt | Lighter sponge |
| Self-raising | Plain flour + tsp baking powder | Reliable rise |
| Caster sugar | Light brown sugar | Caramel note with coffee & chocolate |
Storage and Serving Suggestions
Simple storage steps will protect the flavour of coffee and chocolate between servings.
Store your Mary Berry cake in an airtight container at room temperature for up to two days to keep the sponge soft and the icing glossy.
If you need to keep it longer, place the cake in the fridge for up to five days. Cover it well so the butter‑rich icing does not dry out.
Freezing for Later
Wrap individual slices tightly in cling film and put them in a sealed box for freezing. Slices keep well for up to two months.
To serve chilled slices, leave them at room temperature for 20 minutes so the sponge and frosting soften. Alternatively, warm a slice in the microwave for 8–10 seconds to enhance the chocolate aroma.
When transporting, protect the top with a cake box or a flat tray so the icing keeps its finish.
| Action | Method | Storage Time |
|---|---|---|
| Room temperature | Airtight container | Up to 2 days |
| Refrigerate | Covered, sealed | Up to 5 days |
| Freeze slices | Cling film + sealed box | Up to 2 months |
| Serve | Room temp 20 mins or microwave 8–10 secs | Ready to eat |
Conclusion
With steady technique and good ingredients, you can produce a dessert that tastes far more complex than it looks. This example from the mary berry collection shows how confident baking can reward you with a moist, even sponge.
Follow the steps here and you will create a professional-quality cake suitable for afternoon tea or special occasions. Simple care at each stage gives the best results.
Tip: quality ingredients and patience during mixing, baking and cooling matter more than fancy tools. Try other recipes to build skills and find small swaps that suit your pantry.
Finish with smooth icing, enjoy slicing a rich chocolate cake, and share the results with friends and family.
FAQ
What oven temperature should I use to bake this sponge?
Can I use self‑raising flour instead of plain flour and baking powder?
How do I make sure the cake rises evenly?
What instant coffee measurement gives a balanced mocha flavour?
How long should I cool the cake before icing?
Can I substitute caster sugar with granulated sugar?
What butter is best for the sponge and the frosting?
How do I achieve a smooth, professional icing finish?
Is it possible to freeze the layers or the finished cake?
How do I add a chocolate element without making the frosting too heavy?
Can I reduce sugar or use a sugar substitute?
What size tins should I use and how do they affect baking time?
Mary Berry Mocha Cake
This classic British treat blends deep chocolate and bold coffee into an elegant dessert. The Mary Berry Mocha Cake offers a soft, moist sponge that feels special yet is easy to make.
Ingredients
- 200 g self-raising flour
- 2 tbsp cocoa powder
- 1 tsp baking powder
- 1 tsp baking soda
- 200 g soft butter
- 200 g caster sugar
- 4 large eggs
- 1 tbsp instant coffee
- 2 tbsp hot water
- 2 tbsp milk
- 100 g butter (for frosting)
- 200 g icing sugar
- 1 tbsp cocoa powder (for frosting)
- 1 tsp instant coffee (for frosting)
- 1 tbsp hot water (for frosting)
- 50 g melted dark chocolate
Method
- Preheat the oven to 180°C.
- Sift the self-raising flour and cocoa powder together with baking powder and baking soda.
- Cream the soft butter and caster sugar until pale and fluffy.
- Add the eggs one at a time, beating well after each addition.
- Dissolve the instant coffee in hot water and fold it into the mixture.
- Gently fold in the sifted flour and cocoa mixture, adding milk if needed.
- Divide the batter evenly between two prepared tins and level the tops.
- Bake for 20–25 minutes until the sponge springs back when touched.
- Let the sponges cool in the tins for a few minutes before turning them out onto a wire rack.
- For the frosting, beat the softened butter with icing sugar until pale and fluffy.
- Stir in cocoa powder and dissolved instant coffee, then fold in melted dark chocolate.
- Spread a layer of frosting on top of one sponge, place the second sponge on top, and frost the top and sides.
- Decorate with chocolate curls or coffee beans if desired.