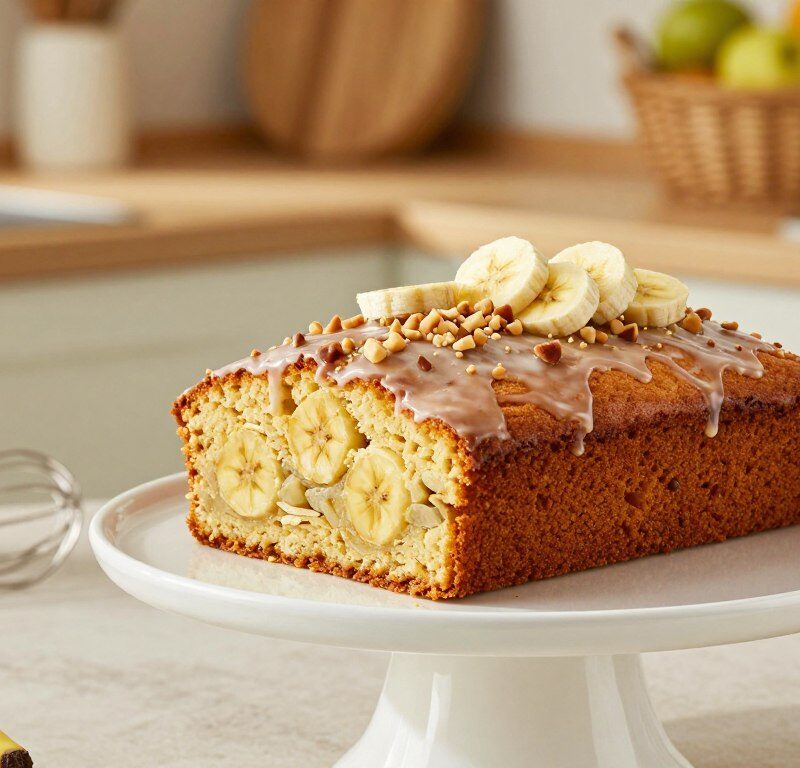
This simple loaf is a moist sponge that uses vegetable oil instead of butter to keep the crumb tender and reliable.
The method is designed for everyday baking. It focuses on clear banana flavour and easy, repeatable steps.
Overripe bananas find a purpose here, turning into a light, airy loaf that stays fresh for longer than many butter-based recipes.
Whether you bake for a school fete or a cosy afternoon tea, the ingredients are straightforward and the results consistent. Follow the recipe and you will enjoy a professional-quality banana bread that feels like a bakery treat at home.
Key Takeaways
- Vegetable oil gives a moist, tender crumb and longer freshness.
- The recipe makes good use of overripe bananas and simple ingredients.
- Steps are beginner-friendly and ideal for everyday baking.
- This loaf performs well for gatherings and casual teatime.
- Results are consistent, yielding a light, bakery-style banana bread.
Why You Will Love This Mary Berry Banana Cake With Oil
A modest ingredient switch yields a reliably moist, everyday loaf that won’t dry out fast.
The oil-based method keeps the crumb tender for days. That means you can bake midweek and still enjoy soft slices by the weekend.
This recipe mixes in one bowl and uses simple storecupboard items. It bakes into a soft, even crumb that feels light rather than dense.
The flavour is firmly banana-led, yet balanced so each slice pairs well with tea. Novice bakers will appreciate how forgiving the method is.
- Lighter texture: oil gives a less heavy sponge than butter-heavy versions.
- Keeps fresh: moisture retention beats many other banana bread recipes.
- Easy method: one bowl, basic ingredients, consistent results.
Many home cooks find this berry banana bread approach dependable, whether using ripe fruit from the market or the supermarket. It’s a reliable recipe for a relaxed afternoon treat.
The Benefits of Using Oil in Your Banana Sponge
Choosing a liquid fat keeps your sponge tender and extends freshness. This simple swap affects texture, flavour clarity and how long a loaf stays soft. It suits home cooks who want reliable results from everyday baking.
The Science of Moisture
Oil remains liquid at room temperature, so it coats flour proteins differently to butter. The result is a looser, more flexible crumb that resists staling.
Moisture retention means slices stay pleasant for days in an airtight tin, making it ideal for busy households or sharing at events.
Why Oil Beats Butter
Compared with butter, oil gives a cleaner taste. That allows the banana to be more prominent without a greasy feel.
- Oil keeps the sponge soft longer, a staple in many mary berry recipes.
- It helps banana bread stay tender after several days.
- Oil-based recipes often yield a lighter mouthfeel than butter-heavy versions.
Essential Ingredients for a Perfect Loaf
Start by gathering precise measures of each ingredient to ensure a faultless loaf.
For this mary berry banana recipe you will need 3 medium ripe bananas, mashed until smooth. Add 175g caster sugar and 2 large eggs to provide structure and sweetness.
Dry ingredients are simple: 225g self-raising flour and 1 tsp baking powder. If your self-raising flour is unavailable, weigh plain flour and add the correct raising agent.
Wet ingredients: 125ml vegetable oil, 2 tbsp milk and 1 tsp vanilla extract. For a richer crumb, you can substitute 100g butter instead of oil—texture will be slightly different.
Use a large mixing bowl so you can fold batter gently without overworking it. Always measure flour and caster sugar on digital scales for consistent results in classic British recipes.

| Ingredient | Amount | Role | Tip |
|---|---|---|---|
| Ripe bananas | 3 medium | Moisture & flavour | Use overripe for best sweetness |
| Caster sugar | 175g | Sweetener & structure | Weigh for accuracy |
| Self-raising flour | 225g | Base & lift | Sift if lumpy |
| Vegetable oil | 125ml | Moisture & tenderness | Or use 100g butter for richer bread |
- Keep ingredients at room temperature for even mixing.
- Use digital scales rather than cups for reliable recipes.
- Gentle mixing in a large bowl gives a lighter loaf and avoids a dense crumb.
Preparing Your Kitchen and Equipment
A tidy, organised workspace makes the difference between a smooth bake and a last-minute scramble. Set out bowls, scales and spoons so you can follow the method without pauses.
Selecting the Right Tin
Choose a 900 g loaf tin for the classic shape. If you prefer a round finish, a 20cm round cake tin is a suitable alternative.
Grease the tin well and line it with baking paper. Always leave an overhang to act as a sling; this makes removing the loaf easy and neat.
- Prepare the tin: grease thoroughly and use baking paper to prevent sticking.
- Oven readiness: preheat fully and, if you have one, check temperature with an internal thermometer for steady heat.
- Final checks: ensure scales, mixing bowl and spatula are at hand before you begin baking.
These simple steps create the ideal environment for a light berry banana or banana loaf to rise and brown evenly. Proper preparation is a hallmark of the mary berry method and saves time when the batter is ready to go into the oven.
Step by Step Mixing and Baking Instructions
A calm, ordered start makes all the difference when you mix and bake this loaf. Preheat the oven and line your loaf tin with baking paper so the batter can go straight in.
Begin by mashing the ripe bananas in a large mixing bowl. Leave a few small lumps to give the crumb pleasant texture.
- Add caster sugar, eggs, vegetable oil, milk and vanilla. Use a hand whisk to blend until the mixture looks smooth.
- Sift self-raising flour and baking powder over the wet mix. Fold gently to avoid knocking out air; a light touch keeps the loaf airy.
- Pour the batter into the prepared tin and bake for 50–60 minutes. Test by inserting a skewer — it should come out clean when the cake is done.
Cool the loaf in the tin for 10 minutes, then transfer to a wire rack to cool completely before slicing. This final rest stops the bread from collapsing and makes neat slices.
| Stage | Action | Time / Note |
|---|---|---|
| Preparation | Preheat oven, line loaf tin | Ready before mixing |
| Mixing | Mash bananas, whisk wet, fold dry | Do not over-mix |
| Bake & cool | Bake 50–60 minutes, cool 10 minutes in tin | Skewer inserted comes clean; cool on wire rack |
Achieving the Perfect Texture and Rise
How you handle the batter determines whether the loaf is light or heavy. Small technique changes at the mixing and baking stages will help your bread rise well and keep a tender crumb.
Avoiding a dense crumb
Work gently in the bowl. Fold dry flour into the wet mixture using a spatula. Overmixing develops gluten and makes the crumb heavy. Stop when streaks of flour disappear.
Testing for Doneness
Check the bake by inserting a skewer. A skewer inserted into the centre should come out clean — not wet with batter but not overly dry.
“A clean skewer gives confidence that the loaf is cooked through without drying out.”
Managing Oven Temperature
Place the tin lower in the oven for even browning. If edges brown too fast, tent the loaf with foil for the last 10 minutes.
After baking, remove the loaf from the tin minutes after baking and cool on a wire rack. Allowing air to circulate stops excess moisture building up and helps you cut neat slices.
| Check | What to do | Why it matters |
|---|---|---|
| Mixing | Fold gently in the bowl | Prevents a dense, heavy crumb |
| Raising agents | Use fresh baking powder | Ensures the loaf is well risen |
| Doneness test | Skewer inserted comes clean | Confirms cooked through without drying |
| Cooling | Cool on a wire rack | Prevents soggy slices and helps set crumb |
Creative Variations to Customise Your Bake
A few simple add-ins will transform the basic loaf into something more seasonal and exciting.
Chocolate chip version: fold 100g of good-quality dark chocolate into the batter for a decadent chocolate cake twist. Use chips or roughly chopped bars so the pieces distribute evenly.
Nutty addition: stir in 50g chopped walnuts or pecans for crunch. Nuts pair well with ripe bananas and lift the texture without masking the base flavour.
Spiced twist: add 1 tsp cinnamon or a pinch of nutmeg to the flour and baking powder for warming notes that suit autumn baking.
Fruit mix: fold in a handful of blueberries for a banana and blueberry variation that brightens each slice. Fresh or frozen fruit both work; toss fruit in a little flour first to stop sinking.
Tips: gently fold any additions to keep the crumb light. Expect small changes to baking time when you add extra ingredients; test with a skewer.
- Maintain the same core ingredients and technique for reliable results.
- Use high-quality chocolate to elevate the loaf into a smart shareable treat.
Expert Tips for Storing and Freezing
Good storage starts the moment the loaf leaves the oven and cools on the rack. Follow a few simple steps and your slices will stay moist and ready to serve.
Maintaining Freshness
Cool completely before wrapping. Trapped steam makes the crust soggy and shortens shelf life.
At room temperature, wrap the loaf tightly in plastic wrap and store in a cool place for 4 to 5 days. This preserves texture and flavour.
If you need longer storage, freeze slices or the whole loaf for up to 3 months. Wrap well in plastic, then place in a freezer-safe container to prevent freezer burn.
- Line your tin with baking paper before baking — it helps remove the loaf cleanly and keeps the exterior intact for storage.
- When reheating frozen slices, thaw at room temperature or warm briefly in a medium oven for best results.
- Keep ingredients fresh and follow these simple tips to enjoy your loaf as if it were just baked.
| Action | Result | Time |
|---|---|---|
| Room-temperature storage | Keeps crumb soft | 4–5 days |
| Freezing (wrapped) | Preserves flavour | Up to 3 months |
| Rewarm from frozen | Restores warmth & texture | Few minutes in a medium oven |
Serving Suggestions for Afternoon Tea
A few thoughtful accompaniments lift the flavours and make each slice feel special. Serve the loaf warm for best texture and aroma.

Light options work well: a smear of butter or a drizzle of honey accentuates natural sweetness without masking the fruit.
- Top warm slices with a spoonful of peanut butter or a handful of fresh berries for contrast.
- Pair each piece with a hot cup of tea or coffee to create a classic afternoon ritual.
- Slice the bread by hand so pieces stay thick enough to hold toppings and look inviting on the plate.
- If you have 100g extra fruit, serve it on the side to cut through the rich, moist crumb.
Using good sugar and fresh eggs in the original recipe means the base is tasty enough to enjoy plain or dressed up. These small touches make this banana loaf the highlight of any relaxed gathering.
Conclusion
A few practical reminders will help you turn the recipe into a go-to loaf for any day of baking. Keep steps calm, measure accurately and trust the simple method for a reliably moist bread.
Focus on the ingredients — ripe bananas, the right flour and fresh baking powder make a big difference. Follow quantities closely and the mary berry banana approach will reward you with a light, even crumb.
Use the creative ideas and storage tips here to enjoy slices for days. These small tips help your bread stay soft and flavourful and make the method adaptable to other recipes.
Want a related classic? See the seed cake guide for more British baking inspiration: seed cake guide.
FAQ
What size loaf tin is best for this recipe?
How ripe should the bananas be?
Can I substitute self-raising flour with plain flour?
Do I need to line the tin with baking paper?
Is caster sugar necessary, or can I use granulated sugar?
Why use oil instead of butter in this loaf?
How long should the cake bake and how do I check it’s done?
My loaf top is browning too quickly — what can I do?
Can I add chocolate or nuts to the mixture?
How should I cool and store the loaf once baked?
Can I make this recipe dairy-free or egg-free?
How can I avoid a dense crumb?
What’s the best way to serve slices for afternoon tea?
Is it possible to halve the recipe for a smaller loaf?
Mary Berry Banana Cake With Oil
This simple loaf is a moist sponge that uses vegetable oil instead of butter to keep the crumb tender and reliable. It focuses on clear banana flavour and easy, repeatable steps, making it ideal for everyday baking.
Ingredients
- 3 medium ripe bananas, mashed until smooth
- 175g caster sugar
- 2 large eggs
- 225g self-raising flour
- 1 tsp baking powder
- 125ml vegetable oil
- 2 tbsp milk
- 1 tsp vanilla extract
Method
- Preheat the oven and line your loaf tin with baking paper.
- Mash the ripe bananas in a large mixing bowl, leaving a few small lumps for texture.
- Add caster sugar, eggs, vegetable oil, milk, and vanilla to the bowl. Use a hand whisk to blend until smooth.
- Sift self-raising flour and baking powder over the wet mixture. Fold gently to avoid knocking out air.
- Pour the batter into the prepared tin and bake for 50–60 minutes. Test doneness by inserting a skewer; it should come out clean.
- Cool the loaf in the tin for 10 minutes, then transfer to a wire rack to cool completely before slicing.