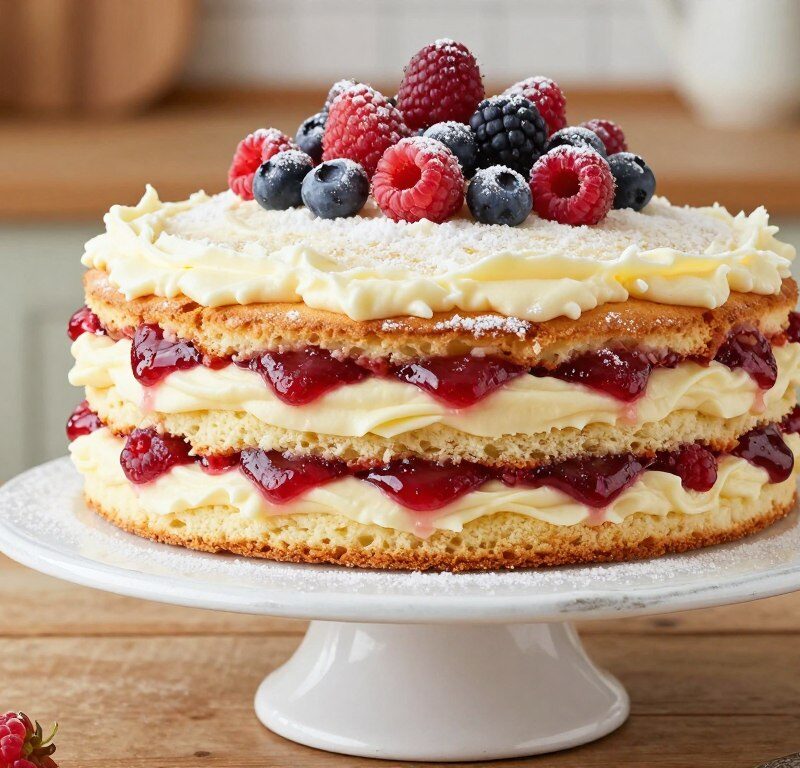
This delightful cake brings three airy sponge layers together for a striking celebration centrepiece.
The recipe uses equal measures of self-raising flour, caster sugar and unsalted butter, with eggs whisked to give a light crumb.
Fresh strawberries, a smear of strawberry jam and a cloud of whipped cream complete the sandwich and lift each slice.
To get the signature height you will need three 20cm round tins and careful stacking to keep the layers steady.
A light dusting of icing sugar finishes the top, making it perfect for afternoon tea or a special gathering.
This classic from a famous baker pairs simplicity with a professional look, so home bakers can create an impressive result with one reliable recipe.
Key Takeaways
- Equal ingredient weights create the sponge’s even texture.
- Three 20cm tins are needed for the iconic stacked look.
- Whipped cream and jam balance sweetness and moisture.
- Finish with icing sugar and fresh strawberries for charm.
- Ideal for afternoon tea, birthdays and casual get-togethers.
The Allure of the Mary Berry 3 Layer Victoria Sponge
Across Britain, this stacked victoria sponge is prized for its delicate, airy texture that lifts any afternoon tea.
The cake stands apart from ordinary sponges because the three layers create striking height and presence on the table.
Simple recipes using equal weights of flour, sugar, butter and eggs are the secret to that reliable light crumb.
Stacking a third layer gives a generous portion for guests and makes the dessert feel more celebratory.
The balance of whipped cream and jam keeps each layer moist and adds a soft, flavourful finish to every slice.
- Light crumb that melts in the mouth.
- Elegant height for special occasions.
- Versatile for birthdays, garden parties and casual tea.
| Feature | Why it matters | Practical tip | Result |
|---|---|---|---|
| Equal weights | Ensures even rise and texture | Use a kitchen scale | Consistent sponge |
| Three layers | Creates visual impact | Chill layers before stacking | Stable cake |
| Whipped cream | Adds moisture and softness | Whip to soft peaks | Balanced flavour |
| Jam filling | Locks in flavour and moisture | Spread thinly | Even slices |
Essential Ingredients for Your Bake
Start with precise weights and simple ingredients to ensure a reliable, airy bake every time. Accurate measuring and good-quality basics make the whole process easier and the result more consistent.
Choosing Quality Butter
Use 300g of unsalted butter, softened to room temperature. Soft butter creams better with 300g caster sugar, trapping air and creating a light crumb.
Choose high-quality, creamy butter for flavour. Softening first helps achieve the right texture during the creaming stage.
Selecting the Right Flour
Use 300g self-raising flour for reliable lift. If you only have plain flour, mix 300g plain flour with 2 tsp baking powder to match self-raising flour performance.
The recipe also calls for 6 large eggs, 2 tbsp milk and 1 tsp vanilla extract to balance moisture and flavour. Measure with a digital scale for consistent results.
- 300g self-raising flour (or 300g plain + 2 tsp baking powder)
- 300g caster sugar
- 300g unsalted butter, softened
- 6 large eggs, 2 tbsp milk, 1 tsp vanilla extract
Necessary Kitchen Equipment
Gathering the right tools before you start makes baking this cake far less stressful.
To achieve even layers you will need three 20cm round sandwich tins. Good-quality sandwich tins give steady heat and an even rise.
An electric whisk or stand mixer speeds up creaming and gives a light, fluffy batter. Digital scales help you divide batter so each tin matches in height.
- Cooling rack — lets air circulate and stops the sponges becoming soggy.
- Offset spatula — ideal for spreading jam and cream evenly.
- Fine-mesh sieve — for a delicate dusting of icing sugar.
- Large mixing bowl — leaves room to mix without mess.
Having these items on hand makes following recipes simpler and helps you get professional results at home. Investing in reliable tools improves every bake and boosts confidence when you stack and fill your sandwich layers.
| Tool | Purpose | Tip |
|---|---|---|
| Three 20cm sandwich tins | Even layer size | Line and chill before stacking |
| Electric whisk / mixer | Cream butter and sugar | Use medium speed until pale |
| Cooling rack | Prevents soggy bases | Cool fully before filling |
Preparing Your Sandwich Tins
Good results begin with simple, careful prep. Take a few simple steps with your tins and you set the stage for even rise and clean removal when the sponges come out of the oven.
Lining for Success
Before you mix a single ingredient, preheat the oven to 180°C (160°C fan). Wait until the oven reaches the correct temperature before you bake.
Grease each of the three 20cm round tins with butter or a light oil. Lightly grease the sides as well as the base to prevent sticking.

Cut circles of good-quality baking paper to fit the base of each tin. Press the paper into the base, then replace the cake batter once the tins are ready.
- Grease sides and base to avoid tears.
- Use baking paper circles for easy release.
- Chill lined tins briefly if you want extra stability when filling.
| Step | Why it matters | Quick tip |
|---|---|---|
| Preheat oven to 180°C (160°C fan) | Ensures even baking from the start | Use an oven thermometer if unsure |
| Grease sides and base | Prevents sticking and tearing | Use a light smear of butter or oil |
| Line with baking paper circles | Guarantees clean release | Cut precise circles to fit snugly |
Creating the Perfect Sponge Batter
Creaming butter and caster sugar until pale gives the batter its essential lift. In a large bowl, beat softened butter with caster sugar until the mix becomes light and airy. This step traps air and sets the base for a soft sponge.
Gradually add the eggs one at a time, mixing well after each addition so the batter stays smooth. Sift the flour and baking powder together to remove lumps and fold them in gently to keep the aeration.
Add 1 tsp vanilla extract and 2 tbsp milk to loosen the mixture and make it easy to spread into the tins. Use an electric whisk to reach a smooth consistency, but stop once combined to avoid a dense cake.
Weigh the batter into each tin for equal layers. Level the tops with a spatula so each sponge bakes flat and stacks neatly. Quality ingredients give the best flavour, so choose good butter and fresh eggs for a reliably delightful result.
- Tip: Proper aeration during creaming is the secret to an even, tender sponge.
Baking for a Light and Airy Texture
Getting the timing and temperature right is the key to a light, airy sponge every baker can rely on.
Place your tins in the centre of the oven and bake for 20–25 minutes until the sponges are golden and springy to the touch.
Checking for Doneness
Gently press the top of the cake; it should spring back immediately when fully baked.
If a cake needs more time, give it an extra 2–3 minutes and watch closely to avoid burning.
Avoiding Overbaking
Avoid opening the oven door too early. Sudden temperature changes can make the sponges sink and lose their height.
Leave the cakes in their tins for 5 minutes after baking, then turn them out onto a wire rack to cool completely.
Using a wire rack prevents trapped steam underneath the cakes. This keeps the crumb moist and stops the bases going soggy.
- Place tins in the centre and bake 20–25 minutes.
- Press the top: it should spring back when done.
- Set a timer for 20 minutes to check the progress of your three layers.
- Cool on a wire rack before adding any cream or jam.
Cooling and Preparing the Filling
Allow the sponges to cool fully on a wire rack before you touch the filling. Adding cream or jam to warm cakes will make fillings slide and lose structure.
Whip 250ml double cream to soft peaks. Soft peaks give light texture while still holding shape between the layers.
Stir 6 tbsp of strawberry jam until spreadable. If your jam is stiff, warm it gently in a small bowl so it spreads smoothly.
“A well-prepared filling is the heart of a good cake — it keeps each slice moist and balanced.”
- Tip: If you want extra stability, fold a spoonful of buttercream into the whipped cream.
- Keep the prepared cream chilled until assembly to avoid it loosening while you build the cakes.
- Choose high-fruit jams for the best flavour, or swap in raspberry jam if preferred.
| Ingredient | Amount | Purpose |
|---|---|---|
| Double cream | 250ml | Whip to soft peaks for light filling |
| Strawberry/raspberry jam | 6 tbsp | Adds flavour and moisture |
| Buttercream (optional) | 1–2 tbsp | Increases stability and sweetness |
Assembling the Three Layers
Begin on a clean serving plate so the sandwich sits straight and looks tidy. Place the first cooled sponge centrally before you add any filling.

Spread a generous spoonful of jam across the base, then add an even layer of cream. Use an offset spatula to push the filling right to the edges without tearing the sponge.
Gently lower the second sponge on top, aligning it with the base for stability. Repeat with jam and cream to build the signature height of the three stacked layers.
If one sponge has a slight dome, trim it with a serrated knife so each layer sits flat. For extra neatness, pipe a thin ring of buttercream around each layer to stabilise the filling and create a clean border.
Place the final sponge as the lid and press down very gently to secure. Finish with a light dusting of icing sugar over the top for the classic look.
- Tip: Keep the assembled cake chilled briefly to set the filling before slicing.
- Use a long serrated knife for even slices through soft cream and jam.
Troubleshooting Common Baking Issues
A few quick checks will sort most problems with texture, layers and fillings before serving.
Fixing Runny Cream
If your cream is too loose, it often needs more whipping or a slower speed. Whip to soft peaks rather than stiff peaks if you want a light finish that still holds.
For very runny mixes, chill the bowl and beaters, then whip again. If buttercream is too soft, add a little more icing sugar to thicken the mixture.
Correcting Uneven Layers
Weigh the batter into tins so each sponge has the same amount of mixture. This avoids sloping layers and makes stacking easier.
If one layer domes, trim it with a serrated knife when cool. Ensure sponges are completely cool before adding cream so the layers do not slide.
Reviving Dry Sponge
Overbaking dries a cake. Next time, reduce baking time by a few minutes and test at the lower end of the suggested range.
To rescue a dry sponge, brush it with a simple lemon syrup for moisture and fresh flavour. A little jam between layers also helps restore softness.
| Issue | Likely Cause | Quick Fix |
|---|---|---|
| Runny cream | Under-whipped / warm bowl | Chill items, whip to soft peaks |
| Uneven layers | Unequal batter / dome | Weigh batter, trim domes |
| Dry sponge | Overbaked | Brush with lemon syrup or jam |
Troubleshooting is part of learning; even the best bakers refine their technique over time.
Creative Variations and Flavour Twists
A simple twist of zest can turn a familiar bake into a memorable centrepiece.
Bright citrus notes: Add lemon zest to the batter or swap jam for tangy lemon curd to give the cake a lively lift. Two teaspoons of lemon make a marked difference.
Fruit and colour: Top with fresh strawberries and mint leaves for a festive finish. Alternatively, use raspberry jam for a sharper contrast to the sweet sponge.
- For richer filling, use buttercream instead of cream — it holds shape for tiered cakes.
- Try Greek yogurt mixed with honey for a lighter, tangy option.
- Drizzle chocolate ganache over the top for added indulgence.
Small swaps to try: a tablespoon of orange essence in the batter, edible flowers for decoration, or a thin ring of icing to stabilise fillings. Keep the base ingredients — caster sugar, flour, eggs, butter — the same so the batter and texture remain reliable.
Play with fillings, not structure; that way you get new flavours without risking the bake.
Storage and Refreshing Tips
Smart freezing and reheating bring back the soft texture of home-baked sponges. Follow simple steps to keep each slice tasting as fresh as the day you baked it.
Freezing for Later
Store your assembled cake in an airtight container in a cool place to keep the crumb soft for up to two days.
If the cake contains fresh cream, refrigerate and eat within 24 hours for safety and quality. Unfilled sponges freeze best.
- Wrap unfilled sponges tightly in cling film, then tin foil, and freeze for up to two months.
- Label packages with the date so you can track storage time easily.
- Defrost at room temperature before filling with jam and cream.
To refresh a slightly dry sponge, warm an unfilled layer in the oven at 140°C for 5 minutes. This helps revive the crumb and improves texture.
Never re-freeze a cake already filled with cream — the quality and safety will suffer.
| Storage | Duration | Quick tip |
|---|---|---|
| Assembled (airtight) | Up to 2 days | Keep cool, avoid strong odours |
| Filled with cream (fridge) | 24 hours | Serve chilled |
| Unfilled sponges (freezer) | Up to 2 months | Wrap well and label date |
| Reviving | 5 minutes | Heat at 140°C to regain softness |
Conclusion
A few final reminders will ensure your finished cake looks and tastes its best at teatime.
This reliable recipe rewards careful measuring — caster sugar, fresh eggs and good butter make a real difference to texture and flavour.
Choose strawberry or raspberry jam for the filling and dust the top with icing sugar just before serving for a classic finish.
Keep the assembled cake cool, slice with a long serrated knife and enjoy within a day if filled with cream. Each serving contains about 430 kcal, so savour it as a special treat.
Happy baking — follow the steps, mind the oven times and minutes, and you will produce an elegant victoria sponge that delights at every tea.
FAQ
What tins and sizes work best for a three-layer sponge?
How do I choose the right butter and sugar for light sponge?
Can I substitute self‑raising flour with plain flour?
What’s the best way to line sandwich tins to prevent sticking?
How should I mix the batter to keep it light?
What oven temperature and time are typical for these sponges?
How do I check when the sponge is cooked through?
What causes a domed or uneven cake and how can I fix it?
How long should I cool layers before adding filling?
How do I prevent runny cream or jam between layers?
What should I do if the sponge turns out dry?
Can I freeze the sponges or a fully assembled cake?
Any quick flavour variations to try with this classic?
Mary Berry 3 Layer Victoria Sponge
This delightful cake brings three airy sponge layers together for a striking celebration centrepiece. The recipe uses equal measures of self-raising flour, caster sugar and unsalted butter, with eggs whisked to give a light crumb. Fresh strawberries, a smear of strawberry jam and a cloud of whipped cream complete the sandwich and lift each slice.
Ingredients
- 300g self-raising flour (or 300g plain + 2 tsp baking powder)
- 300g caster sugar
- 300g unsalted butter, softened
- 6 large eggs
- 2 tbsp milk
- 1 tsp vanilla extract
- 250ml double cream
- 6 tbsp strawberry jam
- Icing sugar for dusting
Method
- Preheat the oven to 180°C (160°C fan).
- Grease three 20cm round sandwich tins and line the bases with baking paper.
- In a large bowl, cream the softened butter and caster sugar until pale and fluffy.
- Gradually add the eggs one at a time, mixing well after each addition.
- Sift the flour and baking powder together, then fold into the mixture gently.
- Add the vanilla extract and milk, mixing until just combined.
- Divide the batter evenly between the three prepared tins and level the tops.
- Bake in the preheated oven for 20-25 minutes until golden and springy to the touch.
- Allow the cakes to cool in the tins for 5 minutes, then turn out onto a wire rack to cool completely.
- Whip the double cream to soft peaks.
- Spread a layer of strawberry jam on the first sponge, followed by a layer of whipped cream.
- Place the second sponge on top and repeat the process with jam and cream.
- Top with the final sponge and dust with icing sugar before serving.