This classic British dessert creates a light sponge that bakes above a glossy sauce. It feels comforting and old-fashioned, perfect for family dinners or cosy weekend gatherings.
The method is pleasingly simple. From mixing to the oven, the whole process takes about 50 minutes, making it an ideal treat when you want something effortless yet impressive.
Home bakers love how humble storecupboard ingredients transform into a luxurious, self-saucing pudding. The trick lies in the way the batter and sauce form together in one ovenproof dish to produce a rich finish beneath a soft top.
Key Takeaways
- This recipe is a beloved British classic that turns simple ingredients into a special dessert.
- Preparation and baking take roughly 50 minutes from start to finish.
- It produces a light sponge with a rich sauce underneath in a single dish.
- Perfect for family meals and low-effort entertaining.
- Following the steps gives a reliably impressive, home-baked result.
The Allure of the Mary Berry Magic Chocolate Pudding Recipe
This classic pudding captivates because one batter produces two very different textures as it bakes.
The contrast is the star: a light sponge floats above a molten sauce. The split happens without extra effort and feels almost like a kitchen trick.
mary berry has long championed reliable, comforting desserts that even new bakers can trust. Her approach makes these recipes a staple in many UK homes.
The deep chocolate flavour is achieved with simple, everyday ingredients. You don’t need specialist items to create a rich chocolate sauce beneath the sponge.
- This dessert separates into a light top and a glossy sauce below.
- mary berry’s guidance makes the method accessible and reassuring.
- Many British puddings share that warm, indulgent texture and easy preparation.
Understanding the simple science behind these puddings helps home cooks reproduce the result every time. It’s why this dish remains timeless.
Essential Ingredients for Your Chocolate Sponge
Start by assembling measured ingredients to ensure the sponge rises evenly. Lay out a measuring jug and a mixing bowl so you work confidently and cleanly.
Dry components
Dry ingredients are simple but vital. Use 110g self-raising flour and 110g caster sugar. These guarantee the sponge lifts and gives a fine crumb.
Wet components
For the wet mix, have 110g softened butter, 150ml milk, one large egg and 1 tsp vanilla extract at room temperature. This makes a smooth, even mixture and helps the sponge brown nicely.
Sauce setup: Combine cocoa powder with 90g soft brown sugar in a separate bowl. Keep 300ml hot water ready in a jug to pour over before baking; it starts the self-saucing magic.
| Category | Item | Amount |
|---|---|---|
| Dry | Self-raising flour | 110g |
| Dry | Caster sugar | 110g |
| Wet | Butter | 110g softened |
| Wet | Milk | 150ml |
| Sauce | Cocoa powder & brown sugar | cocoa powder + 90g brown sugar |
| Finish | Hot water | 300ml |
Preparing Your Kitchen and Equipment
Get your workspace ready so the bake flows smoothly from mixing to the oven. Preheat to about 180°C so the pudding starts cooking evenly the moment it goes in. Having this temperature set saves time and improves the final texture.
Choose an ovenproof dish of roughly 1 litre capacity. A dish this size lets the sponge rise and the sauce form without spilling. Lightly grease the base and sides to help the sponge release cleanly after baking.
Allow roughly 15 minutes of preparation time. Boil the kettle early so hot water is ready for the sauce stage. Many reliable recipes stress that good organisation means fewer interruptions and steadier results.

- Ensure the oven is fully preheated before you begin baking.
- Pick a deep, quality dish to hold batter and liquid safely.
- Grease the dish lightly to prevent sticking and aid serving.
- Set out scales, mixing bowls and a jug so you save time when assembling ingredients.
Creating the Perfect Batter
Begin by creaming together the butter and caster sugar until the mix turns pale and airy. Use a large bowl and a wooden spoon or electric whisk. This creates tiny air pockets that help the sponge rise during baking.
Next, whisk in the egg, 150ml milk and 1 tsp vanilla extract until the mixture is smooth and even. Work steadily so the emulsion stays stable and the batter looks glossy.
Gently fold the flour and cocoa powder into the bowl. Use a spatula and fold with a light hand to avoid overworking the dry ingredients.
When the batter is thick and velvety, spoon it into your prepared ovenproof dish. Level the top with the back of a spoon so the layer is even and ready to support the sauce as it bakes.
Mixing Techniques
- Cream butter and caster sugar until pale and fluffy.
- Add the egg, milk and vanilla extract, mixing to a smooth batter.
- Fold in flour and cocoa powder without overmixing to keep the sponge light.
Tip: A gentle touch is key — mary berry advises light folding to keep the sponge airy rather than heavy. This small care makes a big difference in the final texture and lift.
The Secret to the Glossy Chocolate Sauce Layer
The trick to a shiny sauce is in how you apply the cocoa and sugar before adding liquid.
Mix 2 tbsp of cocoa powder with 90g soft brown sugar to make the topping mixture. Sprinkle this evenly over the surface of the sponge batter so every part of the dish is covered.
Carefully pour 300ml of hot water over the back of a spoon. This slows the flow and keeps the water from disturbing the batter.
Why this works: the hot water sinks through the batter, dissolving the sugar and cocoa to form a glossy sauce layer beneath the sponge. mary berry stresses the water must be hot to achieve a richly flavoured, unctuous sauce.
- Use exactly 300ml of hot water for the correct consistency.
- Sprinkle the cocoa-brown sugar mixture evenly to ensure an even sauce.
- Pour over the back of a spoon to protect the sponge layer.
| Step | Action | Amount |
|---|---|---|
| Prepare topping | Mix cocoa and brown sugar | 2 tbsp cocoa, 90g brown sugar |
| Apply | Sprinkle evenly over batter | Whole surface of dish |
| Add water | Pour over back of spoon | 300ml hot water |
Baking Techniques for Optimal Results
Correct heat, shelf position and a short rest are the simple controls that deliver a reliable self-saucing finish.

Oven temperature
Preheat to 180°C. If you use a fan oven, set it to 160°C to stop the sponge from overbaking before the sauce forms.
Shelf placement
Place the dish on the middle shelf so heat circulates evenly around the batter and the liquid beneath it.
Resting time
After roughly 35 minutes of baking, test the sponge by pressing the top; it should feel firm and springy.
Remove the pudding from the oven and allow it to rest for several minutes. This pause helps the sauce thicken and the sugar and cocoa to settle into a glossy layer.
- Middle shelf for even heat around the dish.
- 160°C for fan ovens to protect the sponge.
- Take the bake out when the top is set but the sauce underneath is still molten.
- Rest briefly so the hot water and sugar combine into a smoother sauce.
| Aspect | Setting | Reason |
|---|---|---|
| Temperature | 180°C (160°C fan) | Even cooking without drying the top |
| Shelf | Middle | Balanced heat for sponge and sauce |
| Bake time | Approx. 35 minutes | Top should be firm, sauce still soft |
| Rest | Several minutes | Thickens sauce and improves texture |
Tip: Follow mary berry’s advice and don’t rush the resting time — it makes a noticeable difference to the final layer and mouthfeel.
Troubleshooting Common Baking Issues
Small mistakes in timing or temperature are often the reason a bake looks different to how you expect. This short guide helps you spot the cause and get the result right next time.
If the sponge is dry, you have probably left it in too long. Reduce the baking time by a few minutes and check a little earlier, especially in a fan oven.
If the sauce comes out too thin, make sure you use freshly boiled hot water, not merely warm. Boiling water dissolves the sugar and forms a glossy layer beneath the sponge.
Uneven layers usually happen when the water is poured too quickly. Always pour the hot water slowly over the back of a spoon so the liquid sinks without disturbing the batter.
A cracked top often signals excessive heat. Try lowering the oven temperature slightly or switch to a gentler fan setting to prevent the surface from drying and splitting.
- Dry sponge: shorten baking time and test earlier.
- Thin sauce: use freshly boiled water and pour gently.
- Cracked top: reduce oven temperature for fan baking.
- No sauce: do not stir layers; add water carefully.
Tip: Keep notes on oven quirks and exact times — a small change in time or temperature often fixes repeat problems and improves every bake.
Creative Variations to Customise Your Pudding
A few simple swaps and additions transform the pudding to suit diets and tastes. These options keep the baking method intact while altering texture and flavour.
Dietary Substitutions
For a lighter finish, swap the butter for Greek yoghurt or a low‑fat spread. This reduces richness while keeping the sponge moist.
Vegan option: replace eggs with a flax egg (1 tbsp ground flax seeds + 3 tbsp water). Use a dairy‑free spread and plant milk to make fully vegan puddings.
- For deeper flavour, use dark cocoa powder or add a pinch of chilli to the batter.
- Add orange zest or chocolate chips to personalise the sponge.
- Try espresso instead of some of the water for an adult twist.
- Keep the base ratios of flour, sugar and liquid steady so the texture stays light and reliable.
Tip: small changes to butter, milk or eggs work best. Test one swap at a time so you learn how each ingredient affects the final result and adapt future recipes with confidence.
Serving Suggestions for a Luxurious Finish
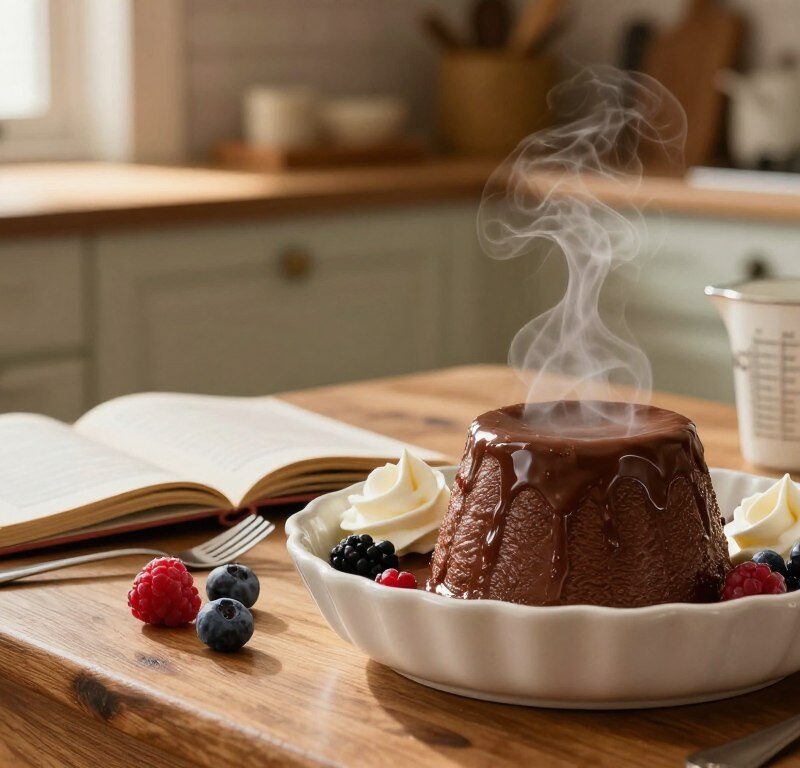
Presenting the pudding straight from the oven keeps the sauce glossy and the top delightfully tender. Serve warm for the best contrast of textures.
For a classic pairing, add a generous scoop of high‑quality vanilla ice cream. The cold ice cream and hot sauce make a lovely contrast that guests will enjoy.
A light dusting of icing sugar over the top creates an elegant finish and adds a touch of sweetness and shine.
For a richer option, pour warm vanilla custard or a splash of cream over each portion. Both lift the deep chocolate sauce without overwhelming it.
- Serve in the same ovenproof dish for a rustic, comforting look.
- Add fresh berries on the side to balance the sugar and add bright colour.
- Enjoy immediately while the sauce is still warm and glossy.
Storing and Reheating Your Leftovers
Smart storage extends the life of this dessert and keeps the sauce glossy for longer. Once cooled, cover the pudding tightly or transfer portions to an airtight container.
Store in the refrigerator for up to 2 days to prevent the sponge from drying out. Keeping the dish covered preserves moisture and slows flavour loss.
Note: the chocolate sauce will thicken as it cools. Stir gently before reheating to restore a smooth, glossy finish.
- Store leftover chocolate pudding in an airtight container in the fridge for up to 2 days.
- Reheat individual portions to protect texture; this saves time and keeps the sauce right.
- Use the microwave on short bursts, stirring between heats so the sponge does not toughen.
- If the sauce is firm, dissolve it with a spoonful of hot water and a quick stir.
“Covering leftovers is the simplest way to keep them tasting fresh the next day.”
Tip: warm servings immediately and add a light dusting of cocoa or a pinch of sugar if needed to freshen the flavour before serving.
Conclusion
In closing, this classic shows how basic steps yield striking contrasts of texture and flavour. ,
This dessert is a fine example of reliable home baking guided by mary berry. A light chocolate sponge sits above a glossy sauce, creating a simple yet memorable treat.
Mastering the pour of hot water is the small skill that delivers the self‑saucing effect every time. Serve warm with a dusting of icing sugar or a scoop of cold ice cream for perfect balance.
Try this chocolate pudding as written or explore the many recipes that spring from it. We hope the method inspires you to bake and enjoy a truly comforting pudding.
FAQ
How long does the pudding take to bake and rest?
Can I use cocoa powder instead of grated chocolate for the sauce?
What type of sugar works best for the sponge and sauce?
Are there easy substitutions for dairy to make this pudding dairy‑free?
Which oven temperature and shelf position should I use?
How do I prevent the sponge from going soggy under the sauce?
Can I prepare the pudding ahead of time and reheat it?
How can I add flavour variations without changing the texture?
What size and type of dish is best for this pudding?
Is it possible to make individual portions instead of one large pudding?
How do I get a glossy sauce finish like in professional recipes?
What are common reasons for the sauce not forming properly?
Can I use brown sugar for a richer sauce, and will it affect colour?
How should leftovers be stored to preserve flavour and texture?
Mary Berry Magic Chocolate Pudding
This classic British dessert creates a light sponge that bakes above a glossy sauce, perfect for family dinners or cozy weekend gatherings.
Ingredients
- 110g self-raising flour
- 110g caster sugar
- 110g softened butter
- 150ml milk
- 1 large egg
- 1 tsp vanilla extract
- 2 tbsp cocoa powder
- 90g soft brown sugar
- 300ml hot water
Method
- Preheat the oven to 180°C (160°C for fan ovens).
- Grease an ovenproof dish of roughly 1 litre capacity.
- Cream together the softened butter and caster sugar until pale and airy.
- Whisk in the egg, milk, and vanilla extract until smooth.
- Gently fold in the self-raising flour and cocoa powder until just combined.
- Spoon the batter into the prepared dish and level the top.
- Mix the cocoa powder and soft brown sugar together, then sprinkle evenly over the batter.
- Carefully pour 300ml of hot water over the back of a spoon onto the batter.
- Place the dish in the oven and bake for approximately 35 minutes, until the top is firm.
- Remove from the oven and let it rest for several minutes before serving.