This simple method makes a silky, rich dessert at home without any machine. By folding sweetened condensed milk into lightly whipped cream, you create a smooth texture that tastes like it took hours to make.
The recipe is versatile and beginner-friendly. You can add vanilla, chocolate or fresh fruit to suit your family and guests.
The whipped cream adds air while the condensed milk prevents iciness. Together they give professional results with minimal fuss.
Preparation usually takes under 10 minutes, so this is perfect for summer treats or a last-minute dessert. Thanks to a few basic ingredients, even busy households can enjoy a creamy, homemade sweet.
Key Takeaways
- Easy method uses whipped cream and condensed milk for smooth texture.
- Ready in under 10 minutes of hands-on time.
- Highly customisable with vanilla, chocolate or fruit mix-ins.
- No ice cream maker or egg custard required.
- Great for family gatherings and summer desserts.
The Appeal of Mary Berry No Churn Ice Cream
Homemade no‑churn versions let you step beyond the limited chocolate lines found in most supermarkets. Supermarket choice often feels boxed into the same 20–30 flavours, so making your own opens up far more options.
This approach is celebrated for its simplicity: you skip complex custards and specialist kit, yet still get a smooth, airy result. Folding whipped cream with sweetened condensed milk traps enough air to mimic traditional churning.
The method is ideal for cooks who want quick results. It is forgiving, so small mistakes won’t ruin the batch. Once you master the basic technique, endless flavour variations and creative mix‑ins await.
Perfect for scooping straight from the tub, these -churn treats fit busy households and last‑minute gatherings. You can add fruit, sauce or shards of chocolate to tailor each batch to taste.
- Accessible: no special equipment required.
- Flexible: easy to customise with flavours and textures.
- Reliable: produces consistently soft, scoopable ice.
Essential Ingredients for Success
Choosing the right staples sets you up for creamy success every time. Quality matters more than flash — pick ingredients that build texture and flavour from the start.
Dairy requirements
Use 600ml of high-quality double cream (at least 35% fat) for volume and richness. The fat helps the mixture stay smooth when frozen.
Sweet base
Combine 397g sweetened condensed milk as the primary sweetener. Condensed milk prevents large crystals and gives a silky mouthfeel.
Dairy add-ons
- Optional: 4 free-range eggs, separated into whites and yolks for a richer base.
- If you use the whites, whisk with 100g caster sugar to form a glossy meringue.
Flavour enhancers
- 1 tsp vanilla (or tsp vanilla) for classic aroma.
- 4 tbsp stem ginger syrup to add spicy-sweet depth.
- Mix-ins: chopped chocolate or fresh fruit transform simple recipes.
Tip: a little care with measurements keeps your tub scoopable and smooth.
Preparing Your Equipment
Gathering the right tools makes the difference between a rushed tub and a professional finish.
Use a large bowl for whipping the cream and a separate bowl to mix the condensed milk and flavourings. This keeps textures consistent and avoids overworking the mix.
- An electric whisk or stand mixer saves time and gets the cream to the correct softness quickly.
- Have measuring spoons to add precisely 2 tsp of vanilla for balanced flavour.
- A rubber spatula is the gentlest method to fold without losing air.
Choose a freezer-safe container with a lid to protect the mixture from freezer burn and help it set evenly. Smooth the top with your spatula before sealing to create a neat, professional-looking finish.
If you don’t own a maker, this method delivers excellent results with minimal equipment and little hands-on time. Proper prep is the key to soft, scoopable ice every time.
The Science of Whipping Cream
A light, airy base is the single most important step for a scoopable frozen dessert.
Pour the double cream into a large bowl and begin whipping. Stop when soft peaks form; the texture should be light and hold its shape.
Achieving Soft Peaks
The whipped cream traps air in the mixture and gives a smooth mouthfeel without a machine. Aim for peaks that fold over gently rather than stand rigidly.
When using egg whites, whisk them separately to stiff peaks and fold them in for extra aeration. If you include yolks, add them later to boost richness.
Careful timing matters: overwhipping makes the mixture grainy. Underwhipping invites icy crystals when frozen.
| Stage | Appearance | Use |
|---|---|---|
| Soft peaks | Peaks fold but hold shape | Best for folding with condensed milk |
| Firm peaks | Peaks stand straight | Good for piping, risks grainy texture |
| Overwhipped | Grainy, starts to separate | Not suitable; rework or start again |

Tip: folding gently preserves the air that keeps the final ice cream light. This step defines the texture more than any other in these recipes.
Achieving the Perfect Texture
A delicate touch while folding preserves the air that gives this dessert its velvet mouthfeel.
Start by whipping to soft peaks, then pour the condensed milk in thirds. Fold each addition gently with a spatula. This keeps the air intact and stops the mix going dense.
Overwhipping the cream causes separation and promotes ice crystals. Likewise, watery fruit purees add free water and raise the risk of a gritty finish. Use full-fat double cream to reduce crystal formation and keep the texture smooth.
If the mix feels heavy, the folding was too forceful. Fold slowly in wide strokes and stop when streaks vanish. The goal is a texture that is scoopable straight from the freezer, not rock hard or chewy.
- Whip cream to soft peaks.
- Fold in condensed milk gently, in batches.
- Avoid excess liquid from purees; macerate fruit sparingly.
| Issue | Cause | Fix |
|---|---|---|
| Dense mix | Aggressive folding collapsed the air | Re-whip a small portion and fold back in gently |
| Grainy finish | Overwhipped cream or excess water | Use full-fat cream, reduce fruit liquid |
| Too hard after freezing | Not enough air trapped | Increase folding care; chill container before freezing |
Incorporating Sweetened Condensed Milk
Adding condensed milk slowly protects the air in the mixture and prevents icy patches. Use a rubber spatula and fold in thirds to keep the texture light and consistent.
“The condensed milk is the stabiliser that saves the final texture.”
Fold until the streaks disappear so you don’t get ribbons of sweetness. Thorough incorporation stops pockets of sugar and avoids uneven flavour.
Tip: fold whipped cream into the condensed milk gently rather than beating. The higher sugar content and lower water in condensed milk reduce crystals and help the frozen dessert stay silky.
When mixed, pour the mixture into a chilled, freezer-safe container and smooth the top. This helps the ice set evenly and makes scooping easier later.
- Fold condensed milk in three additions.
- Avoid overworking the cream to preserve trapped air.
- Transfer to a neat container, seal and freeze.
Adding Flavour Profiles
Think of the base as a blank canvas: gentle tweaks turn it into classic vanilla, deep chocolate or bright fruit folds. Small changes to the mixture give big results and keep the process simple.
Classic Vanilla
For a dependable vanilla hit, stir in 2 tsp vanilla extract into the mixture before folding. A pinch of salt will round out the sweetness and make the aroma pop.
Chocolate Variations
For a rich chocolate version, fold in unsweetened cocoa powder and chocolate chips. Balance the condensed milk with cocoa to avoid over-sweetness and keep the texture smooth.
Fruit Infusions
Ripple sieved raspberry or strawberry puree through the base for bright flavour. Use sieved purée rather than chunks; large pieces can freeze icy and spoil the mouthfeel.
Tips: try espresso for a mocha twist, or a little citrus zest and spices for seasonal notes. Honey can add aroma but is usually unnecessary when using condensed milk.
Freezing and Storage Techniques
Patience at the freezing stage pays off with a smooth, scoopable finish every time.
Freeze time: transfer the mixed base to a chilled, freezer-safe container and freeze for at least 6 hours or overnight until fully set. Aim for firm but still scoopable texture after the required hours.
Covering matters: seal the tub with a tight lid or cling film to prevent freezer burn and keep the milk flavours fresh. Airtight storage preserves aroma and slows ice formation.
Shallow containers freeze faster and are easier to scoop. If using a loaf tin, put it on a flat shelf so the mixture sets level and does not spill.
| Tip | Why it helps | How long | Storage note |
|---|---|---|---|
| Chilled container | Reduces temperature shock | Freeze 6+ hours | Better texture on first freeze |
| Shallow tubs | Freeze quicker, easier to serve | Sets in fewer hours | Use 1–2 litre tubs for family portions |
| Consistent freezer | Prevents recrystallisation | Store up to 2 months | Keep temperature steady for best texture |

Waiting for the set is the hardest part, but it ensures that your -churn creation keeps its velvet mouthfeel. When ready to serve, let it rest at room temperature a few minutes for easier scooping.
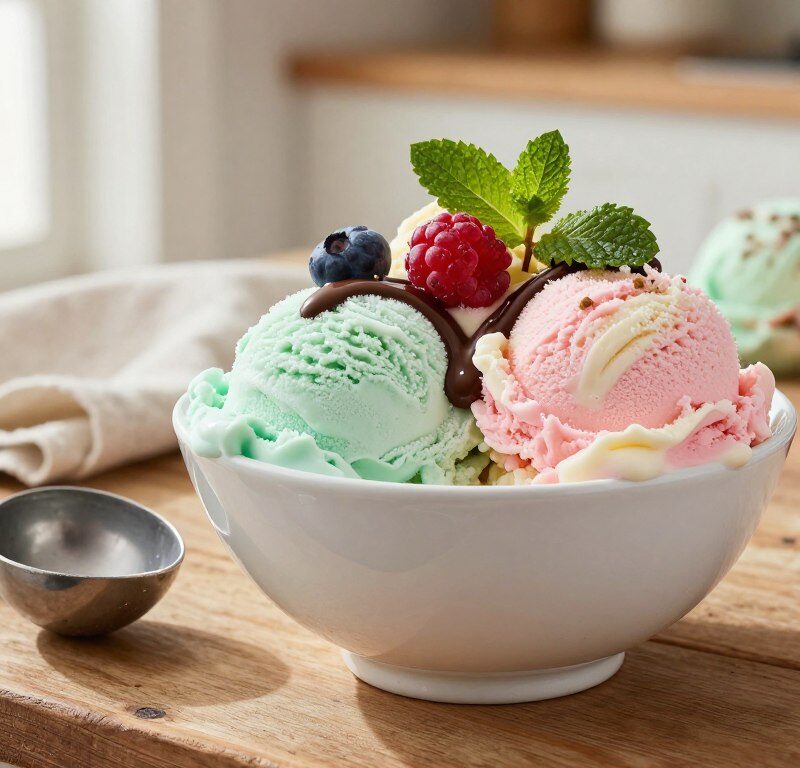
Serving Suggestions for Every Occasion
Think about contrasts — hot puddings and cold spoons make a winning pair.
Warm brownies with a generous scoop of the mary berry base give a lovely hot‑and‑cold contrast. The fudgy cake and cold cream balance each other for a decadent finish.
Fresh berries add a bright note that cuts through rich condensed milk and keeps the plate feeling lighter. A handful of raspberries or sliced strawberries works especially well.
For a breakfast‑dessert crossover, place a scoop of vanilla on warm waffles or freshly made crepes. A drizzle of chocolate or caramel sauce lifts the presentation and adds an extra indulgent layer.
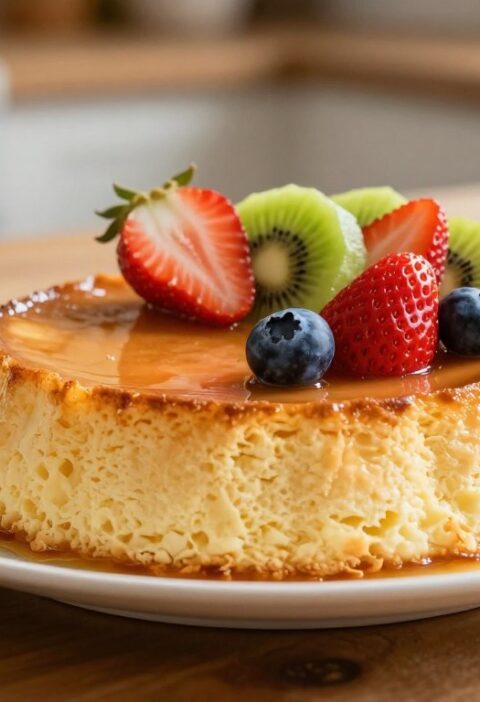
Apple crumble is a classic British match; a cold scoop alongside warm fruit and pastry is hard to beat. Each serving of this frozen treat contains roughly 310 calories, so it’s easy to enjoy in moderation at family gatherings.
Try different flavours and recipes to suit the occasion — simple swaps make a big difference.
Troubleshooting Common Issues
A few quick checks in the freezer and folding technique will save many batches from going grainy.
If the tub is icy, the usual causes are overwhipped cream or excess water from fruit. Check that the whipped cream reached soft peaks before you folded it into the condensed milk.
Dense texture? That often comes from aggressive folding which collapses air in the mixture. Gently re-whip a small portion to soft peaks and fold back in.
Too sweet: balance the sweetness with a pinch of salt, a spoon of unsweetened cocoa or a dash of strong espresso to sharpen the flavour.
Won’t set: confirm your freezer is cold enough and use a deep, tightly sealed container. Allow several hours or overnight for the -churn base to firm properly.
Runny base: whip the cream a little more to soft peaks, then fold in the milk again. Avoid large fruit chunks; they freeze solid and form icy pockets.
| Problem | Likely Cause | Quick Fix |
|---|---|---|
| Icy sections | Overwhipped cream or extra fruit water | Use soft peaks; drain or macerate fruit |
| Dense, heavy | Air lost during folding | Re-whip small portion and fold gently |
| Too sweet | High condensed milk ratio | Add salt, cocoa or espresso |
| Doesn’t set | Warm freezer or shallow container | Use deep container; chill for 6+ hours |
Dairy Free and Alternative Options
Swap ingredients sensibly and you can enjoy a familiar frozen treat even with dietary limits. For a dairy‑free version, replace standard condensed milk with coconut condensed milk to keep the silky texture.
For a lighter, tangy finish, replace half the double cream with Greek yoghurt. This reduces richness but adds a pleasant tartness that pairs well with fruit purées.
When using substitutes, choose whipping cream with at least 35% fat if you need a non‑dairy high‑fat option. That fat content helps the mixture trap air and stay scoopable once frozen.
Want less sugar? Use ripe fruit purées to add natural sweetness and flavour, reducing reliance on condensed milk or extra sugar. Almond or lemon extract can replace vanilla for a different aromatic profile.
“The coconut condensed milk keeps the mouthfeel while catering to lactose‑free diets.”
Quick checklist:
- Use coconut condensed milk for dairy‑free.
- Swap half the cream for Greek yoghurt for a lighter base.
- Reduce added sugar by blending in fruit purée.
Expert Tips for Professional Results
Mastering a few simple habits gives consistently silky, scoopable results every time.
Chill your bowl before you start. Cold metal helps the double cream reach volume faster and with less effort.
Stop whipping at soft peaks. Overwhipping risks a grainy texture and icy patches when you freeze the mix.
Fold the mixture slowly and gently. Wide, patient strokes keep as much air as possible in the base and ensure a light, even finish.
Use full‑fat double cream and good quality condensed milk. These two ingredients are the backbone of a smooth, stable ice cream.
Avoid large fruit chunks; they freeze solid and break up the mouthfeel. Prefer purees or small pieces for consistent texture.
Freeze for at least 6 hours or overnight so the tub sets firm and gives clean scoops. If you want a slightly softer result, add a splash of spirit such as rum or whisky.
Small touches count: a pinch of salt sharpens sweetness, whipped egg whites add lift, and a tsp of vanilla or a drizzle of syrup gives a bright top note.
Conclusion
A few minutes of prep, a strong, gentle fold and good milk produce a silky frozen dessert every time. This mary berry -churn method needs no special kit and rewards simple care.
Master the basics — whip to soft peaks, fold in condensed milk and chill for several hours — and you will have scoopable ice cream with minimal fuss. Use quality milk and a splash of vanilla for the best aroma.
The recipe is endlessly adaptable; try chocolate, fruit or nut swirls to suit the occasion. Whether you serve guests or enjoy a quiet bowl at home, this easy dessert feels professional and reliable.
FAQ
What makes Mary Berry no‑churn ice cream different from machine recipes?
Which dairy should I use to get the best results?
How do I know when the cream has reached soft peaks?
Can I include egg yolks or whites in a no‑churn recipe?
How much condensed milk should I use and why?
What flavours work best without compromising texture?
How can I prevent ice crystals forming during freezing?
How long should I freeze the mixture before serving?
Are there dairy‑free alternatives that still work well?
How do I make a chocolate version without making it grainy?
Can I add fruit to the base, and when should I fold it in?
What are common mistakes that spoil the texture and how do I fix them?
How should I store leftovers and how long do they keep?
Any professional tips to improve aeration and mouthfeel?
Mary Berry No Churn Ice Cream
This simple method makes a silky, rich dessert at home without any machine. By folding sweetened condensed milk into lightly whipped cream, you create a smooth texture that tastes like it took hours to make.
Ingredients
- 600ml high-quality double cream (at least 35% fat)
- 397g sweetened condensed milk
- 1 tsp vanilla extract (optional)
- 4 tbsp stem ginger syrup (optional)
- 4 free-range eggs, separated into whites and yolks (optional)
- 100g caster sugar (optional, for meringue)
- Chopped chocolate or fresh fruit (optional mix-ins)
Method
- Pour the double cream into a large bowl and whip until soft peaks form.
- In a separate bowl, mix the sweetened condensed milk with any desired flavorings (like vanilla or ginger syrup).
- Fold the whipped cream into the condensed milk mixture gently, in thirds, using a rubber spatula.
- If using egg whites, whisk them with caster sugar to form a glossy meringue and fold it into the mixture for extra aeration.
- Transfer the mixture into a chilled, freezer-safe container and smooth the top.
- Seal the container and freeze for at least 6 hours or overnight until fully set.
- Let the ice cream sit at room temperature for a few minutes before scooping to make serving easier.