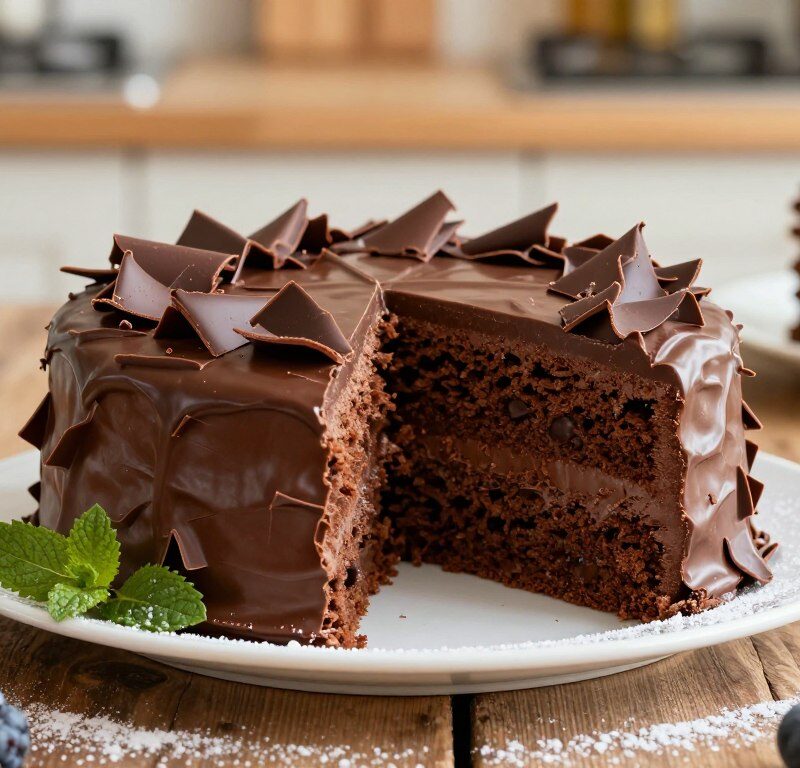
This beloved British layered sponge blends cocoa and a silky milk topping to create a sweeter, smoother dessert that suits all ages.
The recipe focuses on simple steps and reliable results, so even those new to baking can achieve a moist, tender sponge with a professional finish.
Use good-quality chocolate and basic pantry staples to lift the flavour and keep the sponge soft for several days.
Perfect for birthdays or a family gathering, the cake combines a light texture with indulgent buttercream or ganache and looks impressive without fuss.
Key Takeaways
- Classic British sponge made with cocoa and a milk-style topping.
- Sweet, smooth flavour appeals to both children and adults.
- Simple method ensures consistent, moist results for novice bakers.
- High-quality chocolate elevates the taste noticeably.
- Ideal centrepiece for birthdays and family celebrations.
Why You Will Love This Mary Berry Milk Chocolate Cake
This recipe wins hearts because it blends a familiar, gently sweet flavour with a sponge texture that feels light rather than dense.
Family-Friendly Appeal
The soft, approachable flavour makes it a hit with children and adults. Families prefer this version because it avoids the sharp intensity of darker alternatives.
Serve slices with a spoonful of whipped cream for a simple, crowd-pleasing finish.
Texture and Flavour
The sponge stays moist for days thanks to a reliable method. That means leftovers still taste fresh without drying out.
“A silky ganache adds a polished touch that lifts both taste and presentation.”
- Light, tender crumb pairs well with cream or a smooth ganache.
- Balanced sweetness suits afternoon tea and casual treats alike.
- Consistent results across similar cake recipes make this one dependable for any occasion.
Essential Ingredients for Your Sponge and Icing
Gathering the right ingredients sets the tone for a dependable, richly flavoured sponge and a glossy icing.
For the sponge, weigh 175g self-raising flour, 175g caster sugar and 175g softened butter into a large mixing bowl.
Add 3 large eggs, 40g cocoa powder and 1 tsp baking powder. Stir in 2 tbsp milk to loosen the batter.
Pro tip: bloom the cocoa with a splash of boiling water to deepen flavour before adding it to the dry mix.
For the icing, melt 150g milk chocolate with 100g butter. Beat in 200g sifted icing sugar and 2 tbsp milk until smooth. This balance keeps the finish glossy and spreadable.
- Measure precisely — the ratio of cocoa and baking powder is vital for structure.
- Use good-quality chocolate for flavour; small upgrades make a noticeable difference.
- Keep ingredients at room temperature for even mixing and better rise.
Preparing Your Kitchen and Equipment
Before you measure any ingredients, make sure the oven and tins are ready for reliable baking. Preheating stabilises the heat so the sponges rise evenly and cook through.

Choosing the Right Tins
Use two 20cm sandwich tins for even layers. Grease them lightly and line bases baking paper to stop sticking and to aid an easy release.
- Oven settings: set the oven to 180C (160 fan) so the heat is correct from the start.
- Expect the sponges to take about 20–25 minutes in the oven; check at the lower end of the minutes range.
- A palette knife will help you spread the icing evenly once the layers are cool.
- Choose loose-based tins with straight vertical sides for neat, professional-looking cakes.
- Keep your workspace organised with mixing bowls and an electric whisk close by — the all-in-one method moves quickly.
Tip: lining properly with baking paper makes the final presentation simpler and reduces stress when you remove the sponges.
The All-in-One Mixing Method
Combine all your sponge ingredients in one bowl and you’ll see how quickly a smooth batter comes together.
Place softened butter, caster sugar, eggs, flour, cocoa powder and baking powder into a large bowl. Use an electric mixer and beat for about 2 minutes until just blended and smooth.
If the batter seems stiff, add a little milk a tbsp at a time until it drops from a spoon. That dropping consistency helps the sponge rise evenly in the oven.
For deeper flavour, bloom the cocoa powder with a splash of boiling water before folding it in. Make sure the butter is very soft first to avoid overbeating and a tough texture.
- Beat ingredients in a single bowl for faster preparation.
- Limit mixing to roughly two minutes to keep the crumb light.
- Divide the batter evenly between tins so both cakes bake in the same minutes.
“A smooth, well-balanced batter is the best guarantee of an even, moist sponge.”
Baking and Cooling Your Sponges
Once the sponges are in the oven, the next few minutes are crucial for getting an even rise and a soft crumb. Bake for 20–25 minutes in a preheated oven at 180C (160 fan) and watch the tops carefully in the final minutes.
Checking for Doneness
Test the sponges by pressing the top gently. They should feel risen and springy, not wet or jiggly.
If a skewer comes out clean or with a few crumbs, they are done. Avoid overbaking — that leads to a dry, dense sponge.
If the tops brown too quickly, check the oven thermostat as oven 180C or 180C 160 fan is standard for this recipe.
The Importance of Cooling
Leave the sponges to rest in their tins for 5 minutes. This short pause lets the crumb relax and keeps the layers intact when you turn them out.
After five minutes, turn the cakes onto a wire rack to cool. It is essential to let them cool completely before you apply any icing. Warm sponge will melt the topping and ruin the finish.
“Cool the layers fully on a rack — patience here makes assembly and decoration far simpler.”
| Step | Action | Timing / Temp |
|---|---|---|
| Bake | Place tins in preheated oven | 20–25 minutes at 180C (160 fan) |
| Initial cool | Rest in tins to set | 5 minutes |
| Final cool | Transfer to wire rack until fully cool | Until room temperature (cool completely) |
| Prevent sticking | Line bases baking paper before baking | Use every time |
Creating the Perfect Milk Chocolate Ganache
Careful melting and gentle mixing are the small steps that make a professional, spreadable ganache every time.
Melt the chocolate gently and let it cool slightly before adding it to a bowl with beaten butter and sifted icing sugar. If you pour in chocolate that is too hot, the icing can split and turn grainy instead of smooth.
Beat the butter and icing until light, then stir in the cooled melted chocolate and a splash of milk or cream. Mix until the texture is glossy and easily spreadable — not runny.

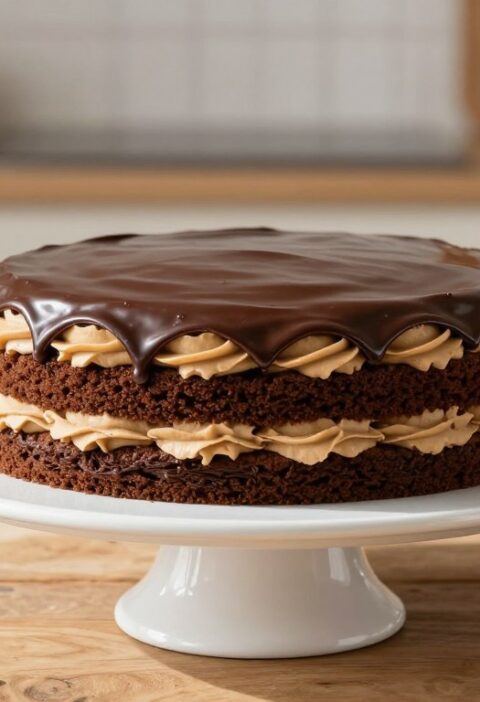
Assembly tip: Spread half the icing between the two sponge layers and use the remainder to coat the top. Ensure the cakes are cool completely before you begin to avoid the ganache running down the sides.
- A soft ganache gives a rich contrast to the light sponge.
- Decorate the top with grated chocolate or curls for a show-stopping finish.
Creative Variations and Flavour Twists
Give the classic sponge a playful twist with simple additions that lift both taste and texture. These changes use the same basic method but add fresh interest.
Adding Fruit
Fresh fruit cuts through sweetness and keeps the slice bright. Try sliced strawberries or a berry compote between the layers for a refreshing contrast to the rich filling.
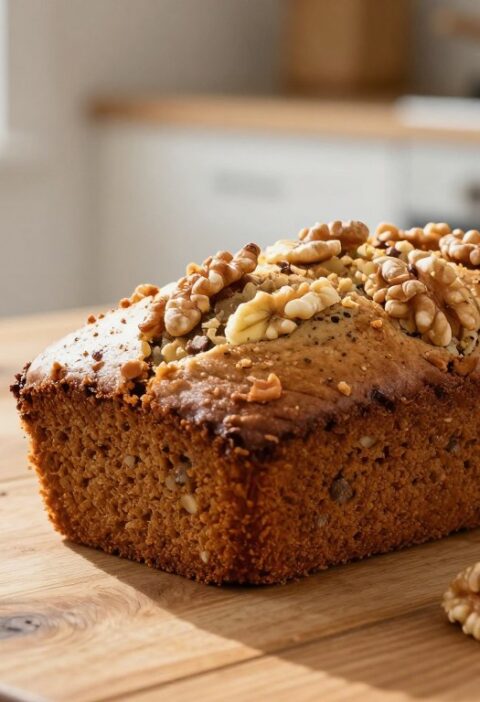
Nutty Textures
For crunch, fold a handful of chopped walnuts or hazelnuts into the batter before baking. This small step adds bite without altering the rise or crumb.
Orange Zest Infusion
Add the finely grated zest of one orange to the sponge and the icing to give a citrus lift. The aroma pairs beautifully with mild cocoa and a soft ganache or icing.
- Substitute the butter with a dairy-free spread for a vegan-friendly version.
- Try powdered coconut sugar in place of icing sugar for a subtle caramel note.
- These tweaks adapt the base recipe while keeping the dependable structure of classic cake making.
Storage and Freezing Advice
Proper storage keeps your sponge tasting fresh and your icing glossy. Store a finished cake in an airtight container at room temperature for up to three days to retain moisture and flavour.
If the cake is filled with fresh cream, keep it refrigerated to protect food safety and to preserve the cream’s texture. Chilled slices will hold shape better when plated.
To freeze sponges (without icing), wrap each layer tightly in two layers of kitchen foil. Place circles of baking paper between layers to stop them sticking together.
Frozen sponges keep well for up to two months. When ready to use, defrost on a wire rack at room temperature before you apply a fresh batch of icing.
- Quick warm-up: heat a slice in the microwave for 10–15 seconds for a near-fresh feel.
- Oven refresh: reheat at 140C for 5–7 minutes to revive texture and warmth.
“Wrap smart, chill when needed and thaw on a rack for the best results.”
Conclusion
Finish confidently: the right method and chilled layers deliver a neat, glossy top and a dependable result.
This mary berry chocolate cake remains a deliciously light, indulgent bake among classic British recipes. By following the simple method and choosing quality ingredients you can create a professional-standard dessert for any special occasion.
Whether you add a fruit twist or stick to a smooth ganache, the steps here give a reliable base. Pay close attention to cooling and ensure the chocolate is the correct temperature before you spread the icing.
We hope this guide inspires you to try more of our favourite recipes. With a moist sponge and creamy finish, this bake will delight friends and family at your next celebration.
FAQ
What temperature should I set the oven to for this sponge?
Can I use the all-in-one mixing method for this recipe?
How do I check if the sponges are done?
Why is cooling the cakes on a wire rack important?
What ingredients do I need for the ganache?
Can I add fruit or nuts to the recipe?
How should I store the finished cake?
Can I freeze the sponge or assembled cake?
What tins and equipment work best for this recipe?
Which sugars and powders are essential in the ingredients list?
Mary Berry Milk Chocolate Cake
This beloved British layered sponge blends cocoa and a silky milk topping to create a sweeter, smoother dessert that suits all ages.
Ingredients
- 175g self-raising flour
- 175g caster sugar
- 175g softened butter
- 3 large eggs
- 40g cocoa powder
- 1 tsp baking powder
- 2 tbsp milk
- 150g milk chocolate
- 100g butter (for icing)
- 200g sifted icing sugar
- 2 tbsp milk (for icing)
Method
- Preheat the oven to 180C (160C fan).
- Grease two 20cm sandwich tins and line the bases with baking paper.
- In a large mixing bowl, combine the self-raising flour, caster sugar, softened butter, eggs, cocoa powder, and baking powder.
- Beat the mixture with an electric mixer for about 2 minutes until smooth.
- If the batter is stiff, add milk a tablespoon at a time until it reaches a dropping consistency.
- Divide the batter evenly between the prepared tins.
- Bake in the preheated oven for 20-25 minutes, checking for doneness with a skewer.
- Once baked, let the sponges rest in the tins for 5 minutes before transferring to a wire rack to cool completely.
- For the icing, melt the milk chocolate and butter together.
- Beat in the sifted icing sugar and milk until smooth and glossy.
- Spread half of the icing between the two cooled sponge layers and use the remainder to coat the top.
- Decorate with grated chocolate or curls if desired.