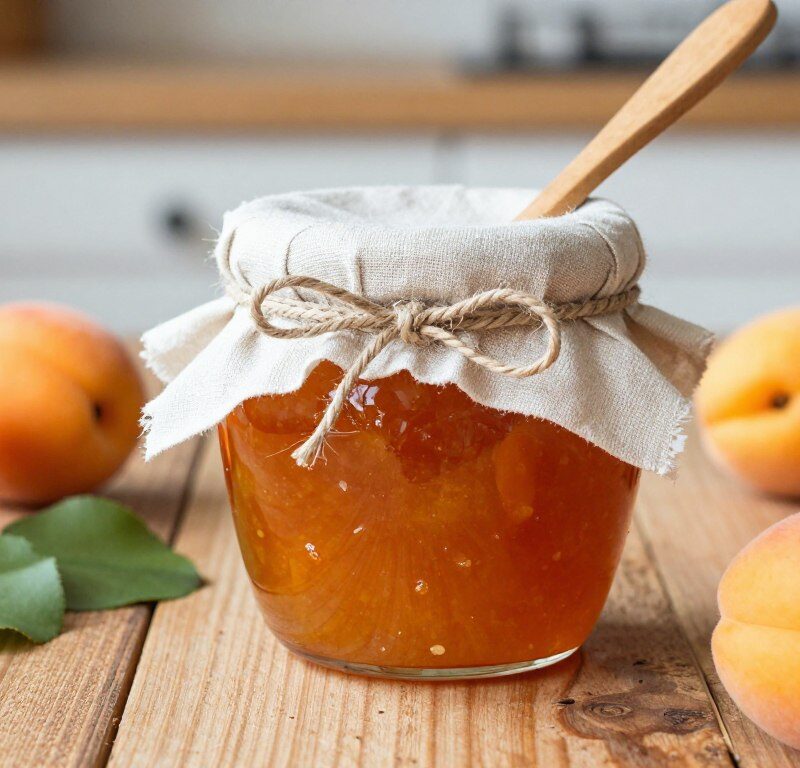
Bright, home-made preserve that brings sunshine to your breakfast. This classic Mary Berry Apricot Jam Recipe shows how a few simple ingredients and around 30–35 minutes of your time turn ripe fruit into a glossy spread.
The method suits both beginners and seasoned cooks. It keeps steps clear so you get a consistent texture and lively flavour. Use fresh apricots and a little patience to lift toast, cakes and other baking treats to a professional standard.
Follow the guide and you will learn how to balance sweetness and tartness, control boiling time and test for the right set. The result is a golden preserve that keeps well and tastes of summer on every slice.
Key Takeaways
- Ready in about 30–35 minutes — quick for a home-made spread.
- Simple ingredients deliver reliable, glossy results.
- Works equally well on toast, in cakes and for general baking.
- Suitable for beginners with clear, step-by-step guidance.
- Captures the fragrance and bright flavour of fresh fruit.
The Appeal of the Mary Berry Apricot Jam Recipe
The true charm of this spread lies in how it bridges sweet baking and savoury dishes with ease.
Homemade jam brings a vibrant fruit flavour that lifts warm toast at breakfast and adds a glossy finish to a sponge cake.
It pairs beautifully with soft cheese, and the same preserve can cut through rich roast chicken for an interesting glaze or accompaniment.
Unlike many shop-bought jars, this apricot preserve delivers depth and freshness that make scones with thick clotted cream feel indulgent rather than plain.
- Versatile: great on toast, in tarts and for filling cakes.
- Seasonal: showcases sun-ripened apricots at their best.
- Sophisticated: perfect for breakfast, afternoon tea or light supper pairings.
Essential Ingredients for Your Preserve
Gathering the right ingredients is the quickest way to guarantee a glossy, well-set preserve.
Pantry staples combine with fresh produce to create a reliable result. For this recipe you will need:
Pantry Staples and Fresh Produce
Fruit: 1 kg of fresh apricots, halved and pitted. Use ripe, fragrant fruit for the best flavour and natural pectin.
Sugar and liquid: 750 g granulated sugar and 100 ml water. The sugar balances sweetness while water helps soften the fruit in the first stage.
Acid and tools: Juice of 1 lemon (lemon juice) to help the set and enhance flavour. Keep a jam thermometer to monitor temperature for accuracy.
- Measure precisely: exact weights give a predictable set.
- Choose quality produce: fresh apricots deliver the best texture and fruit taste.
- Sterilised jars: have clean jars ready to preserve the finish and shelf life.
Preparing the Fruit for Success
Start by preparing the fruit carefully so every jar holds bright, natural flavour. A calm, organised approach before you cook saves time and improves texture. Follow these steps to get the best result from your fresh apricots.
Washing and Pitting
Begin by washing your fresh apricots thoroughly. Halve each fruit and remove the pits, cutting into even pieces to ensure an even set.
Place the prepared pieces into a large pan in a single layer if possible. This makes it easy to check for any bruised fruit and keeps the cooking even.

The Overnight Maceration Technique
Sprinkle layers of sugar and a splash of lemon juice over the fruit. Let the mixture sit overnight so the natural juice is drawn out.
The next day, warm the pan over medium heat to dissolve the sugar before you reach a full boil. Use a jam thermometer to monitor progress.
- Patience: macerating helps the pieces stay intact during boiling.
- No additives: this method relies on the fruit’s own pectin and the correct time and heat to set.
The Traditional Stovetop Cooking Method
First, combine the fruit, water and lemon juice in a wide pan and warm gently until the sugar dissolves. Stir to help the ingredients marry and to prevent burning.
Once the sugar has dissolved over medium heat, turn the heat up to a rolling boil for 10–20 minutes. Keep stirring so the mixture does not stick to the bottom of the pan.
Skim off any foam that rises to the surface. This keeps the finished preserve clear and improves appearance in the jars.
- Use a thermometer to check the set if you prefer precision.
- After boiling, let the mixture settle for about 15 minutes before you pour it into sterilised jars.
- Carefully label jars with the date and store in a cool place.
This stovetop method gives reliable texture and bright flavour. With a little attention to heat and stirring, the simple ingredients turn into a glossy, long-lasting preserve.
Testing for the Perfect Set
A chilled-plate check is the easiest way to judge when the preserve is ready.
Prepare: place three small plates in the freezer before you start boiling the fruit and sugar. This gives a reliably cold surface for quick trials.
The Chilled Plate Test
When you suspect the mixture has reached a good set, remove the pan from the heat. Place a teaspoonful of the hot apricot jam onto one chilled plate.
Allow the sample to cool for a few seconds, then push it gently with your finger. If a crinkly skin forms, the apricot jam has set and is ready for jars.
- If the sample runs, return the pan to a rolling boil for another 5 minutes.
- Skim foam from the surface before testing again to keep the flavour clear.
- Repeat the chilled-plate test until the desired set appears.
| Test result | Action | Notes |
|---|---|---|
| Crinkly skin on plate | Remove from heat | Ready to jar; allow to cool slightly before filling jars |
| Runny sample | Boil for 5 more minutes | Increase heat to maintain a rolling boil, then retest |
| Sticky but not firm | Boil for 3–5 minutes and retest | Watch colour and flavour; overcooking can darken fruit |
Tip: test quickly and avoid long exposure to heat. Proper timing keeps the bright fruit flavour and helps the preserve set in the jars.
Troubleshooting Common Jam Making Issues
A few simple checks will save a batch of spread from becoming too runny or overly dark.

If the preserve is too runny, it usually means the mixture did not reach a rolling boil for enough minutes to evaporate excess water. Bring the pan back to a full boil and re-test on a chilled plate.
Large pieces of fruit give uneven texture. Chop apricots into smaller pieces before cooking so the fruit breaks down evenly while you simmer.
Avoid adding sugar too early. Cook the fruit first to release natural juice and flavour. Adding sugar before the fruit softens can slow the process and leave a poor set.
“Always perform the chilled plate test; it tells you when the set is right.”
- Skim foam from the surface for a clear finish.
- If the jam sticks to the pan, stir more frequently and reduce direct heat.
- Use lemon juice to help the set if needed, but retest before you add sugar or more acid.
Creative Variations and Flavour Twists
A few aromatic tweaks make all the difference to a classic preserve. Small changes can add depth without complicating the method.
Adding Aromatic Notes
Try a splash of vanilla extract for a softer aroma that complements the natural sweetness. Use just a teaspoon towards the end of cooking.
For a floral touch, swap a portion of the sugar with honey. This gives a gentle complexity ideal for afternoon tea with cream or toast.
Fruit Combinations
Combine apricots with raspberries or strawberries to create new recipes that brighten the breakfast table all year. The tartness of berries balances the fruit’s sweetness.
For a savoury pairing, add grated ginger or orange zest. These notes work well with soft cheese or roasted chicken dishes and lift the flavour profile.
| Addition | Effect on flavour | Best pairing |
|---|---|---|
| Vanilla extract | Soften, sweet aroma | Toast, cream |
| Honey (partial for sugar) | Floral depth, less sharp | Afternoon tea, scones |
| Raspberries or strawberries | Bright tartness | Breakfast, pastries |
| Ginger or orange zest | Warm, citrus lift | Cheese, chicken glaze |
Serving Suggestions for Your Homemade Jam
A spoonful of this glossy spread transforms simple dishes into something special. Use it at breakfast to showcase the bright fruit flavour and careful balance of sugar and juice.
Spread over warm, buttered toast or an English muffin for a classic start to the day. It also makes a lively filling for pastries, croissants or a Victoria sponge when you are into baking.
For afternoon tea, offer scones with a thick dollop of cream beside a jar on the table. Stir a teaspoon into plain yoghurt for a quick dessert, or pair the preserve with soft cheese for a sweet‑and‑savoury plate.
- Toast and muffins: simple, quick and reliable.
- Pastry and cake filling: use as a layer in sponge or tart cases.
- Yoghurt and cheese: adds contrast to creamy textures.
- Savoury glaze: blend with lemon juice and a little grated ginger for a chicken glaze.
If you added vanilla, the aromatic note lifts light desserts and pairs beautifully with cream, soft cheese or a slice of cake.
Best Practices for Storing and Reheating
Good storage keeps your preserves tasting like summer long after the jars are sealed.
Maintaining Quality After Opening
Unopened jars should sit in a cool, dark place. Keep them for up to 1 year to retain the best flavour and texture.
Once you open a jar, store the jar in the fridge and use within four weeks. Always use a clean spoon to avoid contaminating the preserve.
If the spread becomes too thick after refrigeration, gently reheat it. Place the sealed jar in a bowl of warm water for a few minutes to loosen the set.
Alternatively, warm a small spoonful in the microwave for 5–8 minutes* and stir until smooth. This is perfect for serving with scones and cream.
“Label jars with the date of production so you can track freshness through the year.”
- Use lemon juice or a touch of water when reheating to restore a glossy finish.
- A little vanilla adds aroma if you want to refresh the flavour before serving.
- Allow cool slightly before filling jars and always label jars with the date.
Conclusion
A final check and careful jarring turn your effort into a preserve you can enjoy all year. Use the right ingredients and allow the correct time for a glossy result.
Always perform the chilled-plate test on a cold plate to confirm the set. This simple trial is the secret to professional-looking apricot jam ready for toast or a sponge cake.
With fresh apricot fruit and a splash of lemon juice, you will make about 1.8–2kg of vibrant spread. Store sealed jars and enjoy the taste of summer on toast or with cream for months to come.
FAQ
What are the basic ingredients needed for this classic apricot preserve?
How do I prepare apricots before cooking?
Is overnight maceration necessary and how long should I leave the fruit?
What pan and heat level work best for stovetop jam making?
How do I test when the preserve has set properly?
Why did my preserve not set and how can I fix it?
What causes foaming and how should I handle it?
Can I add other fruits or flavours to vary the recipe?
How long will the sealed jars keep and how should I store them?
Is it safe to reheat or reprocess jars that didn’t seal correctly?
What are simple serving suggestions for homemade preserve?
Can I reduce sugar for a lower-sweet preserve and how will that affect setting?
What’s the best way to label and date my jars?
Mary Berry Apricot Jam Recipe
Bright, home-made preserve that brings sunshine to your breakfast. This classic Mary Berry Apricot Jam Recipe shows how a few simple ingredients and around 30–35 minutes of your time turn ripe fruit into a glossy spread.
Ingredients
- 1 kg fresh apricots, halved and pitted
- 750 g granulated sugar
- 100 ml water
- Juice of 1 lemon
Method
- Wash the apricots thoroughly, halve each fruit, and remove the pits.
- Place the prepared apricot pieces in a large pan in a single layer.
- Sprinkle layers of sugar and a splash of lemon juice over the fruit and let it sit overnight.
- The next day, warm the pan over medium heat to dissolve the sugar before reaching a full boil.
- Combine the fruit, water, and lemon juice in a wide pan and warm gently until the sugar dissolves.
- Turn the heat up to a rolling boil for 10–20 minutes, stirring constantly.
- Skim off any foam that rises to the surface.
- Perform the chilled plate test to check if the jam has set.
- Once set, let the mixture settle for about 15 minutes before pouring it into sterilised jars.
- Label jars with the date and store in a cool place.