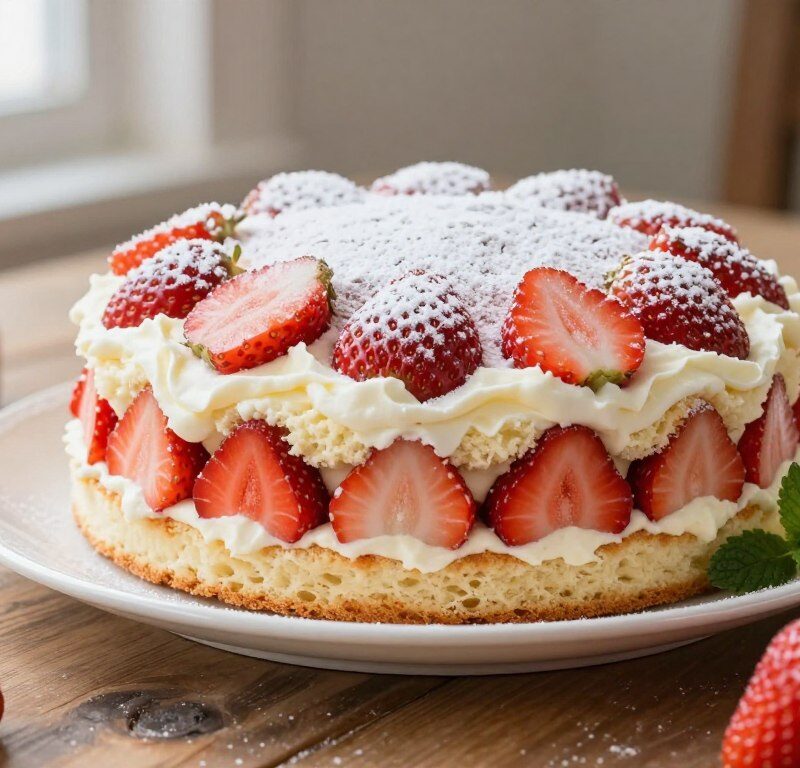
This recipe shows how a classic British layer cake can be light, moist and utterly delicious without wheat flour. Using a gluten-free self-raising flour blend, the result keeps the soft texture you expect from a traditional victoria sponge cake.
The method is simple and reliable. Author Ekani Ella notes it is ready in under 45 minutes, making it ideal for afternoon tea or birthdays.
Soft sponge layers, sweet jam and fresh cream come together to please both those avoiding gluten and regular cake lovers. This sponge cake aims for a professional finish that is not crumbly, whether you make a full cake or mini victoria sandwiches.
Key Takeaways
- Quick and dependable: ready in under 45 minutes for easy baking.
- Classic taste: keeps the traditional jam-and-cream sandwich character.
- Versatile: works for full cakes or mini victoria sandwiches.
- Texture-focused: moist, light layers using a gluten-free blend.
- Suitable for gatherings: perfect for afternoon tea and celebrations.
Why You Will Love This Mary Berry Gluten Free Victoria Sponge
A light, airy crumb and golden finish make this an instant favourite. This gluten-free victoria sponge keeps the classic look and soft texture you expect from a traditional bake.
The recipe is highly versatile. Try different fillings and flavours while keeping the timeless victoria sponge character. The sponge stays moist and avoids the common pitfall of being over-crumbly.
The cake brings people together. It works for tea, birthdays and casual gatherings. Both those avoiding gluten and regular guests will enjoy the taste.
“Fresh strawberry jam and whipped cream create the balanced flavour that defines these traditional cakes.”
Follow these simple recipes and you can achieve a professional result in under an hour. Every bite proves you do not need wheat to enjoy a high-quality dessert.
Essential Ingredients for Your Sponge
Choosing the correct flour and dairy substitutes makes all the difference to the final bake. Use measured, quality ingredients to keep the sponge light and evenly risen.
Flour blends
For the sponge you need 200g of gluten-free self-raising flour. Make this by mixing 200g plain gluten-free flour with 1 tsp baking powder certified as gluten-free.
Dairy alternatives
Use 200g caster sugar and 200g softened unsalted butter for a rich base.
Add 1 tsp vanilla extract and 2 tbsp milk to give moisture and depth. For a citrus twist, fold in lemon zest or swap jam for lemon curd.
- Filling: 4 tbsp strawberry jam and 200ml double cream, whipped to soft peaks.
- Finishing: sieve icing sugar over the top for a classic look.
- Tip: always check that your baking powder is certified gluten-free to avoid cross-contamination.
| Ingredient | Amount | Purpose | Notes |
|---|---|---|---|
| Plain gluten-free flour | 200g | Base for self-raising mix | Mix with 1 tsp baking powder |
| Caster sugar | 200g | Sweetens and stabilises crumb | Essential for texture |
| Unsalted butter | 200g | Richness and moisture | Soften before creaming |
| Strawberry jam / Lemon curd | 4 tbsp | Traditional or zesty filling | Choose to taste |
Preparing Your Kitchen and Equipment
Before you mix a single ingredient, set up your equipment and preheat the oven. This saves time and helps the sponge rise evenly.
Tin Preparation
Preheat to 180°C (160°C fan). Grease and line two 20cm sandwich tins with baking parchment for easy removal.
Proper tin care is vital. Grease and line two tins thoroughly so the gluten-sensitive sponge won’t stick to the sides.

Cut the parchment to size so each layer has a smooth base. Place the lined tins on a tray ready for the oven.
- Have two sandwich tins and a wire rack ready before you start.
- Bake for about 20–25 minutes; watch for a golden, springy top.
- Once out, transfer cakes to a wire rack to cool fully and keep structure.
Maintaining the correct temperature ensures an even rise. A stable oven temperature gives the best result when baking a classic sandwich cake.
Mixing the Perfect Gluten Free Batter
Start by creaming the butter and sugar until the mix turns pale and airy.
In a large bowl, beat 200g softened butter and 200g caster sugar together. The mixture should be pale, creamy and well aerated.
Add 4 large eggs, one at a time, making sure each is fully incorporated before the next. This keeps the batter stable and helps the sponge rise evenly.
Gently fold in 200g self-raising flour and 1 tsp baking powder, followed by 2 tbsp milk and 1 tsp vanilla extract. Stop as soon as the mix is smooth to avoid a dense sponge cake.
Divide the mixture evenly between your prepared tins. Use a spatula to scrape the bowl clean and smooth the surface before baking.
| Step | Action | Why it matters |
|---|---|---|
| 1 | Cream butter and sugar | Incorporates air for light crumb |
| 2 | Add eggs one at a time | Maintains batter stability |
| 3 | Fold in flour and powder | Prevents overmixing and toughness |
Baking and Cooling Techniques
How you control heat and timing has a big effect on the final cake texture. Follow a steady routine so each layer bakes evenly and keeps its shape.
Oven temperature
Preheat and place the tins in the centre of the oven at 180°C (160°C fan). Bake the sponges for 20–22 minutes, or until they are golden-brown and springy to the touch.
Maintain a consistent oven temperature throughout the bake. A steady heat helps the sponge rise and prevents it from sinking in the middle.
Cooling process
Allow the cakes to cool in their tins for 5 minutes before you remove them. This short rest helps them settle.
Transfer each layer to a wire rack and let them cool completely at room temperature. Cooling on a rack prevents steam building and keeps the crumb light.
“If you do not cool the cakes properly, residual heat will cause the butter and cream in the filling to lose structure.”
Whisk your cream in a bowl to soft peaks while the layers cool. Always check the sponges are cool to the touch before spreading jam and whipped cream.
- Tip: Use the cool tins minutes rule—five minutes in the tin, then onto the rack.
- Keep sugar-based fillings and butter-chilled until assembly to avoid slumping.
Assembling Your Classic Victoria Sandwich
A tidy assembly turns two baked discs into an elegant afternoon centrepiece. Once the sponges are completely cool, place one flat-side up on your work surface.
Spread 4 tbsp of strawberry or raspberry jam over the flat side with an offset spatula. Keep the layer thin so the sponge does not become soggy.

Whip 200ml double cream to soft peaks then spread it evenly over the jam. Alternatively, spread the jam on one layer and the cream on the other before sandwiching together.
Gently press the second sponge on top to form a neat sandwich. Dust the top with icing sugar using a fine sieve for a professional finish.
- Tip: If making mini victoria sandwiches, use smaller tins and shorten baking time to keep them light.
- Prep: Always grease line two tins well before baking to make assembly cleaner and easier.
- Serving: Fresh fruit such as strawberry or raspberry with whipped cream lifts the final presentation.
Troubleshooting Common Baking Issues
A few simple checks will fix most issues that crop up during baking. Use these quick tips to rescue your sponge and get consistent results.
Sinking Cakes
If your sponge cake sinks, it is often from overmixing the batter or opening the oven too early. A sudden drop in temperature makes the centre collapse.
Check you used 1 tsp of baking powder (or a gluten-free baking powder if needed) and keep the oven closed for the first crucial minutes. Avoid lowering the temperature mid-bake.
Dry Texture
Dry cakes usually mean too much flour or too little fat and sugar. Measure flour accurately with scales, not cups.
Add a splash of milk to the mix or gently increase butter to bring the crumb back. Bake for the recommended minutes and test with a skewer.
Overmixing
Overworked batter produces a dense cake. Mix just until ingredients combine to keep the sponge light and airy.
Use room temperature butter and eggs for even blending, and always let layers cool completely on a wire rack before filling with jam or cream.
| Issue | Common Cause | Quick Fix |
|---|---|---|
| Sinking | Overmixed batter / oven door opened | Mix gently; keep oven closed first 15 minutes |
| Dry crumb | Too much flour or low fat/sugar | Measure with scales; add 1–2 tbsp milk |
| Dense texture | Overmixing | Fold till just combined; use room temperature eggs |
| Poor rise | Missing baking powder | Check 1 tsp powder before mixing |
Creative Variations and Serving Suggestions
Try bright citrus notes for a modern take by adding lemon zest to the batter or drizzling the finished cake with a lemon glaze. This adds a fresh edge that pairs well with strawberry jam and whipped cream.
You can replace the cream with Greek yogurt for a lighter filling, or use buttercream for better stability when serving outdoors. For a chocolate twist, stir 2 tbsp cocoa into the dry mix in your bowl before mixing.
Serve slices with fresh berries, a scoop of vanilla ice cream or a scattering of edible flowers for colour. To refresh a cake a day old, warm it at 140°C for 5 minutes — it will regain a near-fresh texture.
Store unfilled sponges in an airtight container at room temperature for up to two days, or freeze for two months. Always let layers cool completely on a rack before adding fillings and dust the top with icing sugar for a classic finish.
- Tip: For tea parties, make mini versions — try mini victoria sandwiches in smaller tins.
- Tip: If using two sandwich tins, ensure even temperature and baking time for matched layers.
Conclusion
With good ingredients and steady handling, you can achieve a bakery-quality result at home.
This gluten-free victoria sponge proves a light, fluffy cake need not include wheat. Use quality flour and the right baking powder to secure a soft crumb and golden finish.
Follow the mixing, baking and cooling steps to keep sugar and butter balanced for the best texture. Try small variations from the recipes to suit your taste and occasion.
Perfect for birthdays or afternoon tea, this victoria sponge cake is simple to make and sure to impress. Enjoy sharing the recipe and the results with friends and family.
FAQ
Can I use a ready-made gluten-free flour blend for this recipe?
What type of baking powder should I use?
How do I prepare my sandwich tins to prevent sticking?
What oven temperature and time are best for even baking?
How should I cool the sponge before assembling?
Can I replace butter with a dairy-free alternative?
Why did my cake sink in the middle?
What causes a dry texture and how do I fix it?
How can I avoid overmixing the batter?
What jam and finishing touches work best for a classic sandwich?
Can I make mini victoria sandwiches and how does that change baking?
How long will the finished sandwich keep and how should I store it?
Mary Berry Gluten Free Victoria Sponge
A classic British layer cake that is light, moist, and utterly delicious without wheat flour, using a gluten-free self-raising flour blend.
Ingredients
- 200g gluten-free self-raising flour
- 200g caster sugar
- 200g softened unsalted butter
- 4 tbsp strawberry jam or lemon curd
- 200ml double cream, whipped to soft peaks
- 1 tsp vanilla extract
- 2 tbsp milk
- 1 tsp baking powder (gluten-free)
- Icing sugar for dusting
Method
- Preheat the oven to 180°C (160°C fan) and grease and line two 20cm sandwich tins with baking parchment.
- Cream the softened butter and caster sugar together until pale and airy.
- Add the eggs one at a time, ensuring each is fully incorporated before adding the next.
- Gently fold in the gluten-free self-raising flour and baking powder, followed by the milk and vanilla extract until smooth.
- Divide the mixture evenly between the prepared tins and smooth the surface.
- Bake for 20-25 minutes or until golden and springy to the touch.
- Allow the cakes to cool in their tins for 5 minutes before transferring to a wire rack to cool completely.
- Once cooled, spread the strawberry jam over the flat side of one sponge layer.
- Whip the double cream to soft peaks and spread it over the jam.
- Place the second sponge layer on top and dust with icing sugar for a professional finish.