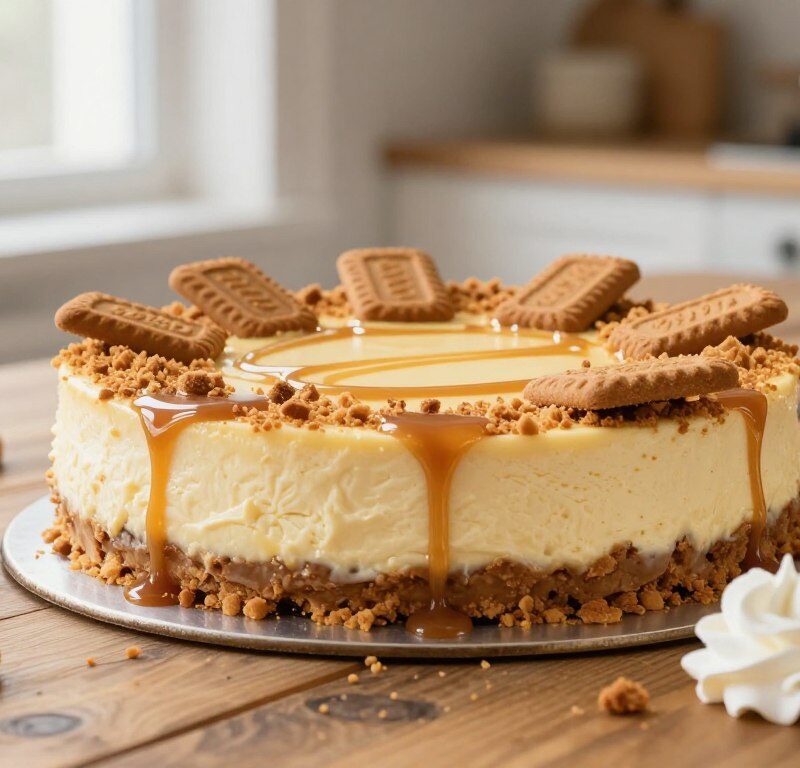
This signature no-bake cheesecake brings together spiced caramel notes and a velvety cream cheese filling to make a showstopping dessert. It uses 300g of Lotus biscoff biscuits for a crisp base and crunchy topping, and the simple mixture comes together in about 30 minutes of hands-on prep.
The biscuit base is made by crushing biscuits into fine crumbs and mixing with melted butter for a firm foundation. The filling blends cream, icing sugar, vanilla and high-quality cream cheese to achieve a smooth texture. After assembly, the cake needs at least 6 hours of chilling so the filling sets perfectly for clean slices.
Key Takeaways
- Use 300g Lotus biscuits for the base and decoration.
- Hands-on prep takes roughly 30 minutes.
- High-quality cream cheese, cream and vanilla give a silky texture.
- No oven needed — this is a true no-bake recipe.
- Allow at least 6 hours chilling for best results.
The Appeal of the Mary Berry Biscoff Cheesecake
The true charm lies in marrying the caramelised biscuit flavour with a lush, velvety cheese filling. This biscoff cheesecake taps into the viral Lotus trend by turning cookie butter into something refined and silky.
As a popular no-bake cheesecake, it saves time without sacrificing impact. Guests see a polished dessert and taste the comforting caramel spice of the spread in every slice.
What makes it special is the balance: enough cream to keep the filling light, yet rich enough to feel indulgent. The signature caramel notes pair naturally with quality cream cheese for a modern twist on a classic.
“The addictive aroma of Lotus biscuits becomes an elegant, crowd-pleasing centrepiece for any celebration.”
- Convenience: Quick prep, no oven needed.
- Versatility: Works for parties or simple treats.
- Authenticity: Use high-quality lotus spread and cream for best flavour.
Essential Ingredients for Your Dessert
Choosing top-quality dairy and biscuits sets the foundation for a stable, flavourful no-bake dessert. Gather everything first so you can work quickly once mixing begins.
Selecting Quality Ingredients
Use 600g of full-fat cream cheese to give the filling structure and body. The higher fat content prevents the cake from collapsing.
Measure 300ml double cream for a rich, stable whipped component. Whip it just until it holds soft peaks for the light texture you want.
Choose authentic spiced biscuits and the matching spread; the type of biscoff biscuits you pick affects crunch and flavour. Use good icing sugar and a teaspoon of pure vanilla to round out the taste.
Room Temperature Requirements
Bring dairy to room temperature before mixing. Cold cream cheese causes lumps and makes it hard to incorporate the spread smoothly.
- Tip: Leave the cream cheese out for about an hour in a cool room to reach the right temperature.
- Ensure double cream is cool but not cold when whipping to reach stable peaks.
Preparing the Perfect Biscuit Base
Crush your spiced biscuits to a fine, even crumb to form the most reliable base for your cheesecake. Use a food processor for speed or a rolling pin in a sealed bag for a rustic touch.
Place the crumbs in a large mixing bowl and add 100g of melted butter. Stir until the mixture looks like wet sand and holds together when pressed.
Line the bottom of a 23cm springform tin with parchment paper. Use the back of a spoon to press the biscuit mixture firmly into an even layer. Compacting the base well prevents crumbling later.
- Chill the base for at least 30 minutes so the butter sets and the base firms up.
- An even, compact layer gives a crisp contrast to the soft cream filling.
- Removing the tin is easier when the bottom is lined with parchment paper.
| Step | Tip | Why it matters |
|---|---|---|
| Crush biscuits | Fine, uniform crumbs | Creates an even base that presses well |
| Mix with melted butter | 100g in a large bowl | Helps crumbs bind and set |
| Press into tin | Use back of spoon; 23cm springform | Ensures clean slices and stability |
| Chill | At least 30 minutes | Butter firms; base stays intact |
Mastering the Creamy Filling
A silky filling begins with careful warming of the spread and patient, gentle mixing. Start by ensuring all dairy is at the right room temperature so it blends easily.
Achieving a Silky Consistency
Place your full-fat cream cheese in a large bowl and beat until completely smooth and free of lumps. Gradually add icing sugar and a splash of vanilla on low speed to keep the air in the mixture.
Warm 200g of biscoff spread in the microwave for 15–20 seconds. This makes the spread fluid so it folds into the cream without streaks.
- Fold the warmed spread gently into the cream cheese to create a uniform colour and flavour.
- Use cooled whipped cream to lighten the filling, folding it in with slow, deliberate strokes.
- Stop as soon as the texture looks even — over-mixing will weaken the structure.
“Softening the spread first gives a glossy, stable filling that sets well in the fridge.”

Whipping and Folding Techniques
Light, airy whipped cream is the key to a filling that feels decadent without heaviness.
Chill your bowl and whisk before you start. Cold equipment helps the cream reach soft peaks faster and with more stability.
Whip the double cream until it just holds soft peaks. Stop early — over-whipping makes the texture grainy and hard to fold into the cheese mixture.
Use a large spatula to fold the whipped cream gently into the beaten cream cheese mixture. Cut through the centre, lift and turn the mix; repeat until no streaks remain.
Be deliberate but quick. Keeping air in the whipped cream yields a silkier filling and a lighter mouthfeel for the cheesecake.
- Warm the biscoff spread slightly so it blends without streaks.
- Fold until uniform; stop when the mixture holds its shape.
- A light mixture lets the spiced notes of the spread shine through.
Assembling Your Mary Berry Biscoff Cheesecake
Now comes the careful transfer of the creamy filling onto your firm biscuit base so every slice will hold together. Work calmly and use even pressure so the dessert sets with clean edges.
Lining the Tin
Line the tin first with a strip of parchment that overlaps the sides. This makes release simple once the cheesecake has set.
Press the chilled crumbs and biscuit base down firmly. Use the back spoon to compact the layer and remove any air pockets.
Smoothing the Surface
Carefully spoon the prepared filling over the chilled base, reaching the tin edges to avoid gaps. Ensure the base is completely covered to protect the structure.
Use the back of a spoon or a palette knife to create a flat top ready for decoration. A smooth top gives a professional result after chilling.
- Return the tin to the fridge for several hours to set the filling.
- The firm base and silky cream combine for a balanced texture.
- For step-by-step guidance, try the no-bake cheesecake recipe.
| Task | Tool | Why it helps |
|---|---|---|
| Line tin | Parchment | Easier release and neater edges |
| Compact base | Back spoon | Prevents crumbling when sliced |
| Smooth top | Palette knife | Creates a flat top for decoration |
| Chill | Fridge | Sets filling for clean slices |
The Importance of Chilling Time
Cold time in the fridge does the heavy lifting: it turns a fragile filling into a firm, elegant dessert.
For a reliable biscoff cheesecake you need at least 6 hours in the refrigerator. This gives the whipped cream and cream cheese time to stabilise.
If you slice too soon the filling will be soft and messy. Slices may slump and the base will not stay crisp against the soft centre.
Many bakers prefer to chill overnight. Extra hours help flavours meld and the texture becomes notably silkier and more cohesive.
“Patience in the fridge rewards you with perfect, clean slices and a velvety mouthfeel.”
- Timing: Allow at least 6 hours, preferably overnight.
- Stability: The cold firms the filling and supports neat portions.
- Serve: Keep the dessert cool; remove close to serving time to preserve texture.
Adding the Finishing Touches
Finish the cake with a glossy drizzle and crisp crumbs to lift both flavour and presentation. Just before serving, gently melt a few tablespoons of biscoff spread in the microwave until it becomes pourable and silky.
Drizzle the warmed spread over the top of the cheesecake in a decorative pattern. A thin, even stream creates a professional look and adds caramelised depth to each slice.
Sprinkle a handful of crushed biscoff biscuits around the edges to add satisfying crunch. This keeps the crumbs crisp and prevents them from soaking into the filling.
- Warm the spread briefly in the microwave for a glossy, drizzly finish.
- Arrange the crushed biscuits on the rim so each slice gets texture and flavour.
- Optionally add a small swirl of whipped cream or extra biscuit pieces for an indulgent touch.
“Add the topping just before serving so the crumbs stay crisp and the spread keeps its shine.”

Troubleshooting Common Texture Issues
Small mistakes in technique often cause a soft or uneven texture—here’s how to fix them quickly.
Preventing a Runny Mixture
Over-whipping the double cream can force the fat to separate and leave a runny mixture. Stop at soft peaks and fold gently.
Also check that your cream cheese and spread are at the right room temperature before combining; extremes cause separation.
Fixing Lumpy Filling
If the filling is lumpy, return the full-fat cream cheese to a warm bowl for a few minutes and beat until smooth.
Sift in a little icing sugar and fold in cooled whipped cream slowly to regain a silky texture.
Ensuring a Firm Base
Press the biscuit crumbs and melted butter very tightly into the tin using the back of a spoon. Compacting prevents crumble when slicing.
If the dessert fails to set, it likely needs at least 6 hours in the refrigerator; overnight is best for a stable top and flavour balance.
| Problem | Cause | Quick fix |
|---|---|---|
| Runny filling | Over-whipped cream | Chill and fold gently |
| Lumpy filling | Cold cream cheese | Warm slightly and beat |
| Soft base | Poorly compacted crumbs | Press firmly; chill longer |
“Simple checks on temperature and technique will save your no-bake cheesecake every time.”
Storage and Freezing Advice
Store leftover slices carefully to keep that silky cream and tangy cheese texture intact.
Keep the dessert refrigerated in an airtight container and use within four days. Because it contains cream cheese, it must stay chilled at all times for safety and to hold its shape.
You can freeze a whole biscoff cheesecake or individual portions. Wrap each piece tightly in plastic wrap, then add a layer of foil to prevent freezer burn.
- Thaw slowly in the fridge overnight so the texture stays smooth and creamy.
- Do not leave the cheesecake at room temperature for more than one hour — the cream will soften and the base can slump.
- Label frozen portions with the date and use within three months for best flavour.
“Freezing is a great way to prepare ahead — just wrap well and thaw in the fridge for perfect slices.”
Serving Suggestions for Special Occasions
A neat slice, paired with the right drink, turns a simple dessert into a celebration. Keep portions modest; the rich filling is very satisfying and one small piece often feels enough.
Pairing with Beverages
Hot coffee or espresso cuts through the sweetness and complements the caramel notes in the biscoff spread. For a more indulgent finish, offer a small glass of sweet dessert wine or a coffee liqueur.
Presentation tips: serve each portion straight from the fridge so the cream cheese filling holds its shape. Add a few fresh berries on the side for a tart contrast and a touch of colour.
- Keep slices chilled until the moment you serve.
- Offer espresso for balance or a sweet wine for a decadent pairing.
- Garnish with berries or a tiny dollop of whipped cream for flair.
| Occasion | Best Drink | Serving Tip |
|---|---|---|
| Dinner party | Espresso | Small slices with berries |
| Birthday | Sweet dessert wine | Garnish with extra biscuit crumbs |
| Casual tea | Black coffee | Offer small portions to finish the meal |
| After-dinner treat | Coffee liqueur | Serve chilled; keep texture firm |
“A chilled slice and the right pairing will make your celebration feel thoughtfully finished.”
Conclusion
In closing, the secret is balancing a crisp base with a silky, well-chilled filling. Use full-fat cream cheese and gently whipped cream to build the right texture.
This no-bake cheesecake recipe is simple for beginners yet impressive for guests. Keep ingredients at room temperature, measure sugar and icing carefully, and press the biscuit crumbs with enough butter to hold the base.
Allow at least 6 hours (overnight if possible) so the mixture sets. A final drizzle of biscoff spread and a scatter of crumbs finishes a dessert that will become a firm favourite at gatherings.
FAQ
What makes this biscuit-spread cheesecake so popular?
Which ingredients are essential for the best result?
Why should ingredients be at room temperature?
How do I make a firm biscuit base?
What’s the best technique for a smooth filling?
How can I prevent a runny mixture?
What do I do if the filling becomes lumpy?
How long should the cheesecake chill in the refrigerator?
Can I freeze the no-bake cheesecake?
How should I serve and garnish the dessert?
What causes the base to crumble when slicing, and how to fix it?
Can I reduce the sugar without affecting texture?
Mary Berry Biscoff Cheesecake
This signature no-bake cheesecake brings together spiced caramel notes and a velvety cream cheese filling to make a showstopping dessert.
Ingredients
- 300g Lotus biscoff biscuits
- 100g melted butter
- 600g full-fat cream cheese
- 300ml double cream
- 200g Biscoff spread
- 100g icing sugar
- 1 teaspoon vanilla extract
Method
- Crush the Lotus biscoff biscuits into fine crumbs using a food processor or a rolling pin in a sealed bag.
- In a large mixing bowl, combine the crushed biscuits with 100g of melted butter and stir until the mixture resembles wet sand.
- Line the bottom of a 23cm springform tin with parchment paper and press the biscuit mixture firmly into an even layer. Chill for at least 30 minutes.
- In a large bowl, beat the full-fat cream cheese until smooth and free of lumps. Gradually add icing sugar and vanilla extract on low speed.
- Warm the Biscoff spread in the microwave for 15-20 seconds until fluid, then fold it gently into the cream cheese mixture.
- Whip the double cream until it holds soft peaks, then fold it into the cream cheese mixture until no streaks remain.
- Spoon the filling over the chilled biscuit base, smoothing the top with a palette knife. Return to the fridge for at least 6 hours to set.
- Before serving, drizzle warmed Biscoff spread over the top and sprinkle with crushed biscoff biscuits.