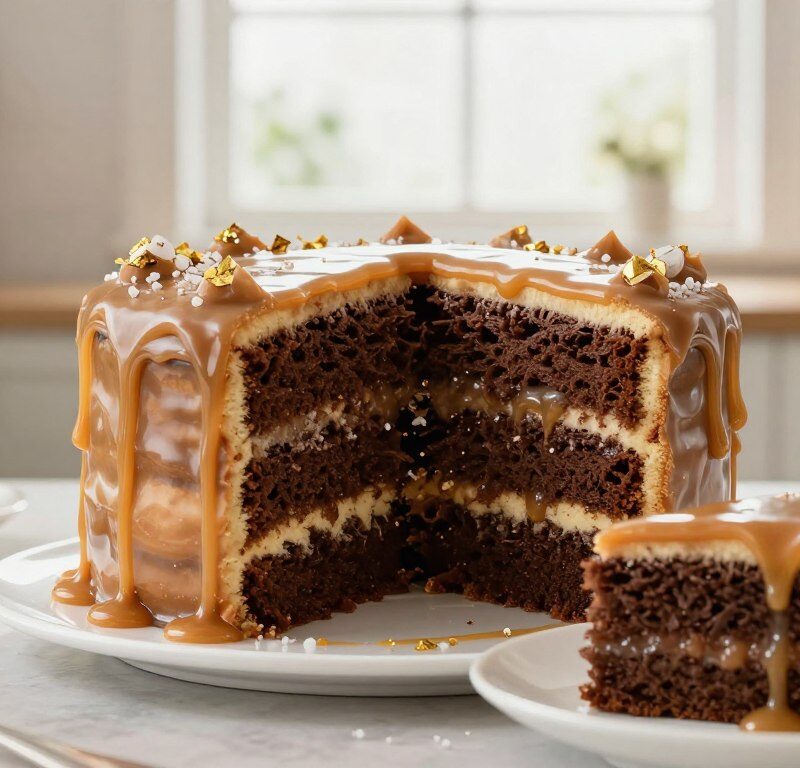
This beloved dessert is a delightful blend of classic sponge and a glossy, sweet glaze. It reflects the simple, foolproof approach to home baking that made the cookery author so popular.
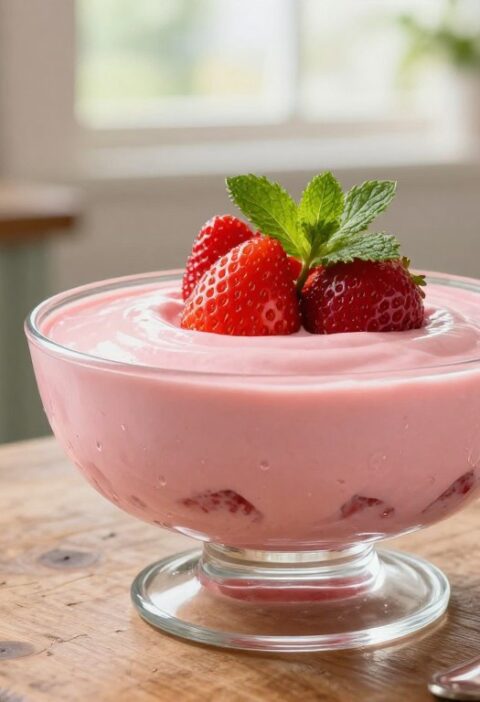
Many home bakers praise this recipe as one of the best caramel options for anyone who enjoys rich, comforting flavours. The berry salted twist adds a refined note to a familiar sponge, making it an excellent choice for gatherings.
Every mary berry salted creation begins with top-quality ingredients. That care ensures the final cake is moist, golden and wonderfully moreish for guests and family.
Whether you are new to baking or an experienced cook, this guide walks you through the steps. Follow the method and your kitchen will be filled with the aroma of sweet caramel while producing a stunning, crowd-pleasing dessert.
Key Takeaways
- Authentic, approachable style: a straightforward recipe that suits both beginners and pros.
- Rich but balanced flavour: caramel notes matched with a gentle berry salted twist.
- Quality ingredients matter: they ensure a moist, golden result every time.
- Perfect for occasions: an elegant dessert that feels bakery-made at home.
- Clear steps: the method keeps baking stress-free and successful.
Why You Will Love This Mary Berry Salted Caramel Cake
You will adore how the rich glaze and gentle salt lift a simple sponge to something special. The balance of sweet caramel with a whisper of sea salt gives a grown-up twist that still feels comforting.
Easy method, reliable results: the recipe is designed for home bakers. Follow the clear steps and your finish will look and taste like a bakery treat.
The soft, golden sponge pairs beautifully with smooth icing, creating contrasting textures from moist crumb to creamy topping. That makes it perfect for celebrations or an afternoon tea.
Fans of berry salted caramel style praise the consistent flavour this mary berry salted technique delivers. It’s accessible enough for new cooks yet special enough for guests.
- Balanced flavour: sweet and salty in harmony.
- Beginner-friendly: straightforward steps for confident baking.
- Versatile: ideal for parties, gifts or casual teatime.
| Feature | Why it matters | Result |
|---|---|---|
| Balanced glaze | Caramel depth with a salt finish | Complex, satisfying taste |
| Simple method | Clear steps for any skill level | Consistent, professional look |
| Moist sponge | Comforting base for icing | Great texture and mouthfeel |
For a related twist, try a pineapple upside-down version via this pineapple upside-down recipe for more baking ideas.
Essential Ingredients for Your Bake
Start by assembling fresh, measured ingredients to ensure a fuss-free bake. Accurate weights and a short checklist save time and improve results.
Dry Ingredients
226g self-raising flour and 226g soft light brown sugar form the base. Add 1 tsp baking powder for the rise and a tsp fine sea salt to lift the caramel flavour.
- 175g caster sugar and 55g light muscovado sugar for depth.
- 250g icing sugar for the icing finish.
Wet Ingredients
Have 225g baking spread chilled, plus 250g very soft butter for the icing. Use 1 tsp vanilla extract and 1 tbsp milk to keep the batter smooth.
Measure carefully. For a neat sandwich cake, correct amounts of flour, powder and sugars ensure structure and flavour.
Preparing the Sponge Batter
Set the oven to 180C/160C fan and let it stabilise while you prepare. Grease and line two tins so they are ready.
In a large bowl, beat 226g of Stork baking spread (straight from the fridge) with caster and muscovado sugar. Add 4 medium eggs one at a time.
Stir in 1 tsp vanilla bean paste and 1 tbsp milk. Sift in 226g flour with 1 tsp baking powder and fold gently.
- Use an electric hand mixer to combine ingredients for several minutes until smooth and airy.
- Mix in 3 tbsp salted caramel sauce for even flavour distribution.
- Scrape the sides of the bowl with a spatula halfway through mixing.
“Proper aeration at this stage gives a light, even sponge every time.”
Divide the batter between your prepared tins, level the surfaces and bake. This careful method ensures a soft, light sandwich cake ready for filling.
| Step | Why it matters | Tip |
|---|---|---|
| Preheat oven 180C/160C fan | Stable heat gives an even rise | Wait until temperature is steady |
| Room-temperature eggs | Prevents curdling and aids volume | Take eggs out 30 minutes before use |
| Beat until airy | Creates light crumb and structure | Use electric mixer for a few minutes |
Baking and Cooling the Layers
Timing and handling at this stage set the foundation for a neat finish. A steady oven temperature and correct tin placement make a clear difference to the crumb and height.

Achieving the Perfect Rise
Place your tins on the middle shelf of a preheated 180C/160C fan oven. Bake for 28–30 minutes until the sponges are golden and springy to the touch.
The baking powder reacts with heat to create lift. That reaction, plus the right flour and sugar balance, ensures layers that are light and stable for filling.
Remove the tins and leave them to settle for 5 minutes. Then turn the sponges onto a wire rack to cool fully.
It is vital that layers are completely cool before you add any icing. Warm sponges will melt butter-based frosting and spoil the finish.
| Check | Why it matters | How to test |
|---|---|---|
| Bake time | Ensures even colour and set crumb | 28–30 minutes; surface should spring back |
| Tin size & placement | Prevents dry edges and uneven centres | Use same-size tins; centre shelf for best heat |
| Cooling on rack | Circulates air to keep moist texture | Cool completely before decorating |
Creating the Perfect Salted Caramel Buttercream
Good butter and patient whisking are the secret to an icing that looks as good as it tastes. Follow a simple sequence and you’ll get a smooth, stable buttercream that spreads easily and holds its shape when decorating.
Choosing the Right Butter
Use 250g softened unsalted butter. It should be very soft but not melted. Soft butter traps air as you whisk and gives a light, fluffy texture.
Achieving Smooth Consistency
Place the butter in a clean bowl and beat until pale. Gradually add 260g golden icing sugar to avoid a gritty finish.
Add 2 tbsp double cream and 1 tsp vanilla to loosen the mix. Whisk for several minutes until the mixture is smooth and light. Stop before it splits.
Adding the Salted Caramel
Stir in your tin of high-quality caramel a spoonful at a time. Add a pinch of fine sea salt to balance the sugar and lift the flavour.
For texture, fold in some chopped caramel fudge. Taste as you go and adjust the sea salt to preference. The result should be a creamy, spreadable icing perfect for filling and coating your cake layers.
- Whisk butter and icing sugar until pale and creamy.
- Add cream and tsp vanilla; beat gently.
- Fold in caramel and a pinch of fine sea salt; finish with chopped fudge if desired.
Assembling and Decorating Your Masterpiece
C place the base layer flat and steady; neat assembly makes decorating far easier. Ensure the cake is stable before you add any heavy topping to avoid slippage.
Spread a generous layer of your salted caramel buttercream over the first sponge, working from the centre to the edges. Use a palette knife to get an even thickness so each slice has the same balance of sponge and icing.
Place the second sponge on top and smooth the remaining icing over the top and sides. For a clean finish, chill briefly, then re-smooth any imperfections with the warmed palette knife.

“A steady base and careful smoothing turn simple layers into a professional-looking centrepiece.”
- Drizzle extra caramel over the top, letting it drip down the sides for drama.
- Scatter chopped caramel fudge and a light pinch of sea salt for texture and contrast.
- Chill slightly before serving to set the icing for neater slices.
The combination of sea salt and sweet caramel delivers a complex, satisfying flavour that makes this dessert memorable. Your careful baking and tidy spread will shine at the table.
Expert Tips for Success
Follow a few simple habits in the kitchen and your sponge will reward you with a reliable rise and great texture.
Storage and Freshness
Use baking spread straight from the fridge. Cold spread helps create a lighter sponge and steadier batter when you beat with sugar and eggs.
Check your flour, baking powder and other ingredients for freshness. Old ingredients can stop the sponge rising to its full potential.
Once cooled, wrap layers well and store on a rack before assembly. If you need more time, keep wrapped layers in a cool place and bring them to room temperature before filling.
You can keep the finished cake in an airtight container for up to 3 days. Store away from direct sunlight to keep the icing and caramel stable.
- Measure caster sugar, muscovado and flour with a digital scale for accurate results.
- Beat the icing for several minutes until light and easy to spread; add 1 tbsp milk if it feels too stiff.
- Finish with a pinch of fine sea salt or a few chopped fudge pieces for contrast.
For more variations and a related bake, see the seed cake variations.
Conclusion
A few careful techniques turn basic pantry items into a show-stopping salted caramel cake.
By following this recipe, you have the keys to a moist sponge, smooth icing and a pleasing sweet‑and‑salt balance. The caramel addition and chopped fudge bring extra indulgence and texture.
Use these recipes again for celebrations or casual teatime. The berry salted caramel touch makes slices memorable and perfect to share with friends and family.
Practice improves finish and confidence. Thank you for baking along — we hope this mary berry salted recipe becomes a firm favourite in your collection.
FAQ
What oven temperature and tin size does the recipe use?
Which dry ingredients are essential for the sponge?
What wet ingredients should I prepare?
How do I prepare the sponge batter for even texture?
How long should I bake the layers and how do I check for doneness?
How can I achieve a perfect rise in the sponge?
What type of butter is best for the caramel buttercream?
How do I get a smooth buttercream consistency?
How do I make and add the salted caramel safely?
Can I use shop-bought caramel or caramel fudge instead?
What’s the best way to sandwich and decorate the layers?
How should I store the finished bake for freshness?
Can I freeze the layers or the assembled cake?
Are there recipe variations for a lighter or richer result?
What small tools make the process easier?
Mary Berry Salted Caramel Cake
This beloved dessert is a delightful blend of classic sponge and a glossy, sweet glaze, reflecting a simple, foolproof approach to home baking.
Ingredients
- 226g self-raising flour
- 226g soft light brown sugar
- 1 tsp baking powder
- 1 tsp fine sea salt
- 175g caster sugar
- 55g light muscovado sugar
- 250g icing sugar
- 225g baking spread (chilled)
- 250g very soft butter (for icing)
- 1 tsp vanilla extract
- 1 tbsp milk
- 4 medium eggs
- 3 tbsp salted caramel sauce
- 250g softened unsalted butter (for buttercream)
- 260g golden icing sugar
- 2 tbsp double cream
- 1 tsp vanilla (for buttercream)
- pinch of fine sea salt (for buttercream)
- chopped caramel fudge (optional)
Method
- Preheat the oven to 180C/160C fan and grease and line two 20cm round tins.
- In a large bowl, beat the chilled baking spread with caster and muscovado sugar until smooth.
- Add the eggs one at a time, mixing well after each addition.
- Stir in the vanilla extract and milk.
- Sift in the self-raising flour and baking powder, and fold gently until combined.
- Mix in the salted caramel sauce until evenly distributed.
- Divide the batter between the prepared tins and level the surfaces.
- Bake for 28-30 minutes until golden and springy to the touch.
- Allow the cakes to cool in the tins for 5 minutes, then turn out onto a wire rack to cool completely.
- For the buttercream, beat the softened unsalted butter until pale.
- Gradually add the golden icing sugar, mixing until smooth.
- Add the double cream and vanilla, and whisk until light and fluffy.
- Fold in the salted caramel and a pinch of fine sea salt, adjusting to taste.
- Once the cakes are completely cool, spread a layer of buttercream on the first sponge.
- Place the second sponge on top and smooth the remaining buttercream over the top and sides.
- Drizzle extra caramel over the top and sprinkle with chopped caramel fudge and a light pinch of sea salt.
- Chill slightly before serving to set the icing.