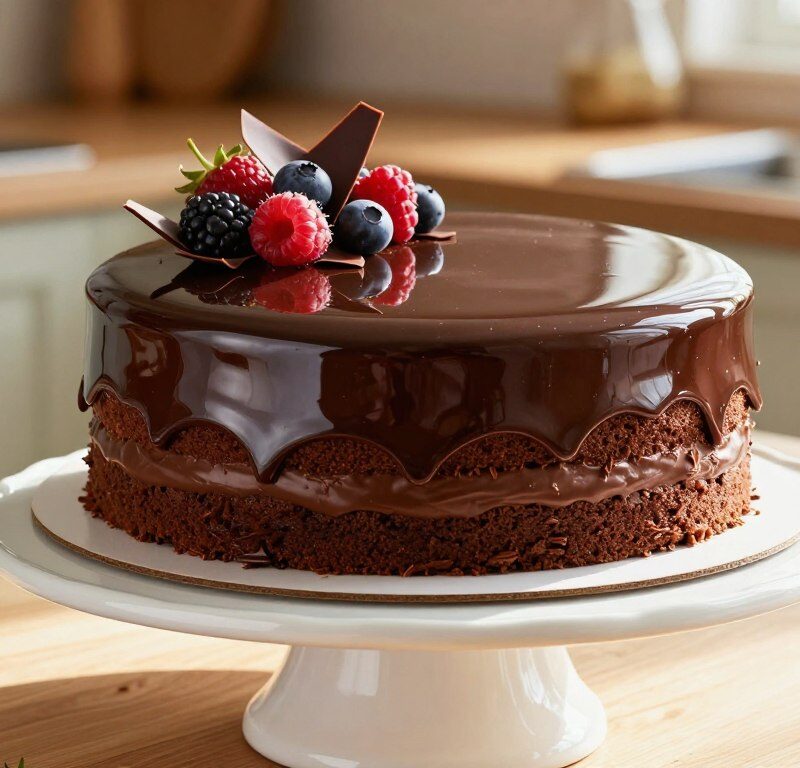
This iconic chocolate reflection dessert delivers a glossy, mirror-like finish that wows at any gathering. It asks for patience and care, but rewards you with a stunning centrepiece.
The full process takes about an hour and a half from start to finish. Expect roughly 20 minutes of prep, up to 45 minutes in the oven, then careful cooling and glazing.
Once cooled, place the sponge on a wire rack over a tray so excess glaze can drip from the sides. After it sets for an hour, add fresh glazed strawberries around the base for a professional look.
Follow clear steps and simple techniques and even home bakers can achieve a reflective, professional finish. For tips on related marble techniques and timing, see the original recipe here: Mary Berry marble cake guide.
Key Takeaways
- Allow about 90 minutes to complete the whole process.
- Use a wire rack and tray to catch glaze that runs down the sides.
- Let the glaze set for an hour before finishing with fruit.
- Short prep and careful timing create a glossy mirror finish.
- Fresh strawberries add colour and a professional touch.
Understanding the Mary Berry Chocolate Reflection Cake
A mirror glaze transforms a simple sponge into a show-stopping centrepiece.
This dessert is famed for a glossy, mirror-like surface and a soft, rich sponge beneath. The name comes from that gleaming coat, which reflects light when poured at the right temperature.
The Appeal of the Reflection Cake
The glossy finish gives a professional bakery look at home. It balances a light sponge with a deep, decadent filling for a refined taste and texture.
“A gleaming glaze turns simple baking into an elegant celebration piece.”
Why It Is Perfect for Celebrations
- Standout appearance makes it ideal for birthdays and dinner parties.
- The design is a staple in the mary berry everyday collection and suits both fans and newcomers.
- The reflective surface is made by combining chocolate, cream and gelatin for a smooth, bakery-style finish.
Essential Ingredients for Your Chocolate Sponge
Gathering the right staples is the simple secret to a flawless sponge. Start by measuring ingredients precisely and bringing them to room temperature.
Dry mix: 200g self-raising flour, 2 tbsp cocoa powder and a good pinch of baking powder. Add 200g caster sugar to the bowl so it’s ready when you cream the butter.
- Fat and sweet: 200g softened unsalted butter or baking spread.
- For the filling: 200g dark chocolate, 150ml double cream and 50g unsalted butter, melted together in a heatproof bowl until smooth.
- Mirror glaze note: 1 tsp gelatin powder dissolved in 2 tbsp warm water — this gives the classic chocolate reflection finish.
Tip: Ensure all ingredients are at room temperature. Accurate weighing and simple prep are the first step to a light, even bake and a glossy finish.
Required Baking Equipment
Choosing the right tools ensures your sponge and glaze come out flawless. Gather a compact kit before you start so you can focus on technique, not hunting for utensils.

Must-have items include two 8-inch loose-bottomed cake tins to bake even layers and remove them easily once cooled.
- Loose-bottomed cake tins: Two 8-inch tins keep layers uniform and speed removal.
- High-quality baking paper: Line the tins to prevent sticking during the high-temperature baking.
- Electric mixer or whisk: Use this to aerate ingredients for a light, fluffy cake.
- Heatproof bowl and saucepan: Needed for melting the chocolate and combining cream for the filling and glaze.
- Offset spatula and palette knife: An offset spatula helps spread filling, while a palette knife smooths sides before glazing.
Keep tools close at hand and dry. A well-prepared work area makes baking easier and improves final presentation.
Preparing the Perfect Chocolate Sponge
Get organised early: line your loose-bottomed cake tins and set the oven to 180°C. This simple start prevents stress and helps the layers bake evenly.
Sift the dry ingredients — combine self-raising flour and cocoa powder in a bowl to remove lumps. Sifting gives a lighter crumb and avoids streaks in the mixture.
Creaming matters. Beat the softened butter with caster sugar until pale and airy. Add the eggs one at a time, beating well after each addition as advised in the mary berry everyday guide for stability.
Tips for Even Sponge Layers
- Divide the batter equally between the two tins so the cakes rise at the same rate.
- Bake for 20–25 minutes until the tops spring back when touched — this usually takes around the stated minutes in the recipe.
- Once cool, use a palette knife to level each layer so the finished cakes sit flat before filling.
- Always use room temperature ingredients to stop the batter from curdling and to ensure a smooth texture.
Creating the Silky Chocolate Filling
Start by warming the cream gently; the right temperature makes the filling silky.
Heat 150ml of double cream until it is just warm, not boiling. Place 200g of chopped dark chocolate in a heatproof bowl and pour the cream over it.
Let it sit for a minute, then use a whisk to stir smooth in wide, gentle circles. Add 50g unsalted butter and whisk until the mixture looks glossy and fully combined.
Spread the filling evenly over the first sponge layer, taking care to reach the edges and sides so the layers bond. For a subtle contrast, brush a thin smear of apricot jam on the sponge before you add the filling.
- Ensure the filling is thick enough to hold the two layers without bulging.
- Chill briefly so the chocolate layer sets and gives a stable top for glazing.
Mastering the Mirror Glaze Technique
Achieving a flawless sheen requires attention to heat, gelatin and a steady pour.
Achieving the Mirror Finish
Prepare the glaze using 150g dark chocolate, 120ml double cream, 80g caster sugar, 1 tbsp golden syrup and 1 tsp gelatin.
Combine the cream, caster sugar and syrup in a saucepan and warm gently until the sugar dissolves.
Add the chopped dark chocolate and stir smooth in a bowl until the mixture is glossy and free of bubbles.
The Importance of Temperature
Cool the glaze to room temperature before you pour. This is the most critical step for a true mirror surface.
Pour the glaze in one steady motion over a well-chilled cake and let it run down the sides.
The glaze will set in about 10 minutes, leaving a glassy, bakery-style finish.
Using Gelatin Correctly
Dissolve the gelatin powder in 2 tbsp warm water first, then whisk it into the warm mixture so it blends evenly.
This gives structure without clouding the shine and helps the glaze hold on the sponge after about a few minutes of setting.
- Use a fine sieve if needed to remove any small lumps.
- Work quickly but calmly — steady pours make the best finish.
- Store any leftover glaze in a bowl covered in cling film in the fridge; gently rewarm before reuse.
Assembling and Glazing Your Masterpiece
Set your filled layers on a centred rack so the glaze can flow from the top to the sides without pooling.
Ensure the stacked sponges are level and chilled. If you used apricot jam between the layers, keep the cake well chilled so the filling does not shift.
Warm the glaze to the right texture, then pour slowly in one steady motion. Work calmly so the surface stays even and you can stir smooth any minor ripples with a gentle touch.
- Place your filled cake on a wire rack set over a tray so excess glaze can drip away.
- Use a palette knife to tidy drips at the base once the initial pour finishes.
- Pour the glaze slowly to cover every part of the cake surface and ensure a professional finish.
Leave the glazed cake at room temperature for at least 60 minutes so the mirror sets firm and glossy.
When set, use a clean palette knife to lift the cake gently from the rack and transfer it to a serving plate. A neat finish makes every slice look as good as it tastes.
Troubleshooting Common Glazing Issues
Quick checks save a glaze. If glaze runs straight off the top, it was probably too hot. Let the mixture cool for a few minutes before pouring so it clings to the sides.
Uneven pooling usually comes from unlevel layers. Use a sharp knife to trim any high spots and create a flat top. This prevents glaze gathering in low areas and keeps the sheen uniform.
“Chill the cake for 30 minutes before glazing; a cool surface helps the glaze set quickly and smoothly.”
Common faults and fixes:
- If your glaze is too thin, the saucepan mix may not have been heated long enough to thicken the cream; gently warm and reduce it slightly.
- Check that your oven temperature was accurate — slanted layers often come from uneven baking.
- Pour the glaze in one continuous motion over the top to avoid streaks and to keep the finish smooth.
- Chill the filled sponge for about 30 minutes so the chocolate layer firms before glazing the sides.
- If the glaze looks dull, it may have trapped air from over-vigorous stirring; stir gently and sieve if needed.
| Issue | Likely Cause | Quick Fix (minutes) |
|---|---|---|
| Glaze runs off | Too hot when poured | Let cool 5–10 minutes |
| Pooling on top | Uneven layers or high centre | Level with a knife, 5–10 minutes |
| Thin glaze | Insufficient reduction in saucepan | Warm and reduce 3–5 minutes |
| Dull finish | Air introduced by vigorous stirring | Stir gently, rest 10 minutes |
Follow these checks and you’ll rescue most glazing faults without starting over. Small adjustments in heat, timing and a steady pour make the biggest difference.
Creative Variations and Substitutions
Small ingredient swaps can change texture and nutrition without losing the glossy finish. Below are practical ideas to adapt the recipe for lighter eating or dietary needs.
Healthy Alternatives
Reduce fat by replacing half the butter with Greek yoghurt. This keeps moisture while cutting calories and preserves crumb structure.
Use 70% dark chocolate to lower sugar and deepen flavour. Swap self-raising flour with 200g plain flour plus 2 tsp baking powder when you run out.

- Substitute 1 tbsp honey for golden syrup in the glaze for similar shine and texture.
- For a vegetarian set, replace gelatin with 1 tsp agar-agar powder dissolved in water as directed on the pack.
- Decorate with fresh strawberries or raspberries to cut richness and add brightness.
- Always line tins with fresh baking paper to ensure the cake releases cleanly when experimenting.
Tip: Keep core ingredients like caster sugar, cream and baking spread in mind when altering quantities so the final texture remains balanced.
Storage and Serving Suggestions
The way you rest and store the dessert affects shine, texture and flavour more than you might expect.
Keep the finished cake covered in the refrigerator for up to four days to protect the mirror sheen and to preserve the cream filling. Place it in a cake box or an airtight container so the delicate surface stays free of dust or knocks.
For longer storage, wrap individual slices tightly in plastic wrap and freeze for up to two months. Defrost in the fridge before bringing to room temperature.
“Allow the cake to sit at room temperature for 20 minutes before serving to bring out full flavour.”
- Use a wire rack if serving within a few hours of glazing.
- If you like a slightly warm sponge, microwave a slice for 8–10 seconds; avoid melting the mirror glaze.
- Keep spare tins and ingredient labels handy when planning batches to avoid confusion.
| Action | Duration | Notes |
|---|---|---|
| Refrigerate covered | Up to 4 days | Keep in a box to protect the glaze |
| Freeze slices | Up to 2 months | Wrap tightly to prevent freezer burn |
| Serve from fridge | 20 minutes | Brings cream and sponge to ideal texture |
Conclusion
Key tip: , With steady hands and a chilled sponge, you can achieve a bakery-quality finish at home.
mary berry everyday fans will recognise how a simple sponge and a glossy chocolate reflection cake combine to create a showpiece. Follow the recipe, mind the glaze temperature and chill times, and basic ingredients become a stunning dessert.
Practice improves results. Focus on baking technique, be patient with the glaze and enjoy sharing the final slice. This guide is designed to help you feel confident and ready to make your own reflection cake.
FAQ
What tins should I use for the sponge layers?
Which cocoa or powder works best in the recipe?
How do I keep the layers even when baking?
How long should I heat the saucepan mixture for the glaze?
What is the correct temperature for pouring a mirror glaze?
How should I use gelatin in the glaze?
Can I substitute caster sugar with other sweeteners?
What are fast tips for stirring and smoothing the filling?
How do I prevent bubbles in the mirror glaze?
How long should the cake rest before serving?
What can I use if I don’t have loose-bottomed tins?
Are there quick variations using fruit or jam?
How should I store leftovers and how long will they keep?
What equipment is essential besides tins?
Mary Berry Chocolate Reflection Cake
This iconic chocolate reflection dessert delivers a glossy, mirror-like finish that wows at any gathering. It asks for patience and care, but rewards you with a stunning centrepiece.
Ingredients
- 200g self-raising flour
- 2 tbsp cocoa powder
- 1 pinch baking powder
- 200g caster sugar
- 200g softened unsalted butter
- 4 large eggs
- 200g dark chocolate
- 150ml double cream
- 50g unsalted butter (for filling)
- 1 tsp gelatin powder
- 2 tbsp warm water
- 150g dark chocolate (for glaze)
- 120ml double cream (for glaze)
- 80g caster sugar (for glaze)
- 1 tbsp golden syrup
Method
- Preheat the oven to 180°C and line two 8-inch loose-bottomed cake tins with baking paper.
- Sift the self-raising flour, cocoa powder, and baking powder into a bowl.
- In a separate bowl, cream the softened butter and caster sugar until pale and airy.
- Add the eggs one at a time to the butter mixture, beating well after each addition.
- Fold in the sifted dry ingredients until just combined.
- Divide the batter equally between the two prepared tins.
- Bake for 20-25 minutes until the tops spring back when touched.
- Once cooled, level each layer with a palette knife.
- For the filling, heat the double cream until warm, then pour over the chopped dark chocolate in a heatproof bowl.
- Let it sit for a minute, then whisk until smooth. Add the melted unsalted butter and mix until glossy.
- Spread the filling evenly over the first sponge layer, then place the second layer on top.
- For the mirror glaze, combine the double cream, caster sugar, and golden syrup in a saucepan and warm gently until the sugar dissolves.
- Add the chopped dark chocolate and stir until smooth and glossy.
- Dissolve the gelatin powder in warm water and whisk it into the glaze mixture.
- Cool the glaze to room temperature before pouring it over the chilled cake.
- Let the glaze set for at least 60 minutes before serving.