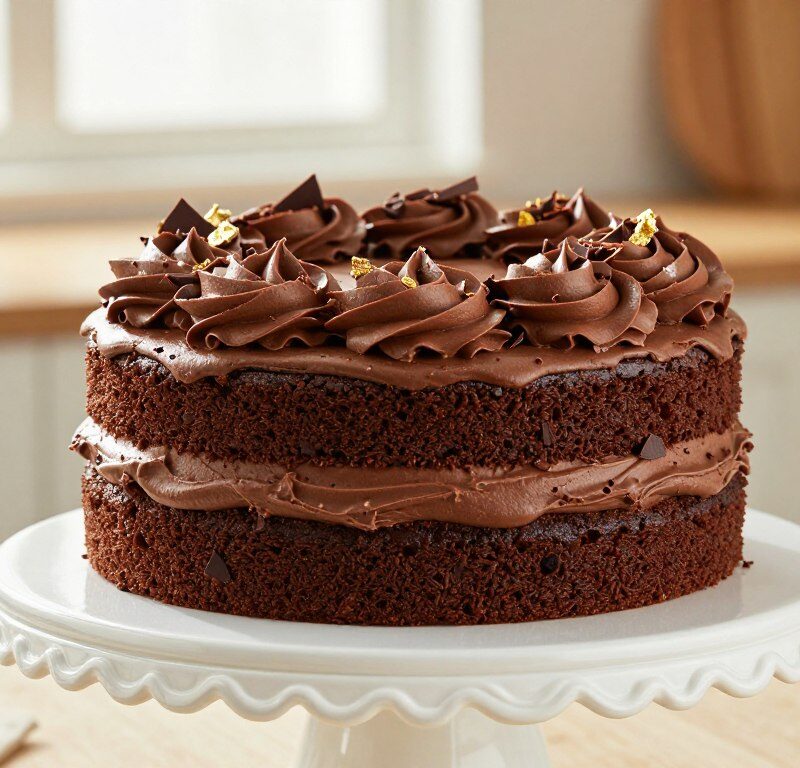
The Mary Berry Chocolate Buttercream Cake is a quintessential British bake that remains a firm favourite for home cooks across the United Kingdom.
This classic sponge cake pairs light, tender layers with a rich, smooth chocolate finish. It is designed to deliver bakery-style results using simple, high-quality ingredients and a reliable method.
The trusted all-in-one technique means even beginners can enjoy confident baking. Follow the clear recipe steps and you will achieve a moist, evenly crumbed sponge that impresses at birthdays or a casual afternoon tea.
Mastering this approach builds skill and saves time, while producing a striking dessert that never goes out of style.
Key Takeaways
- The bake is a beloved British classic that suits many occasions.
- Light sponge and rich chocolate frosting create a balanced flavour.
- The all-in-one method simplifies preparation for beginners.
- Simple, quality ingredients help achieve bakery-style results.
- Following the recipe yields a moist, evenly textured sponge.
The Appeal of a Classic Mary Berry Chocolate Buttercream Cake
Home cooks love this recipe because it combines a simple method with reliably indulgent results. The technique makes complex baking feel doable, so novices and busy cooks can reach the same outcome.
The charm lies in the balanced flavour. It is indulgent without being cloying, and the sponge is airy rather than dense. That light texture makes it a memorable centrepiece for gatherings.
Many turn to these recipes again and again because they beat shop-bought alternatives in taste and consistency. With a few finishing touches, you can lift the top to a professional standard.
- Simple steps that demystify baking.
- Light sponge with deep cocoa notes.
- Versatile for casual teas or formal events.
Essential Ingredients for Your Sponge
Start by gathering the key ingredients; quality here makes the biggest difference to the final sponge. Use measured amounts and room-temperature items for best results.
Selecting Quality Cocoa Powder
Choose a premium cocoa powder for a deep, authentic chocolate flavour. Two tablespoons of good cocoa powder lift the batter without drying it out.
- 175g unsalted butter, softened to room temperature
- 175g caster sugar for a fine crumb
- 3 large eggs at room temperature to avoid curdling
- 2 tablespoons milk to loosen the batter
Choosing the Right Flour
Use 175g self-raising flour for the classic light texture. Add 1 teaspoon baking powder when extra lift is needed, especially with the all-in-one method.
| Ingredient | Role | Amount |
|---|---|---|
| Self-raising flour | Structure and lift | 175g |
| Unsalted butter | Moisture and richness | 175g |
| Cocoa powder | Colour and chocolate flavour | 2 tbsp |
| Baking powder | Extra rise (if needed) | 1 tsp |
Tip: Weigh ingredients for consistent results and keep eggs at room temperature to help the mixture combine smoothly.
Preparing Your Baking Equipment
Get your tools ready before you start mixing. Proper preparation helps the sponge rise evenly and makes assembly easier. Preheat the oven to 180C (160 fan) so it is fully up to temperature before you begin.

Use two 20 cm sandwich tins. Grease each tin well and line the base with non-stick paper. This prevents the sponge sticking and speeds up removal.
- Choose loose-based tins with straight, vertical sides for neat layers and even baking.
- Check that your tins are the same size so the two sponges finish at the same time.
- Invest in quality sandwich tins if you make layered cakes often; they give more consistent results.
Final tip: confirm the oven has reached 180C (160 fan) before you pour in the batter. A fully preheated oven ensures the layers rise correctly from the start and helps you follow the recipe with confidence.
The All-in-One Mixing Method
Using a single bowl technique simplifies the process and reduces washing up without sacrificing texture. This is the method many home bakers prefer when they want consistent results fast.
Softening Your Butter
Make sure the butter is soft enough to beat easily. Cut 175g into small cubes and leave at room temperature for at least 30 minutes.
Avoiding Curdled Mixtures
Add the 175g caster sugar, 175g self-raising flour and 1 teaspoon baking powder into the bowl with the butter. Beat until smooth before adding liquids.
Stir in 2 tablespoons cocoa powder and 2 tablespoons milk at the right stage to keep the mixture silky. Make sure you mix thoroughly to avoid a split batter.
The Importance of Room Temperature Eggs
Use room temperature eggs and add them one at a time. Beat the mixture well after each egg to prevent curdling and to keep the batter even.
- Place all main ingredients in a large bowl.
- Beat until fully combined and smooth.
- This method saves time and reduces washing up.
“The one-bowl method gives a light sponge and a reliably smooth batter every time.”
Achieving the Perfect Bake
Timing and oven position are crucial to getting an even, moist sponge every time. Once your batter is ready, weigh the mixture in a bowl and divide it equally between two sandwich tins. This helps both layers bake at the same rate.
Preheat to 180C (160C fan) and bake for 20–25 minutes. Avoid placing the tins too high in the oven; a lower shelf prevents a thick crust that can crack.
You will know the cake is done when the top is springy and it pulls slightly away from the sides. Always use a skewer in the centre — it should come out clean before you take the tins out.
Watch the bake minutes carefully to keep the sponge moist. Small ovens vary, so check a minute or two before the lower limit if your oven runs hot.
- Divide batter by weight for even layers.
- Bake 20–25 minutes at 180C or 160C fan.
- Test with a skewer and check the sides for shrinkage.
“Simple checks at the end of baking save you from dry layers.”
Cooling and Preparing the Sponge
Once the sponges leave the oven, a short rest in the tin helps set their shape before you turn them out.
Turn them out after a few minutes so they release cleanly from the tin without tearing. This small pause makes handling far easier.
Using a Wire Rack for Airflow
Place each layer on a wire rack to cool completely. Proper airflow from the rack stops the base of the cake going soggy.
Do not ice a warm sponge; buttercream will melt and slide off the sides. Wait until the sponge is cold before you sandwich the layers.
- Leave cool in the tins for a few minutes, then turn out.
- Cool completely on a wire rack for about 30–60 minutes depending on kitchen temperature.
- Once cold, the sponges are ready to be sandwiched together.
| Step | Action | Why it matters |
|---|---|---|
| Rest in tin | 2–5 minutes | Prevents tearing when turning out |
| Cool on rack | 30–60 minutes | Allows airflow; keeps base dry |
| Assemble | After cool | Stops filling from sliding |
“Cooling on a wire rack keeps the sponge light and ready for filling.”
Whipping Up Rich Chocolate Buttercream
Start by whipping the 200g of softened butter until it is pale and creamy. This creates a stable base that holds the icing while keeping it light.
Gradually add 400g of sifted icing sugar and 3 tablespoons of sifted cocoa powder. Beat between additions so the mixture stays smooth and lump-free.
Add 2–3 tablespoons of milk to reach a spreadable consistency. The whipped icing should hold its shape when piped yet glide easily with a palette knife.
- Sift both cocoa and icing sugar to avoid grainy texture.
- Mix in a single bowl on a low speed first, then increase to aerate the mixture.
- For extra luxury, finish with a layer of chocolate ganache made from double cream and plain pieces.
“A well-whipped butter and sifted powders give the best flavour and a silky finish.”
Assembling and Decorating Your Cake
A neat assembly is the final step that lifts texture and appearance in equal measure. Take your time and work on a flat surface so layers sit straight.
Applying the Crumb Coat
Start by spreading a generous layer of buttercream on the bottom sponge. Place the second layer on top and press gently to level the stack.
Apply a thin crumb coat of icing to seal loose crumbs. This thin shell traps stray bits and gives a smooth base for the final finish.
Smoothing with a Palette Knife
Use a palette knife to smooth the icing over the top and sides. Work in long, even strokes and rotate the turntable if you have one.
Make sure you do not push the icing over the edge when smoothing; keep the knife steady and lift rather than scrape.
- Use a small amount of apricot jam as a barrier before adding a thin layer of ganache.
- Use a knife to trim any uneven edges before finishing.
- A well-decorated bake is the hallmark of skill; the right tools make the job easier.
| Step | Tool | Purpose |
|---|---|---|
| Sandwiching | Flat spatula | Even spread of filling |
| Crumb coat | Small palette knife | Seal crumbs and smooth base |
| Final smoothing | Large palette knife / bench scraper | Clean top and sides |
| Ganache barrier | Pastry brush | Apply jam to protect sponge |
“A steady hand and the right blade make a professional finish achievable at home.”
Creative Variations and Flavour Twists
Try a few simple swaps to give the basic recipe fresh personality without changing the reliable method.
For citrus lift, add the finely grated zest of one orange into the batter. This brightens the flavour and pairs well with a richer icing or ganache.

Swap fillings by replacing apricot jam with seedless raspberry jam. The tart fruit cuts through the sweet chocolate ganache and adds a lively contrast.
- Use dark bars (40–50% cocoa solids) when making chocolate ganache or buttercream to deepen the chocolate note.
- If time is tight, bake the mixture in one deep tin — just reduce the bake minutes and check from the lower limit.
- Add a spoonful of sifted flour with each egg while beating in the bowl to reduce the risk of curdling.
These small changes let you customise recipes for different events so your cakes suit every guest. Experiment gently and keep notes on which combination you prefer.
“Simple twists let a familiar recipe feel new and exciting.”
Storage and Freezing Advice
Knowing how to freeze and thaw sponges lets you prepare ahead without losing texture or flavour. Proper storage keeps the top and sides intact and preserves the crumb while you finish the icing.
Short-term: Store a finished cake in an airtight container at room temperature for up to two days. This keeps the butter and sugar balanced and the sponge moist.
Fridge: For longer life, keep cakes in the refrigerator for up to four days. Bring them to room temperature before serving so the butter in the icing softens and the flavour opens up.
Thawing Frozen Sponges
Allow sponges to cool completely on a wire rack before wrapping. Place each layer on a circle of baking paper to stop it sticking to the foil.
Wrap in two layers of kitchen foil and freeze. To thaw, put the frozen sponges on a wire rack and leave for about an hour. This helps any condensation form on the rack instead of the sponge.
- Tip: unwrap only when cold to avoid sogginess from sudden temperature change.
- Tip: keep tins and storage areas dry and cool to protect the icing and texture.
“Proper storage is essential for keeping your chocolate sponge moist and delicious, even if you prepare the dessert in advance.”
Conclusion
Simple techniques and quality store-cupboard staples combine to produce reliably impressive results. Follow the method and you will bake a moist mary berry chocolate cake that suits any celebration.
Use good flour and measured ingredients. Take time to cool layers on a wire rack so the icing keeps its shape and the texture stays perfect.
Whether you enjoy baking as a hobby or want dependable recipes for guests, this recipe gives a firm foundation. Try variations, note what you prefer, and share the finished cake with family and friends for best flavour.
FAQ
How long should I bake a chocolate sponge in sandwich tins?
Can I use baking powder and self-raising flour together?
What type of cocoa powder gives the best flavour?
How should I bring eggs and butter to room temperature quickly?
My mixture looks curdled—what can I do?
How do I prevent the sponge from doming or cracking?
When should I apply the crumb coat?
What’s the best way to smooth icing with a palette knife?
How should I store a frosted sponge at room temperature?
Can I freeze sponge layers or a complete assembled cake?
How do I thaw frozen sponges without drying them out?
What icing options work well besides buttercream?
Is caster sugar necessary or can I use granulated?
How do I add flavour twists without changing the bake time?
What tools are essential for this recipe?
Mary Berry Chocolate Buttercream Cake
A quintessential British bake that combines light sponge layers with rich chocolate buttercream, perfect for any occasion.
Ingredients
- 175g unsalted butter, softened to room temperature
- 175g caster sugar
- 3 large eggs, at room temperature
- 175g self-raising flour
- 2 tablespoons cocoa powder
- 1 teaspoon baking powder
- 2 tablespoons milk
- 200g softened butter for buttercream
- 400g sifted icing sugar
- 3 tablespoons sifted cocoa powder for buttercream
- 2-3 tablespoons milk for buttercream
Method
- Preheat the oven to 180C (160C fan) and prepare two 20 cm sandwich tins by greasing and lining them with non-stick paper.
- In a large bowl, combine the softened butter, caster sugar, self-raising flour, baking powder, cocoa powder, and milk.
- Add the eggs one at a time, beating well after each addition until the mixture is smooth.
- Divide the batter evenly between the prepared tins and bake for 20-25 minutes, or until a skewer inserted into the center comes out clean.
- Allow the cakes to cool in the tins for 2-5 minutes before turning them out onto a wire rack to cool completely.
- For the buttercream, whip the softened butter until pale and creamy, then gradually add the sifted icing sugar and cocoa powder, beating until smooth.
- Add milk as needed to achieve a spreadable consistency.
- Once the cakes are completely cool, place one layer on a serving plate and spread a generous layer of buttercream on top.
- Place the second layer on top and apply a thin crumb coat of icing to seal in crumbs.
- Smooth the icing over the top and sides of the cake with a palette knife, then decorate as desired.