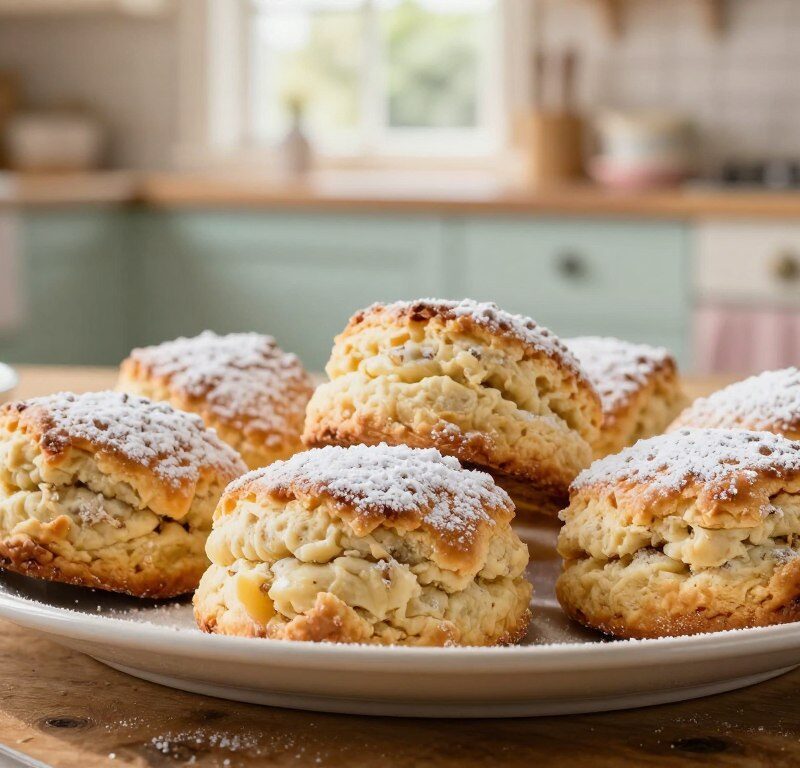
These classic scones are ready in under 40 minutes from start to finish. The recipe yields soft, tall rounds with a rich, buttery crumb that pulls apart easily.
The gentle tang of buttermilk lifts the dough and creates a tender texture. This simple method suits both new bakers and those who bake often.
Serve warm at an afternoon tea or as a quick snack. Follow the steps and you will have light, fluffy results that taste like a bakery treat.
Key Takeaways
- Ready in under 40 minutes for speedy satisfaction.
- Soft, tall and tender texture that splits well for fillings.
- Buttermilk adds a mild tang and keeps crumb delicate.
- Suitable for beginners and experienced bakers alike.
- Perfect for afternoon teas or casual gatherings.
The Appeal of Mary Berry Buttermilk Scones
What sets this recipe apart is the acid in the liquid, which reacts quickly to make a light interior. Home bakers praise the method because it reliably produces tall, tender rounds with a gentle crumb.
The use of buttermilk gives a mild tang that helps the raising agents work. This keeps the inside moist while the outside stays lightly crisp. The balance of flavour is never too sweet, so these treats suit an afternoon tea perfectly.
- Even rise: acidity activates baking powder for a fluffy centre.
- Light texture: classic method yields soft, pull-apart crumbs.
- Quick bake: ready in minutes for last-minute guests.
| Feature | Result | Best for |
|---|---|---|
| Acidic liquid | Fluffy interior | Afternoon tea |
| Classic method | Light crust | Weekend bake |
| Quick bake time | Consistent rise | Last-minute guests |
“Simple technique, bakery-style results — perfect for sharing.”
These scones deliver consistent, crowd-pleasing results every time.
Essential Ingredients for Your Bake
Good ingredients make all the difference when you want bakery-style results at home. Use exact measures and keep items cold where specified. These small choices give consistent height and a tender crumb.
Choosing Quality Flour
Use 350g of high-quality self-raising flour for structure and lift. Fresh flour gives better texture and colour.
If your self-raising flour is old, replace it. Always handle the flour gently to avoid overworking the dough.
The Role of Buttermilk
Measure 175ml of fresh buttermilk. Its acidity reacts with 1 tsp of baking powder to create the rise.
Combine 85g of cold unsalted butter and 3 tbsp of caster sugar for flavour and a flaky crumb. Keep the butter chilled until you need it.
| Ingredient | Amount | Purpose |
|---|---|---|
| Self-raising flour | 350g | Structure and lift |
| Unsalted butter | 85g | Rich flavour, flaky texture |
| Buttermilk | 175ml | Acidity for rise |
| Baking powder | 1 tsp | Extra lift |
| Caster sugar | 3 tbsp | Delicate sweetness |
“Use fresh ingredients and chill the butter for the best results.”
Preparing Your Kitchen and Oven
Start with a quick prep: preheat oven 220°C (200 fan) and clear a clean bench. This step is vital for a fast rise and an even bake when you make the Mary Berry recipe.
Line a large baking tray with baking parchment before you begin mixing. A lined tray stops sticking and gives the bases an even colour.
Keep your tools and ingredients close at hand. Working with buttermilk needs attention, so an organised workspace reduces spills and stress.
Ensure the oven is fully hot before you place the tray inside. That initial burst of heat helps achieve a professional finish and a good lift.
“Set up the tray and oven early to create a calm, efficient workflow.”
Tip: Preheat the oven and check the tray placement so that when the dough is ready you can move quickly and enjoy the baking.
Mixing the Dry Ingredients
Begin by sifting self-raising flour and 1 tsp baking powder into a large bowl. This removes lumps and aerates the mix so the scones rise evenly.
Stir in 3 tbsp of caster sugar until the dry ingredients look uniform. Even distribution of the sugar gives a consistent sweetness in each bite.
Make a well in the centre of the bowl when you are ready to form soft dough. Use a round-bladed knife or spatula to hold the dry mix back as you add the wet ingredient.

- Pour 175ml of buttermilk gently into the well.
- Bring the mix together with a light hand to form soft dough that is not too sticky.
- The goal is a tender dough that comes together easily for a quick turn into shapes.
“A light, well-mixed base makes all the difference to the final texture.”
Incorporating the Butter
Begin by working chilled butter into the dry mix until the texture looks like tiny crumbs. Use 85g of cold unsalted butter, cut into small cubes for speed and even distribution.
Achieving the right texture matters because it creates that tender crumb in the scones during baking. Rub butter into the flour and 1 tsp baking powder using your fingertips.
Achieving the Breadcrumb Texture
Keep your movements light. Rub butter flour with your fingertips until the mixture resembles fine breadcrumbs. The pieces of butter should be pea-sized or smaller.
Once it resembles fine breadcrumbs, stir in 3 tbsp caster sugar and any other dry ingredients. This completes the dry ingredients base for the dough.
- Tip: Rubbing the butter by hand distributes fat evenly and prevents a tough dough.
- You can use a pastry cutter if preferred, but rubbing by hand is traditional and reliable.
“A light, sandy mix gives the best rise and a tender, flaky crumb.”
Forming the Soft Dough
Use a round-bladed knife to unite the ingredients with soft, brief strokes so the dough remains tender. After you add the buttermilk, work only until the mix just comes together. This helps you form soft dough that is easy to handle.
Turn the mixture onto a lightly floured surface and knead very lightly to smooth. Too much pressure will knock out air and create dense bakes.
Keep the flour use minimal. Add a dusting only where the dough sticks. By avoiding excess flour, the scones stay moist and the sugar and butter pockets bake into a flaky crumb.
- Bring the mix together gently with the knife until you form soft dough.
- Handle dough as little as possible to keep the texture light.
- Turn out on a floured surface and pat to the required thickness without overworking.
“The secret is to form soft dough that is barely combined — let the butter pieces do the work.”
| Stage | Action | Why it matters |
|---|---|---|
| After adding buttermilk | Bring together with a round knife | Prevents overmixing and keeps butter pockets |
| Turning out | Use a lightly floured surface | Stops sticking and avoids extra flour |
| Kneading | Very light and brief | Maintains rise and tender crumb |
| Final check | Ensure dough is soft and easy to handle | Gives moist, flaky scones after baking |
Shaping and Cutting the Scones
Shape the dough with confidence: aim for even rounds that bake tall and tender. Work quickly so the butter remains cold and the dough keeps its lift.
The Importance of Thickness
Pat your dough out on a floured surface until it reaches a thickness of 2.5cm. This is the ideal height for a mary berry style result and helps you form soft dough that rises well in the oven.
Avoiding the Twist
Use a 5cm plain cutter and press straight down. Do not use a twisting cutter — cut scones without twisting to keep the edges neat and ensure even rise.
- Place cut rounds close together on a lined baking tray to encourage upward rise.
- Lightly brush tops with a little extra buttermilk for colour once baked.
- Always cut scones without twisting; this maintains structure and height.
| Action | Measurement | Why it matters |
|---|---|---|
| Pat dough | 2.5cm thick | Ideal height for a tall, tender crumb |
| Use cutter | 5cm plain cutter | Produces uniform rounds that bake evenly |
| Place on tray | Close together | Encourages upward rise, less spreading |
“Press straight down and avoid twisting the cutter for the best lift.”
Achieving the Perfect Rise
A tall, even rise comes from keeping the dough cool and cutting with care.

Press the cutter straight down without twisting so the edges do not seal. Using a twisting cutter will pinch the dough and stop an upward rise.
Handle dough gently and keep it the correct thickness. This preserves the air pockets and helps you get scones light and airy.
Place the rounds close together on the lined tray. When they bake side by side for 12 to 15 minutes, they push up rather than spread, giving a well risen, taller finish.
If results are flat, check the oven is fully preheated and use fresh self-raising flour. The mix of a hot oven and careful handling of the dough is what makes these buttermilk scones rise to perfection every time.
“A hot oven and a straight press with the cutter are the baker’s best friends.”
| Action | Why it works | When to use |
|---|---|---|
| Press cutter straight | Prevents sealed edges that block rise | At cutting stage |
| Handle dough gently | Keeps air and butter pockets intact | While forming and moving |
| Place close on tray | Encourages upward rise, less spread | Before baking 12–15 min |
| Preheat oven fully | Gives immediate lift and set crust | Just before baking |
Baking to Golden Perfection
Slide the tray onto the top shelf and let the oven do the work. A high position helps the tops colour while the centres rise.
Preheat oven to 220°C (200°C fan) so the scones get an immediate burst of heat. This temperature helps achieve a crisp exterior and a well risen interior.
Bake for 12 to 15 minutes. Check in the final minutes so you catch the perfect golden tone without over-browning.
If you chose to brush tops with buttermilk before baking, expect a subtle sheen and deeper colour on finish. A short, hot bake rewards careful timing.
“Place the tray high, watch the last few minutes closely, and remove when tops are golden and well risen.”
- Top shelf gives best colour and lift.
- 220°C (200 fan) is the recommended oven setting.
- Bake minutes: aim for 12–15 for an ideal result.
- Keep an eye on the tray during the final minutes.
| Action | Setting | Result |
|---|---|---|
| Place tray on top shelf | Top rack | Even browning on tops |
| Preheat oven | 220°C / 200°C fan | Quick rise and crisp crust |
| Bake time | 12–15 minutes | Well risen, golden finish |
| Brush tops before baking | Use buttermilk lightly | Shiny, richer colour |
Cooling and Serving Suggestions
Once the scones leave the oven, transfer them straight onto a wire rack and allow cool slightly. This step helps the interior set and keeps the crumb tender.
Using a wire rack allow air to circulate around each round. That prevents the bases from becoming soggy while they come down to the right temperature.
Classic Accompaniments
Serve while warm for the best experience. Split the scones and add a generous spoonful of clotted cream with strawberry jam.
- Once baked, transfer your scones to a wire rack and allow cool slightly before splitting them open.
- Serve these scones light and warm with clotted cream and jam for a proper afternoon treat.
- For a simpler option, try butter and honey — the sweetness balances the sugar from the bake.
- Always allow cool on the rack for a few minutes; this gives the crumb time to finish setting.
| Serve | Why it works | Best with |
|---|---|---|
| Clotted cream & jam | Rich, traditional balance | Strawberry jam, warm scones |
| Butter & honey | Simple, sweet finish | Fresh butter, mild honey |
| Plain with tea | Lets baking flavour shine | Strong black tea |
“Transfer to a rack and allow cool slightly so the centres stay tender and the bottoms stay crisp.”
Storing Your Freshly Baked Treats
Store your freshly baked rounds correctly to lock in their bakery-like texture. To keep scones fresh, wait until they are completely cool, then place them in an airtight container at room temperature for up to two days.
If you have more than you can eat, freeze the baked items rather than the raw dough. A sealed container or freezer bag will keep them for up to three months and preserve the crumb and flavour.
Avoid the refrigerator. Cold air dries the crumb and can ruin the delicate texture you achieved during baking.
When ready to serve, warm the frozen or stored treats briefly in a hot oven to refresh their texture and bring back that just-baked aroma. A short reheat restores the flaky interior and brightens the taste of any leftover buttermilk in the bake.
“Proper storage keeps your baking tasting as good as the day it was made.”
| Storage Method | Duration | Best use |
|---|---|---|
| Airtight container (room temp) | Up to 2 days | Everyday eating |
| Sealed freezer container | Up to 3 months | Make ahead or large batches of dough |
| Fridge | Not recommended | May dry out crumb — avoid |
Conclusion
Simple technique, a sharp cutter and the correct oven heat combine to give a tall, tender finish. Follow the 220°C (200°C fan) setting and bake for 12–15 minutes to get that golden top and light crumb.
Handle the dough very lightly and press the cutter straight down on the tray to keep the edges neat and ensure a strong rise. Allow the rounds to cool slightly on a wire rack before splitting to retain moisture in the centre.
With just a few ingredients, a 5cm cutter and careful timing, you can enjoy classic British baking at home. These scones make a simple, dependable treat whether served warm with jam and cream or eaten plain with tea.
FAQ
What flour should I use for the best results?
How do I get the butter to the right texture?
How wet should the dough be?
What’s the best way to cut the scones?
How thick should I make each scone?
What oven temperature and baking time work best?
Should I brush the tops before baking?
How can I tell when the scones are cooked through?
What’s the recommended cooling process?
How should I store leftover scones?
Any tips for handling the dough without overworking it?
Can I add sugar or other flavours?
Mary Berry Buttermilk Scones
These classic scones are ready in under 40 minutes from start to finish. The recipe yields soft, tall rounds with a rich, buttery crumb that pulls apart easily. The gentle tang of buttermilk lifts the dough and creates a tender texture.
Ingredients
- 350g self-raising flour
- 85g cold unsalted butter
- 175ml fresh buttermilk
- 1 tsp baking powder
- 3 tbsp caster sugar
Method
- Preheat the oven to 220°C (200°C fan) and line a baking tray with baking parchment.
- Sift the self-raising flour and baking powder into a large bowl.
- Stir in the caster sugar until evenly mixed.
- Make a well in the center of the dry ingredients and pour in the buttermilk.
- Gently bring the mixture together with a round-bladed knife until a soft dough forms.
- Rub the cold butter into the dry mix until it resembles fine breadcrumbs.
- Turn the dough onto a lightly floured surface and knead very lightly to smooth.
- Pat the dough out to a thickness of 2.5cm and use a 5cm plain cutter to cut out rounds.
- Place the rounds close together on the lined baking tray and brush the tops with a little buttermilk.
- Bake in the preheated oven for 12 to 15 minutes until golden and well risen.
- Transfer the baked scones to a wire rack to cool slightly before serving.