Learn how to bake a classic sponge that delivers light, airy results every time. This introduction walks you through the simple principles behind the iconic Mary Berry method and explains why careful technique matters more than tricks. The focus is on quality ingredients and steady, confident steps.
The recipe aims to help both novice and practiced bakers achieve professional results at home. Follow clear timings, gentle folding and correct oven temperature to keep the texture tender. With attention to detail, your cakes will rise evenly and remain soft.
This guide is practical, friendly and rooted in tradition. It covers the essentials you need to make a memorable sponge cake for any celebration, with tips to avoid common mistakes.
Key Takeaways
- Use quality ingredients and precise measurements for consistent results.
- Gentle folding keeps the batter light and encourages even rise.
- Correct oven temperature and timing are crucial to avoid collapse.
- Simple technique outperforms elaborate shortcuts every time.
- The method suits both beginners and experienced bakers alike.
Why Choose a Mary Berry Birthday Cake Sponge
This well-loved method delivers consistent, airy results that many home bakers trust. It combines simple technique with reliable timings so you get even rise and a tender crumb.
The recipe is prized because it keeps the process straightforward. These recipes explain each step clearly. You will find tips that prevent common pitfalls when making a classic sponge cake.
Many bakers choose these cakes for celebrations across the United Kingdom. They hold their structure well and look attractive when decorated. That makes them ideal for parties and family gatherings.
Choose this approach and you benefit from decades of tested guidance. The mary berry method focuses on quality ingredients and gentle handling. The result is a show-stopping cake that tastes as good as it looks.
- Clear instructions to avoid collapse.
- Light, even texture that holds fillings.
- Widely trusted recipes for reliable results.
Essential Ingredients for Success
Precision in ingredients makes a real difference. Measure flour, eggs and butter with care to get the texture right. Small errors cost rise and crumb quality.
Choosing the Right Butter
Baking spread gives a lighter rise than soft butter. Many bakers prefer spread for a taller, airier result. Use room-temperature butter or a baking spread as the recipe suggests.
Measuring Your Flour
Weigh flour where possible. Spoon and level when using cups to avoid packing. Too much flour makes a dense sponge cake rather than a tender crumb.
- Use the correct amount of baking powder and check tsp baking measures.
- Choose high-quality caster sugar for even sweetness.
- Add lemon zest for brightness and use eggs for structure.
- Combine in a large bowl or use a freestanding mixer until smooth and pale.
| Ingredient | Tip | Effect |
|---|---|---|
| Flour | Weigh or spoon and level | Correct rise and light crumb |
| Butter / Baking spread | Use baking spread for lighter rise | Softer, taller sponge |
| Baking powder | Measure tsp precisely | Consistent lift and volume |
| Caster sugar | Fine sugar for even mix | Balanced sweetness and texture |
Preparing Your Oven and Tins
A stable oven temperature and well-prepared tins mean the batter can rise without trouble. Always preheat the oven to 180°C/160°C fan/Gas 4 so the heat is steady by the time you bake.
Lightly grease two 20cm (8in) deep loose-bottomed sandwich tins. Then line the bases with non-stick baking paper to help the layers release cleanly.
Greasing and papering the tins prevents sticking and protects the edges during baking. Proper tin prep is essential for a reliable mary berry method and a neat final layer.

Set the correct oven temperature to ensure even rise and the golden colour we expect from this classic cake recipe. A fan oven at 160°C gives gentle, even heat.
- Preheat to 180°C/160°C fan/Gas 4 so the temperature is stable.
- Lightly grease both 20cm loose-bottomed sandwich tins and line bases with non-stick paper.
- Careful tin prep makes removing the finished cake much easier and reduces the risk of damage.
Mixing the Perfect Sponge Batter
Measure ingredients carefully, then use your mixer to transform the mixture into a pale, airy batter.
Using an Electric Mixer
Place the weighed ingredients into a large bowl or the bowl of a freestanding mixer. Use an electric whisk or mixer and beat for about 2 minutes.
Mix until the colour lightens and the texture looks smooth and slightly ribbon-like. The exact time will vary with your mixer, so watch for that pale change rather than the clock.
Divide the mixture evenly between the prepared tins. Even portions help both layers bake at the same rate and finish with matching height.
- Use an electric mixer to beat for about two minutes until the mixture is light and smooth.
- Adjust the time to suit your mixer—efficiency varies by model.
- Scrape the sides with a spatula so every bit of batter is included.
A well-mixed batter forms the foundation for a light, fluffy result. With careful mixing and even dividing, your cakes will be ready for the oven with confidence.
Baking to Golden Perfection
Aim for a steady, even bake so each layer rises to an even height and turns a warm, golden colour.
Place the tins on the centre shelf of a fully preheated oven. Bake for about 25 minutes until the tops look golden and well risen.
Check the cakes by pressing the top lightly; it should spring back when the baking is complete. You will also see the layers starting to shrink away from the sides of the tins.
Before you put the tins in, make sure the mixture is level. A flat top helps when you come to fill and stack the cakes later.
- Timing: Keep a close eye on the time — even a few extra minutes can dry the sponge.
- Top check: Press the centre gently; a spring-back indicates doneness.
- Release from tins: Look for the cakes pulling away from the sides as a key sign.
- Finish: A golden, even surface means the baking was successful.
Cooling Your Cakes Correctly
Cool the layers carefully to preserve texture and shape. Let the tins rest briefly so the steam settles and the crumb firms before you free the edges. This pause helps the top set and prevents the edge from tearing when you remove it.
Using a Wire Rack
Turn the cakes onto a wire rack and leave them to cool completely. A wire rack lets air circulate under the layers so the base does not go soggy.
Place each layer on the rack as soon as it is turned out. Allowing the cakes to cool on the rack for the full cooling period keeps the mixture light and ready for filling.

Removing from Tins
Allow your cakes to cool in the tins for a few moments before using a palette knife or a thin knife to run gently around the edge. This helps free the sides without damage.
Turn the tins over, peel off the paper and let the cakes cool completely on the rack. Cooling tins and cakes cool correctly preserves the top and edge and keeps the sponge structure intact.
- Allow cakes to cool in the tins a few minutes before freeing the sides with a knife.
- Use a wire rack so air circulates and cakes cool evenly underneath.
- Careful knife work around the edge reduces the risk of tearing the top or sides.
Creating the Whipped Cream Filling
For a light, stable filling, combine cold double cream with icing sugar and vanilla in a chilled bowl.
Keeping the bowl cold helps the cream reach soft peaks quickly. Use a hand‑held electric whisk and beat on medium speed until the mixture holds soft peaks.
Once soft peaks form, stop whisking. This keeps the texture tender and prevents over‑beating. The icing sugar adds a gentle sweetness that complements the airy sponge base.
Transfer around three‑quarters of the whipped cream into a piping bag fitted with a large plain nozzle. Reserve the remainder to spread between the layers or to finish the top.
- Combine cream, icing sugar and vanilla in a chilled bowl until soft peaks form.
- Use an electric whisk and whip until just firm enough to hold shape for filling.
- Place three‑quarters into a piping bag for neat, professional assembly.
- Keep the remaining cream chilled until needed to prevent collapse.
| Step | Why it matters | Tip |
|---|---|---|
| Chill bowl | Speeds whipping and gives stable peaks | Use metal or glass and chill for 10–15 minutes |
| Whip to soft peaks | Maintains light, spreadable texture | Stop early; peaks should bend slightly |
| Pipe three‑quarters | Gives neat, even filling and finish | Use large plain nozzle for smooth layers |
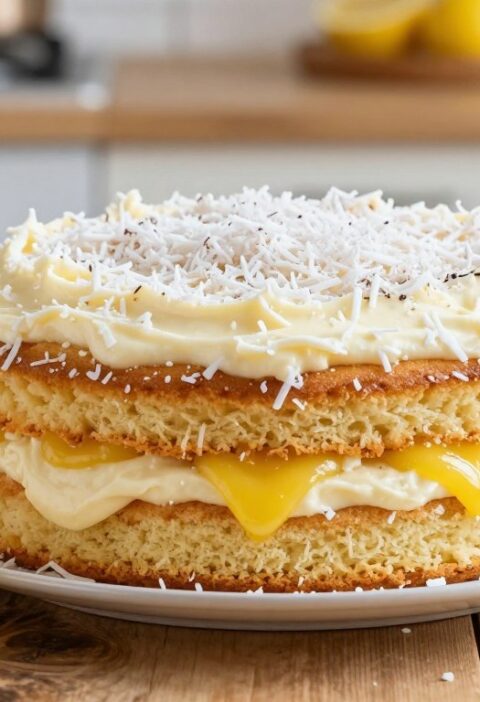
Assembling and Serving Your Celebration Cake
Choose the layer with the best top and spread the underside with a thin layer of jam.
Place that layer on your serving plate. Then put the second layer top downwards over the jam so the jam side contacts the filling.
Spread the remaining whipped cream across the exposed layer evenly, taking care not to press too hard. A light, even finish keeps the sponge soft and the texture airy.
You can assemble the whole thing up to 8 hours ahead. Wrap the cake and keep it chilled in the fridge until you are ready to serve.
- Choose the cake with the best top and spread the underside with jam before placing it on the serving plate.
- Assemble by placing the second sponge top downwards on the cream so the jam side touches the filling.
- Prepare up to 8 hours ahead; keep wrapped in the fridge until serving.
- Always serve at room temperature so the sponge and cream have the best texture.
- Sprinkle a little extra sugar on the top just before serving for a neat, professional finish.
Conclusion
A little attention to timing and technique transforms basic pantry staples into something special.
Mastering this recipe brings a classic British tradition into your home. Use good sugar and fresh ingredients, and trust accurate oven temperatures for consistent results.
By following the steps you can produce a light sponge cake that is soft and even. These methods help you bake with confidence for parties or a simple afternoon tea.
Enjoy serving the cake to friends and family. With practice, your baking skills will grow and your cakes will delight every time.
FAQ
How do I ensure my sponge rises evenly?
Can I use self‑raising flour instead of plain flour and baking powder?
What’s the best way to measure flour accurately?
How long should I beat the sugar and eggs?
Is it important to preheat the oven and use a fan setting?
How can I tell when the cake is cooked through?
What’s the best method for cooling layers?
How do I remove cakes from tins without breaking the edges?
How do I make stable whipped cream for filling?
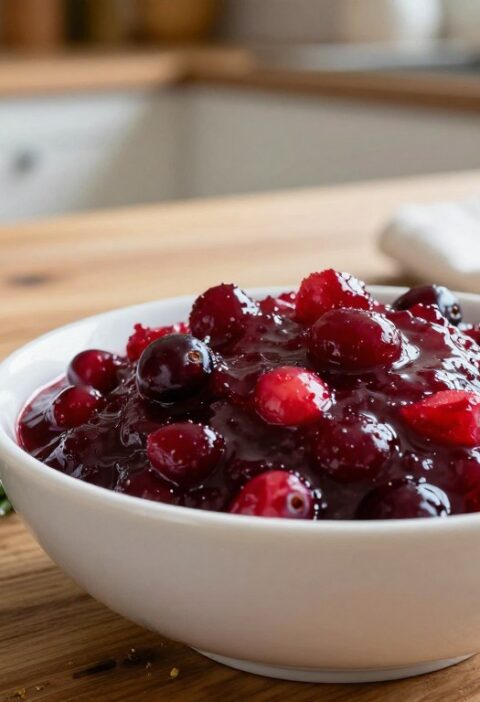
Can I add jam between the layers, and which type works best?
How long can a filled cake sit before serving?
Any tips for trimming a domed top before sandwiching layers?
Mary Berry Birthday Cake Sponge
Learn how to bake a classic sponge that delivers light, airy results every time using the iconic Mary Berry method.
Ingredients
- 200g plain flour
- 200g baking spread or room-temperature butter
- 200g caster sugar
- 4 large eggs
- 2 tsp baking powder
- Zest of 1 lemon
- 300ml double cream
- 2 tbsp icing sugar
- 1 tsp vanilla extract
- Jam for filling
Method
- Preheat the oven to 180°C/160°C fan/Gas 4.
- Lightly grease two 20cm (8in) deep loose-bottomed sandwich tins and line the bases with non-stick baking paper.
- In a large bowl, measure and combine the flour, baking spread, caster sugar, eggs, baking powder, and lemon zest.
- Using an electric mixer, beat the mixture for about 2 minutes until it is pale and smooth.
- Divide the mixture evenly between the prepared tins.
- Bake in the preheated oven for about 25 minutes until golden and well risen.
- Check the cakes by pressing the top lightly; it should spring back when done.
- Allow the cakes to cool in the tins for a few minutes before transferring them to a wire rack to cool completely.
- In a chilled bowl, combine the double cream, icing sugar, and vanilla extract, and whip until soft peaks form.
- Place one cake layer on a serving plate, spread the underside with a thin layer of jam, and top with whipped cream.
- Place the second layer on top, jam side down, and spread the remaining whipped cream on top.
- Serve at room temperature and enjoy!