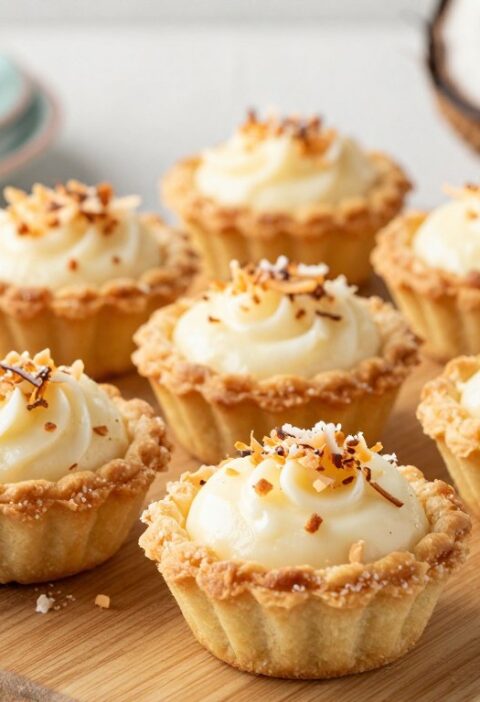
Light, soft and reliably risen — this introduction explains how a classic sponge can be adapted for special diets without losing charm. The method focuses on balance and gentle mixing to avoid dry or crumbly results. The result is a tender crumb that feels comforting with every bite.
Perfect for birthdays, afternoon tea or a simple treat, these small sponge cakes give a familiar lift to your tea table. The steps are straightforward, with a short baking time and clear tips so even new bakers can reach a professional finish.
Inspired by the dependable style of mary berry, this recipe shows that gluten‑aware baking can still be full of flavour and texture. Expect crowd‑friendly cakes that are simple to prepare and pleasing to serve.
Key Takeaways
- These cupcakes are light, moist and evenly risen.
- The method prevents dryness and crumbling.
- Simple steps suit both new and experienced bakers.
- Quick baking time makes them convenient for events.
- Designed to keep flavour and texture despite dietary limits.
Why You Will Love This Mary Berry Gluten Free Cupcakes Recipe
The method here focuses on gentle mixing and balance, resulting in reliably soft, springy cakes. This keeps the crumb light and moist and avoids the heavy texture common in alternative sponge mixes.
You’ll love how easy these cakes are to make. Simple ingredients and clear steps mean they are an easy make for bakers of any level.
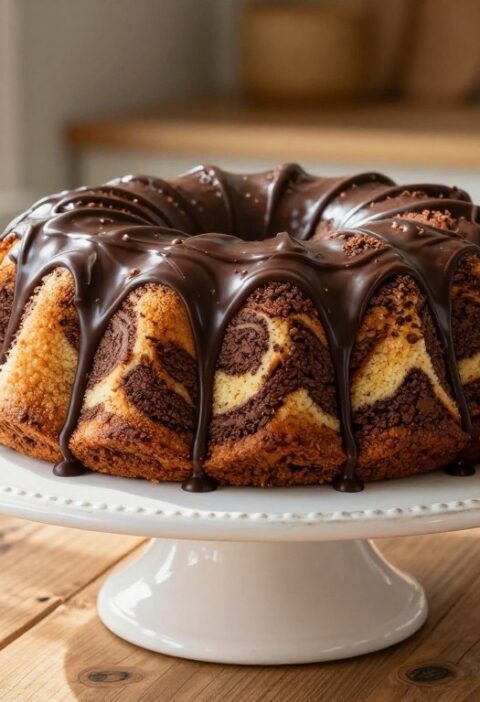
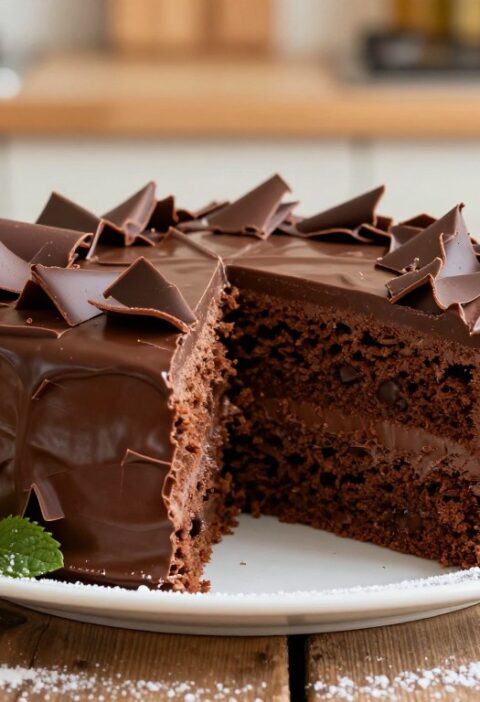
The base is versatile. Stir in chocolate for a richer taste or finish with classic buttercream or a chocolate icing to suit your occasion.
They are ideal for tea, birthdays or a quick afternoon treat. With a short prep and bake time, you can have fresh cakes ready in under an hour.
- Reliable rise: techniques that work every time.
- Quick to make: minimal fuss and fast results.
- Flexible flavours: swap in chocolate or different icings.
Essential Ingredients for Perfect Gluten Free Sponge
Start with accurate measures and simple staples to get a light, even sponge. Precise weighing matters: 175g of gluten-free self-raising flour gives the structure your cakes need to rise reliably.
Dry ingredients
- 175g self-raising flour — sifted to remove lumps.
- A pinch of salt and the recommended amount of baking powder for extra lift.
- For a chocolate twist, add 40g cocoa powder mixed into a smooth paste with a little boiling water.
Wet ingredients
- 175g softened butter (or margarine) beaten with 175g caster sugar in a large bowl until pale and airy.
- 3 large eggs added one at a time to bind the batter.
- 2 tbsp milk and 1 tsp vanilla extract for moisture and flavour; add an extra tbsp milk if the batter needs loosening.
Keep butter at the right consistency so it creams easily with sugar and traps air. Measure each ingredient carefully — the flour-to-butter ratio is crucial for soft, springy cupcakes.
Must Have Baking Equipment
Good kit makes all the difference when you want even, tidy cupcakes every time.
A sturdy muffin tin keeps each cake the same shape and helps them bake evenly. Use high‑quality paper cupcake cases to stop batter sticking and to make serving simple.
An electric hand mixer or a freestanding mixer will beat butter and sugar to a fluffy texture much faster and with less effort. A spatula is essential for scraping the bowl so no batter is wasted.

Measure accurately with cups and spoons. An ice‑cream scoop helps portion batter so each case contains the same amount. Finish decorations with a piping bag and star nozzle for neat swirls on chocolate or vanilla cakes.
- Wire cooling rack to cool cakes evenly and avoid soggy bases.
- Reliable tin and good cases to ensure tidy removal and display.
- Portion tools make baking consistent across different recipes.
| Tool | Why it matters | Tip | Best for |
|---|---|---|---|
| Muffin tin | Ensures even heat and uniform shape | Use a heavy‑gauge tin for consistent results | All cupcake and muffin bakes |
| Cupcake cases | Prevents sticking and eases serving | Choose grease‑resistant paper for chocolate cakes | Decorated or plain cakes |
| Mixer | Creates light, aerated batter | Hand mixers are fine for small batches | Butter and sugar creaming |
| Piping bag & nozzle | Produces neat, professional finishes | Use a star nozzle for classic swirls | Chocolate and buttercream toppings |
For a quick guide to a popular variation, try the red velvet cupcakes link for inspiration.
Step by Step Preparation Method
Get the oven hot and the muffin tin ready—this small prep step makes a big difference to the final cakes.
Preparing the Oven
Preheat to 180°C (160°C fan) and line the tin with cupcake cases. This ensures a steady temperature and tidy removal once baked.
Mixing the Batter
In a large bowl, cream the butter with caster sugar until pale and fluffy. Add the eggs one at a time, mixing well after each addition so the mixture stays smooth.
Gently fold in the flour and baking powder. Do this slowly to avoid overworking the mixture and making the sponge dense.
Baking Times
Spoon the batter into cases, filling each about three‑quarters full. Bake for 18–20 minutes until lightly golden and the centres spring back when pressed.
Check with a skewer to ensure they are cooked through. Transfer the cakes to a wire rack to cool completely before adding icing or buttercream.
| Step | Action | Tip | Time |
|---|---|---|---|
| Prep | Preheat oven and line tin | Use good quality cupcake cases | 5 minutes |
| Mix | Cream butter & sugar, add eggs, fold in flour | Don’t overmix the batter | 10 minutes |
| Bake | Fill cases and bake | Skewer to test centres | 18–20 minutes |
| Finish | Cool on a rack, then ice | Wait until completely cool for neat icing | 15–20 minutes |
Tips for Achieving the Perfect Rise
Rise depends as much on technique as on ingredients — master both and you win every bake. Follow a few clear checks to avoid sinks, dense crumbs or uneven tops. These simple habits make a real difference to your final cakes.
Avoiding Common Pitfalls
Bring key ingredients to room temperature. Softened butter and room temperature eggs mix more smoothly, creating a light batter that traps air.
Measure flour carefully. Spoon and level or weigh flour to avoid adding too much. Excess flour dries the sponge and limits rise.
Be gentle once the flour goes in. Fold with a spatula until just combined. Overmixing develops structure that makes the sponge dense.
Mind the oven and timing. Preheat fully and avoid opening the oven in the first 15 minutes. A sudden temperature change can make cakes sink.
If tops brown too fast, loosely tent with foil for the final few minutes. Always let cakes rest in the tin for about 5 minutes, then transfer to a rack to cool completely before icing or adding buttercream.
| Problem | Likely cause | Quick fix |
|---|---|---|
| Sinking centre | Oven door opened or underbaked | Resist opening door; increase bake time by 2–3 minutes |
| Flat, heavy sponge | Overmixed after adding flour | Fold gently and stop when streaks disappear |
| Too brown on top | Oven temperature high or long bake | Tent with foil for last 3–5 minutes |
Creative Variations and Flavour Twists
Try a few easy flavour swaps to lift the base mix and make each cake feel new. For a chocolate version, add 25g cocoa powder to the dry ingredients and reduce the flour slightly to keep the balance right.
Add fresh lemon or orange zest to the batter for a bright citrus note. Spoon a teaspoon of jam into the centre of each case before baking to create a fruity surprise inside.
For lighter toppings, swap buttercream for Greek yogurt sweetened with a little icing sugar. This keeps the top fresh and less rich.
Use a dairy-free baking margarine and almond milk for a non-dairy option. Finish with chopped pistachios or colourful sprinkles to add texture and visual appeal.
Enhance a classic vanilla buttercream with a drop of extract and a few drops of food colouring for themed events. For a richer idea, see the all-in-one chocolate cake for inspiration.
How to Decorate Your Cupcakes
A neat finish lifts the bake from simple to special, and decorating is where small touches shine. Start with completely cool cakes and a tidy workspace. This prevents the icing from slipping and keeps your tops tidy.
Buttercream Basics
To make a smooth buttercream, beat softened butter with icing sugar and a splash of tbsp milk until the mixture is light and creamy.
Add a little vanilla extract (about a tsp) to lift the flavour. Mix in a bowl then taste and adjust sugar or milk to get the right texture.
If you prefer chocolate, fold in a spoonful of cocoa for a simple twist.
Piping Techniques
Fit a piping bag with a star nozzle for classic swirls on the top of each cake. Practice on a plate to learn the pressure needed for even swirls.
No piping bag? Use a palette knife to spread the icing evenly. For a two-toned effect, spoon two different colours side-by-side into the bag before you pipe.
- Finish: Scatter sprinkles or chocolate flakes for texture.
- Tip: Work on cool cakes and chill buttercream slightly if it gets too soft.
Storing and Freezing Your Bakes
How you store your cakes matters as much as how you bake them. Store unfrosted cupcakes in an airtight container at room temperature for up to two days to keep them soft and moist.
If you have iced them already, pop finished cakes into the fridge. Iced cupcakes with buttercream or other icing will keep well for up to four days when refrigerated.
For longer storage, wrap unfrosted sponges tightly in cling film then place them in a freezer bag. They freeze well for up to one month.
When ready to serve, thaw frozen sponges at room temperature naturally. Do not add fresh icing until they are fully thawed. If you like a slightly warm cake with tea, warm an unfrosted sponge in the microwave for 10–15 seconds.
| Situation | Storage | Max time |
|---|---|---|
| Unfrosted | Airtight container, room temperature | Up to 2 days |
| Iced (buttercream) | Refrigerate, covered | Up to 4 days |
| Unfrosted (long term) | Wrapped + freezer bag | Up to 1 month |
Nutritional Information and Serving Sizes
Each cupcake is approximately 260 kcal, a handy guide when you want a modest treat. The typical nutritional split is about 32g of carbohydrates, 13g of fat and 4g of protein per portion.

A standard batch makes 12 cupcakes, ideal for a small gathering or family tea. You can bake mini cupcakes to cut portion size and enjoy the chocolate flavour with less sugar per serving.
- Use gluten‑free self‑raising flour and caster sugar to keep classic taste while meeting dietary needs. Check baking powder and cocoa powder labels for certification.
- If you’re watching sugar, slightly reduce caster sugar without affecting rise.
- Adding buttercream, icing or sprinkles will raise calories and sugar — ice sparingly if you prefer a lighter top.
- Keep key items at room temperature for best mixing and texture.
| Yield | Per cupcake | Notes |
|---|---|---|
| 12 cupcakes | ~260 kcal; 32g carbs; 13g fat; 4g protein | Values rise with icing or extra toppings |
Conclusion
Good ingredients and calm technique are the real shortcuts to consistent, crowd‑pleasing bakes. The mary berry approach shows you can keep flavour and texture while following a clear method. This makes the whole process an easy make for any baker.
Follow the steps here and this recipe will reward you with light, springy cakes suitable for birthdays, afternoon tea or a simple treat. Use quality staples, measure carefully and keep your movements gentle when folding.
Enjoy experimenting with flavours and decorations. With these tips, baking becomes reliable and fun, and you will find more recipes that suit your taste and occasions.
FAQ
Can I use self-raising gluten-free flour instead of adding baking powder?
What is the best fat to use — butter or margarine?
How do I prevent cupcakes from sinking in the middle?
Can I make the batter with cocoa powder for chocolate cupcakes?
How long should cupcakes cool before icing?
What are simple buttercream measurements for 12 cupcakes?
Can I freeze uniced cupcakes and for how long?
Are cupcake cases important and which types are best?
How do I adapt the recipe for a fan oven setting?
What’s the ideal oven temperature and baking time for small cupcakes?
How can I make vanilla cupcakes more flavourful without adding sugar?
What are quick decoration ideas for children’s parties?
Can I replace some sugar with caster sugar alternatives?
How much milk should I add if the batter seems too thick?
Are there tips for achieving consistent cupcake sizes?
Mary Berry Gluten Free Cupcakes
Light, soft and reliably risen gluten-free cupcakes that are perfect for birthdays, afternoon tea or a simple treat.
Ingredients
- 175g gluten-free self-raising flour, sifted
- A pinch of salt
- Baking powder (recommended amount)
- 175g softened butter or margarine
- 175g caster sugar
- 3 large eggs
- 2 tbsp milk
- 1 tsp vanilla extract
- 40g cocoa powder (optional, for chocolate version)
Method
- Preheat the oven to 180°C (160°C fan) and line a muffin tin with cupcake cases.
- In a large bowl, cream the softened butter with caster sugar until pale and fluffy.
- Add the eggs one at a time, mixing well after each addition to keep the mixture smooth.
- Gently fold in the sifted gluten-free flour and baking powder, being careful not to overmix.
- Spoon the batter into the cupcake cases, filling each about three-quarters full.
- Bake for 18–20 minutes until lightly golden and the centres spring back when pressed.
- Check with a skewer to ensure they are cooked through.
- Transfer the cakes to a wire rack to cool completely before icing or adding buttercream.