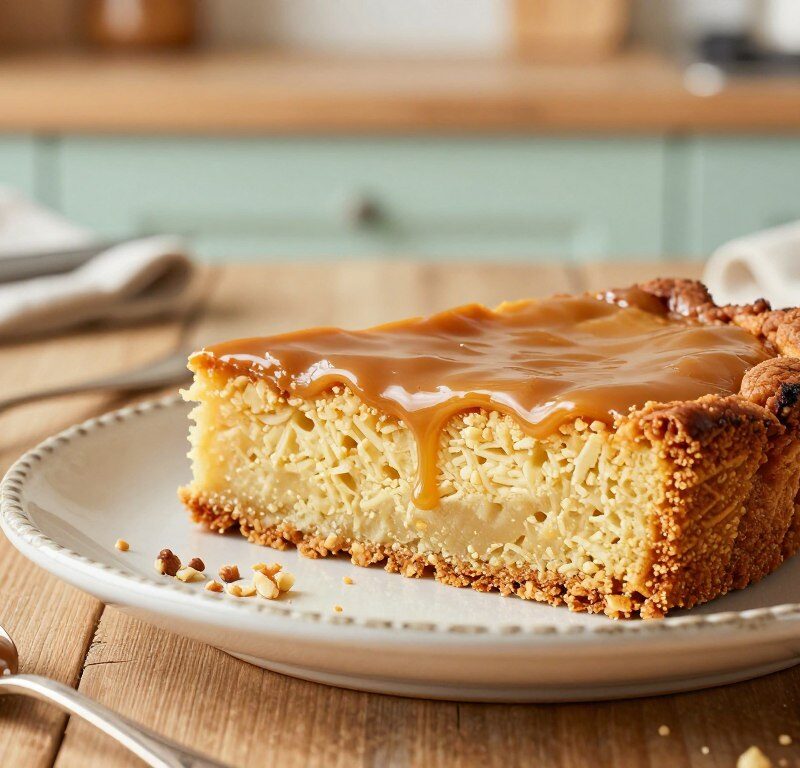
This classic British bake is a soft, buttery sponge with warm caramel notes and a glossy, sweet icing. It feels like a slice of nostalgia and suits afternoon tea, parties or school events with ease.
Simple to make and easy to share, the Mary Berry touch keeps the texture tender and the flavour well balanced. The recipe feeds a crowd and remains a go-to for home bakers across the UK.
The balance of sweetness and warmth makes it ideal for celebrations or a cosy treat at home. Expect a moist crumb, buttery icing and a comforting scent that fills the kitchen.
Key Takeaways
- Comforting classic: a nostalgic, crowd-pleasing dessert.
- Great for gatherings: feeds a large group with minimal fuss.
- Balanced flavour: buttery sponge with warm caramel notes.
- Trusted method: mary berry’s approach ensures reliable results.
- Versatile serve: perfect for afternoon tea, parties or school events.
The Appeal of the Mary Berry Butterscotch Traybake
This beloved traybake shines because it slices into tidy squares that suit any gathering.
Easy to portion: The recipe is built for sharing, so cutting neat pieces is simple and stress-free. That makes it ideal for parties, school events and tea.
Comforting texture: A moist, tender sponge gives every bite a pleasing crumb. The soft base holds the icing well and prevents sogginess.
Reliable and fuss-free, these recipes produce consistent results even for new bakers. The glaze adds richness and lifts this cake from everyday to special.
- Feeds a crowd with even, predictable portions.
- Simple steps that reward with classic flavour.
- Perfect balance of sponge and sweet icing.
| Feature | Why it works | Ideal for |
|---|---|---|
| Even slices | Firm, even bake that holds shape | Parties & school events |
| Moist sponge | Soft crumb with lasting freshness | Afternoon tea |
| Rich icing | Adds deep flavour and a glossy finish | Celebrations |
Essential Ingredients for Your Sponge
A great sponge begins with simple, well-measured ingredients you can trust. Use fresh staples and a clear routine to get the light, tender crumb this recipe needs.
Dry ingredients
In a large bowl sift 225g of self-raising flour with 1 teaspoon of baking powder. Add 225g of light brown sugar and mix to combine. Ensuring the flour is fresh matters because the baking powder inside gives the sponge its rise.
Wet ingredients
Beat together 225g of soft butter and 4 large eggs until pale and smooth. Use a large bowl so you can cream the butter and sugar thoroughly — this step shapes the texture of the sponge.
Tip: Measure flour and sugar accurately for a balanced batter. High-quality eggs and butter help recreate the signature tender crumb recommended by mary berry.
| Ingredient | Amount | Purpose |
|---|---|---|
| Self-raising flour | 225g | Structure and rise (contains baking powder) |
| Light brown sugar | 225g | Sweetness and moisture for flavour |
| Butter | 225g, soft | Richness and tender crumb |
| Eggs | 4 large | Bind and add lift |
Preparing Your Baking Tin and Oven
Take a few careful steps before you mix the batter — a properly prepared tin and a hot oven set the scene for success.
Preheat oven to 180°C (350°F) before you start mixing. Doing this means the baking begins immediately and helps the sponge rise evenly.
Line a 9×12 inch traybake tin with baking parchment. Make sure the parchment fits neatly into the corners so the cake lifts out easily once cooled.
Mary Berry stresses that a prepared tin avoids sticking and promotes an even bake across the whole surface. Set the oven temperature precisely for consistent, golden-brown results every time.
- Preheat oven to 180°C (350°F) before mixing the batter.
- Use a well-fitted sheet of parchment in the prepared tin.
- Check the oven temperature with an oven thermometer if needed.
| Step | Why it matters | Quick tip |
|---|---|---|
| Preheat oven to 180°C (350°F) | Ensures immediate, even rising and correct bake time | Turn oven on before you assemble ingredients |
| Line the 9×12 inch tin | Prevents sticking and speeds removal after cooling | Press parchment into corners for a smooth fit |
| Check temperature | Consistent heat gives predictable colour and texture | Use an oven thermometer for accuracy |
Mixing the Perfect Batter
Start by building lightness into the batter — good aeration makes for a springy, tender cake.
Creaming Technique
In a large bowl, beat 225g of butter and 225g of light brown sugar for about 2 minutes until the mixture looks pale and creamy.
Tip: Use a stand mixer or a hand whisk on medium speed to trap air efficiently.
Add the 4 eggs one at a time, beating well after each addition. This step helps the texture stay light and even.
Use a spatula to scrape down the sides of the bowl frequently. That ensures all ingredients are worked into the batter and nothing is left clinging to the bowl.
- Once the batter is smooth, pour it into your prepared tin.
- Use a spatula to level the surface so the cake bakes evenly.
- Be careful not to overmix after you add the flour — too much mixing will make a dense cake rather than a light sponge.
The creaming method is central to the mary berry approach because it traps tiny bubbles in the butter and sugar. Those bubbles expand in the oven and give the sponge its lift.
Baking to Golden Perfection
Aim for an even, golden colour and a sponge that feels springy when touched at the centre. Bake in the preheated oven for about 35–40 minutes, though some recipes call for an initial check at 25–30 minutes. Use the gentle press test — the cake should spring back in the centre when you touch it.
Look for a golden top and a slight shrink away from the edges of the tin. These signs show the bake is complete and that the crumb set correctly. Oven performance varies, so always test the centre before removing the traybake.
Once removed, let the tray cool slightly in the tin for a few minutes. Then lift using the lining paper and place the cake on a wire rack to cool completely. Removing the paper while still warm stops the edges from going soggy.
- Bake your traybake for 25–30 minutes to check initial colour and texture, then continue to 35–40 minutes if needed.
- A perfectly baked sponge will feel firm and springy — a hallmark of the mary berry approach.
- Allow the cake to cool completely on a wire rack before icing or storing.
| Check | What to look for | Action |
|---|---|---|
| 25–30 minutes | Golden colour, beginning to spring back | Test centre; continue baking if soft |
| 35–40 minutes | Firm, springs back, edges pulling away | Remove from oven and cool slightly in tin |
| Cooling | Warm lift from tin, then cool completely | Transfer to wire rack; remove lining paper while warm |
Crafting the Smooth Butterscotch Icing
Finish matters: a silky icing gives the cake its signature shine and rich taste. Follow a few quick steps to make a glossy glaze that sets neatly on top.
Melting the Butter and Sugar
To make icing, gently heat 75g of butter, 100g of light brown sugar and 50–75ml of milk in a small saucepan. Stir until the mixture is melted and smooth.
Simmer for 1 minute so the sugar fully dissolves — this helps prevent grainy texture once the icing sugar is added.
Finishing the Glaze
Remove the pan from the heat and sift in 150g of icing sugar. Whisk briskly with a spoon or whisk until the mixture is glossy and lump-free. Add a splash of vanilla if you like.
When the cake is cool completely, use a spatula to spread the warm icing over the surface. Work quickly: the glaze sets fast as it cools.
“Use 75g of butter for a rich, buttery flavour that defines this classic icing.”
If the icing thickens too much, warm it very gently to loosen it again. If the cake is not allowed to traybake cool, the icing will sink in, so be sure the sponge is fully cooled first.

| Stage | What to do | Why it matters |
|---|---|---|
| Heat butter & sugar | 75g butter, 100g brown sugar, milk; melt and stir | Creates smooth base for icing sugar |
| Simmer | Gently for 1 minute | Dissolves sugar and avoids graininess |
| Whisk in icing sugar | 150g sifted; whisk until glossy | Gives smooth, spreadable glaze |
| Spread on cake | Use a spatula on the cake once cool completely | Prevents the icing from soaking into the sponge |
Tips for Achieving the Ideal Texture
A few careful checks during baking will help you get a soft, even crumb every time.
Handle the batter gently once the flour is folded in. Too much mixing tightens the gluten and makes the sponge dense.
Keep an eye on the oven and check the centre by pressing lightly. The cake should spring back and feel slightly firm.
- Avoid overbaking: test early so the sponge stays light and moist.
- If the edges brown too quickly, loosely tent the tin with foil to protect the cake from the heat of the oven.
- Add a splash of milk to the batter if the sponge seems dry; it helps retain moisture.
- Apply the icing while it is still pourable for a smooth, even finish across the traybake.
- Use fresh baking powder and properly measured flour to secure a steady rise and airy crumb, as advised by Mary Berry.
- Have the surface ready before you make the glaze so the icing does not set too fast.
“Press the centre gently — if it springs back, the bake is done.”
| Check | Sign | Fix |
|---|---|---|
| Centre | Gives slight spring | Remove from oven |
| Edges | Browning fast | Tent with foil |
| Icing | Sets too fast | Prepare surface first |
Creative Variations to Try
A few simple swaps—sweet syrups, chopped nuts or chocolate—turn a plain bake into something special. These small changes keep the basic method but add new depth to flavour and texture.
Flavour Twists
Spicy ginger boost: Fold 4 pieces of chopped stem ginger and 2 tablespoons of ginger syrup into the batter for a lively, warming hit. You can also add 1 teaspoon of ground ginger from a jar for extra aroma.
Deeper, treacly notes: Replace part of the sugar with a tablespoon or two of treacle to give a rich, molasses-like flavour that pairs well with baking powder in the mix.
Chocolate and nuts: For a more indulgent slice, fold in 6 tablespoons of chocolate chips or add chopped pecans or walnuts for crunch and healthier fats.
- Swap vanilla for almond extract and add a pinch of ground cinnamon for warmth.
- Try toffee pieces or chopped stem for a sticky, fruity contrast to the icing.
- Use a light hand with add-ins so the sponge stays soft and even.
Tip: Keep proportions similar to the original recipe so the balance of butter, self-raising flour and eggs remains correct. Little tweaks deliver big flavour without extra fuss.
Storing and Freezing Your Traybake
How you store and freeze the sponge determines its texture and the ease of later icing.
At room temperature, keep the cake in an airtight container for up to 4 days to retain a soft, light crumb. Store it in a cool, dry room away from direct sunlight so flavours stay fresh.

If you plan to freeze, do so before adding the icing. Wrap the un-iced sponge tightly in cling film and foil to prevent freezer burn.
Frozen sponge can keep for up to 3 months. Thaw at room temperature before you finish with the icing and cut into neat squares.
“Avoid refrigerating the slice — cold air can dry out the sponge and make the icing less glossy.”
- Keep whole or cut: wrap individual squares in parchment for quick snacks or lunchboxes.
- Tin tip: remove the cake from the tin once cooled and wrap it to store better.
- mary berry advice: do not chill the iced cake; room temperature is kinder to texture and shine.
| Storage method | Duration | Best practice |
|---|---|---|
| Airtight container (room) | Up to 4 days | Keep in a cool, dry place out of direct sunlight |
| Freezer (un-iced sponge) | Up to 3 months | Wrap well; thaw at room temperature before icing |
| Individual squares | 4 days (room) | Wrap in parchment then place in container for easy serving |
Conclusion
A reliably soft sponge and glossy icing make this treat a go-to for casual and special occasions.
Follow the simple steps and use quality ingredients to recreate this classic cake at home. Keep to the creaming method, check your oven temperature and finish with a smooth icing using sifted icing sugar for the best shine.
Whether you stick to the traditional mary berry recipe or tweak the flavours, this traybake rewards clear technique and modest effort. It suits teas, parties and lunchboxes, and freezes well if made ahead.
Enjoy the baking, share the slices, and take pride in a dependable recipe that brings warm, nostalgic flavour to any table.
FAQ
What size tin should I use for this traybake?
Can I swap self‑raising flour for plain flour?
How do I know when the sponge is cooked?
What’s the best way to make the butterscotch icing smooth?
Can I add stem ginger or other flavours to the batter?
How long does this traybake keep and can it be frozen?
My sponge sank in the middle — what went wrong?
Can I make the icing ahead and store it?
Is it possible to make this recipe dairy‑free?
How should I cut the traybake into neat squares?
Mary Berry Butterscotch Traybake
This classic British bake is a soft, buttery sponge with warm caramel notes and a glossy, sweet icing. It feels like a slice of nostalgia and suits afternoon tea, parties or school events with ease.
Ingredients
- 225g self-raising flour
- 1 teaspoon baking powder
- 225g light brown sugar
- 225g soft butter
- 4 large eggs
- 75g butter (for icing)
- 100g light brown sugar (for icing)
- 50-75ml milk (for icing)
- 150g icing sugar
Method
- Preheat oven to 180°C (350°F).
- Line a 9×12 inch traybake tin with baking parchment.
- In a large bowl, sift together the self-raising flour and baking powder.
- Add the light brown sugar and mix to combine.
- In another bowl, beat together the soft butter and eggs until pale and smooth.
- Add the butter mixture to the flour mixture and mix until just combined.
- Pour the batter into the prepared tin and level the surface.
- Bake in the preheated oven for 35-40 minutes, checking at 25-30 minutes.
- Once baked, let the traybake cool slightly in the tin before transferring to a wire rack.
- To make the icing, melt the butter, light brown sugar, and milk in a saucepan until smooth.
- Simmer for 1 minute, then remove from heat and sift in the icing sugar, whisking until glossy.
- Spread the icing over the cooled cake using a spatula.