This classic spread is smooth, tangy and buttery. It delivers bright citrus flavour in a short space of time, ideal for bakers who need quick results.
The recipe is designed to be simple yet professional, using a few high‑quality ingredients to beat any shop‑bought version.
The method takes only a quarter of an hour and suits both beginners and confident cooks. Follow the steps to balance tart fruit with rich butter for a silky, glossy finish.
This guide will walk you from choosing ripe fruit to the final cooling stage, so you can achieve consistent success in the kitchen. Expect a vibrant berry lemon curd that lifts scones, cakes and desserts alike.
Key Takeaways
- Quick, accessible recipe that produces professional results.
- Uses simple, high‑quality ingredients for superior flavour.
- Short preparation time suits busy home bakers.
- Step‑by‑step guidance helps beginners achieve a silky texture.
- Perfect for brightening tarts, puddings and morning bakes.
The Appeal of Mary Berry 15 Minute Lemon Curd
A classic citrus spread has long been a star of British afternoon tea, prized for its zing.
First created in England during the early 19th century, this lemon curd classic arrived as a luxury for teatime.
What makes the mary berry lemon version so popular is its bright, tangy flavour and smooth, velvety texture. It lifts simple toast or scones and brings freshness to light sponge cakes.
- Homemade curd feels luxurious compared with mass-produced jars.
- It balances sweet and tart notes for versatile use in desserts.
- The berry lemon twist is ideal for adding colour and depth to pastries.
Whether for a formal tea or a quiet breakfast, this berry lemon curd adds a sophisticated, crowd‑pleasing touch.
Why Homemade Curd Beats Store Bought
Making your own curd gives you control over taste, texture and ingredients in a way bought jars cannot.
Ingredient quality matters. A mary berry lemon spread made at home lets you avoid preservatives and use real butter and fresh eggs. The result is richer and more silky than many commercial pots.
Freshness makes a big difference. Homemade lemon curd has a brighter flavour that supermarket versions struggle to match. You will notice the clean citrus lift and smooth mouthfeel.
- Control of ingredients for a natural, authentic taste.
- Better texture from real butter and egg yolks.
- A simple process that produces professional results.
| Feature | Homemade | Store bought | Benefit |
|---|---|---|---|
| Ingredients | Real butter, fresh eggs | Preservatives, stabilisers | Cleaner flavour |
| Texture | Silky, glossy | Sometimes gummy | Better mouthfeel |
| Time | Quick to make | Ready to use | Satisfaction of making |
| Customisation | Easy to tweak | Fixed flavour | Personal touch |
Follow this mary berry guide and you will soon know how to make lemon curd that outshines jars on the shelf.
Essential Ingredients for Success
The secret to a glossy curd is not technique alone but quality ingredients.
Use two large, fresh lemons for both zest and juice. The zest contains oils that add depth you cannot get from bottled juice.
Measure 150g caster sugar so the mixture sweetens evenly and dissolves quickly. Caster gives a fine texture that suits this recipe.
Two large eggs provide the thickening structure, while 100g unsalted butter adds the creamy, glossy finish that defines a quality curd.
If the mix seems too firm, stir in about 1 tbsp water to loosen the texture without diluting flavour.
- 2 large lemons — zest and juice for best flavour.
- 150g caster sugar — dissolves smoothly.
- 2 large eggs — thickening agents.
- 100g unsalted butter — for richness.
- 1 tbsp water — to adjust consistency.
| Ingredient | Amount | Role | Tip |
|---|---|---|---|
| Fresh lemons | 2 large | Zest and juice | Use ripe, heavy fruits |
| Caster sugar | 150g | Sweetening & texture | Dissolves quickly |
| Eggs | 2 large | Thickening | Room temperature works best |
| Unsalted butter | 100g | Enriches & smooths | Add in small cubes |
Necessary Kitchen Equipment
Before you start, gather a few reliable tools to make the process smooth and safe.
Collecting the right kit will help you turn basic ingredients into a silky curd. A small saucepan and a heatproof mixing bowl create a gentle double boiler. This setup keeps heat steady so eggs do not scramble.
Use a good whisk to blend eggs, sugar and butter until smooth. A fine grater is best for zesting lemons without the bitter pith. A citrus juicer makes extracting every drop of juice quick and tidy.
Keep a wooden spoon or spatula to stir constantly. Finally, have a clean, sterilised glass jar ready to store your finished preserve.
- Small saucepan + heatproof bowl — for gentle heating.
- Whisk — to keep the mixture smooth.
- Fine grater & juicer — for zest and fresh juice.
- Wooden spoon/spatula — for constant stirring.
- Sterilised jar — to preserve freshness.
| Tool | Purpose | Tip |
|---|---|---|
| Small saucepan & bowl | Create a double boiler for gentle heat | Use a snug-fitting bowl to avoid steam loss |
| Whisk | Combine eggs, sugar and butter evenly | Choose a comfortable handle for longer whisking |
| Grater & juicer | Extract zest and juice from lemons | Grate finely; juice at room temperature |
| Wooden spoon & jar | Stir while cooking and store the finished product | Sterilise jar in boiling water before filling |
Preparing Your Fresh Lemons
Select lemons that smell bright at the stem and feel full of juice when you give them a gentle roll. Good fruit ensures a zesty result and makes the process easier.
Wash each fruit thoroughly to remove any surface wax or residue before you begin zesting or juicing.
Selecting the best citrus
Use a fine grater to take only the yellow zest. Remove just the outer layer to avoid bitter white pith. The zest supplies aromatic oils that lift the flavour.
Next, halve and squeeze the fruit with a citrus press. Strain the liquid to remove pulp and any stray seeds. Always check the juice for seeds; they spoil the texture and look of your curd.
Using fresh lemon juice is key — it gives the bright acidity that shop jars lack. Combine the strained juice and zest immediately into your mix for the best aroma and balance.
| Step | Action | Reason | Tip |
|---|---|---|---|
| Wash | Rinse under warm water | Removes wax and dirt | Pat dry before zesting |
| Zest | Grate outer layer only | Preserves oils, avoids bitterness | Use a fine grater |
| Juice | Press and strain | Removes pulp and seeds | Check for seeds visually |
| Combine | Add zest to juice | Balances aroma and acidity | Use fresh lemon juice for best flavour |
Whisking the Egg and Sugar Base
Begin by briskly whisking eggs and caster sugar in a heatproof bowl until the mixture turns pale and silky.
This step is vital for a smooth berry lemon curd. Proper whisking helps the sugar dissolve fully so the acidic lemon juice won’t cause curdling later.
Once the eggs and sugar are combined, stir in the lemon juice and zest to form the flavourful base.
Use a steady wrist and short strokes to keep air evenly distributed and to avoid large bubbles. A smooth mixture gives a better texture after cooking.
- Whisk eggs and caster sugar until pale and creamy.
- Add lemon juice and zest, then blend until even.
- Ensure the bowl is heatproof for the double boiler stage.
| Step | Action | Tip |
|---|---|---|
| Mix | Whisk eggs + caster sugar | Watch for pale, creamy colour |
| Flavour | Add lemon juice & zest | Stir until evenly combined |
| Prepare | Use a heatproof bowl | Ready for gentle cooking over simmering water |
Mastering the Double Boiler Method
Using a double boiler keeps the temperature even and protects the eggs from curdling. Set a small amount of simmering water in a saucepan and rest a heatproof bowl on top so the base does not touch the water.
Gentle heat control
Keep the flame low. Mary Berry stresses that gentle heat is essential; a rolling boil will split the mixture and ruin the texture.
Stir in the lemon juice, sugar and egg mix, then cook slowly. Maintain a low simmer and never let the water boil hard beneath the bowl.
Avoiding scrambled eggs
Whisking continuously is the most important technique. Move the whisk steadily so heat spreads and no hot spots form.
- Cook for about 10-15 minutes, stirring until the curd will coat the back of a spoon.
- If it is slow to thicken, keep on the gentle heat for a few more minutes rather than increasing temperature.
- When the mixture coats the back of a spoon and falls in a ribbon, the curd is ready.
Master this method and your lemon curd will stay glossy and smooth, not grainy or lumpy.
Adding Butter for a Silky Finish
When the mixture begins to thicken, the moment to add butter arrives — and it changes everything.
Cut 100g unsalted butter into small, uniform cubes so each piece melts evenly. Add the cubes gradually while stirring; this helps the fat emulsify with the eggs and lemon juice to form a glossy texture.
The butter brings richness that balances sharp acidity. As each cube disappears into the warm curd, the spread will turn opaque and silky. If you rush, the emulsion can break, so keep the heat gentle and steady.
Tip: Add the last few cubes off the heat and whisk briskly. This seals the texture and gives a smooth mouthfeel that coats the palate.
Finish by tasting for sweetness; a small pinch more sugar can round the flavour if needed. The result is a bright berry lemon curd with a luxurious, buttery finish ready for jars or immediate use.
Achieving the Perfect Consistency
A quick fingertip test on a wooden spoon gives the clearest sign that the lemon curd has set. Dip the spoon into the warm mixture, lift it out and run your finger across the back.
If the line stays clear and the spread does not run, it is ready. That shows the proteins from the eggs have set and the curd ready coats the spoon in a thick, even layer.
A curd that coats the back of a spoon will hold its shape when tipped. Remember the mixture will continue to thicken as it cools, so stop cooking on gentle heat while it still moves slightly.
If the mixture is too runny, keep whisking continuously for another minute or two over the low heat. A final taste will tell you if more sugar or a touch more butter is needed to balance the juice and acidity.
“The spoon test is the simplest way to judge doneness—trust it.”
- Use a wooden spoon for the back‑of‑spoon test.
- Look for a thick ribbon that does not run.
- Finish slightly underdone to allow setting as it cools.
Straining for a Professional Texture
A final strain through a fine mesh instantly lifts the texture to a professional standard. After cooking, pour the warm lemon curd through a fine sieve to catch any small bits of zest or accidental egg solids. This gives a perfectly smooth finish that looks and feels refined.
Even if you whisked well, the sieve step is worth doing. It removes tiny particles and ensures the spread is free of lumps. If you used fresh lemon juice, the result will taste bright and clean.
Use the back of a spoon to press the mixture through the mesh gently. When the curd ready coats the spoon and the mixture is strained, you will see how silky it becomes. Aim for enough coat back so the curd holds a thick ribbon when tipped.

The payoff is simple: a silky, refined lemon curd that spreads evenly and looks elegant in jars or as a filling for delicate pastries.
Sterilising Your Glass Jars
A simple oven sterilise will make sure your jars are ready to receive hot curd.
Start by washing each jar in very hot, soapy water or run them through the hottest dishwasher cycle. Rinse well to remove any soap and residue so the glass is clean.
Place jars upright on a baking tray and slide them into an oven preheated to 160C/325F/Gas 3. Heat for 10–15 minutes so the jars dry and sterilise fully. Allow the tray to cool a little; this helps prevent sudden temperature shock when you pour in the warm curd.
When filling, use caution: let the jar allow cool slightly before adding the filling. Once filled, always allow cool completely before sealing the lid. This step helps form a proper vacuum seal and preserves the bright lemon juice flavour inside.
- Wash in hot water or use the dishwasher hot cycle.
- Oven-sterilise at 160C/325F/Gas 3 for 10–15 minutes.
- Let jars cool slightly before filling; allow cool completely before sealing.
| Step | Temperature | Time | Why it matters |
|---|---|---|---|
| Wash | Hot soapy water | As needed | Removes dirt and bacteria |
| Oven sterilise | 160C / 325F / Gas 3 | 10–15 minutes | Dries jars and kills microbes |
| Cool & fill | Room temperature | Allow to cool slightly | Prevents glass cracking and keeps preserve safe |
Creative Flavour Variations
Small additions to the base recipe let you explore bright, creamy and exotic flavour profiles. These tweaks keep the same simple method while offering new tastes for cakes, scones and more.
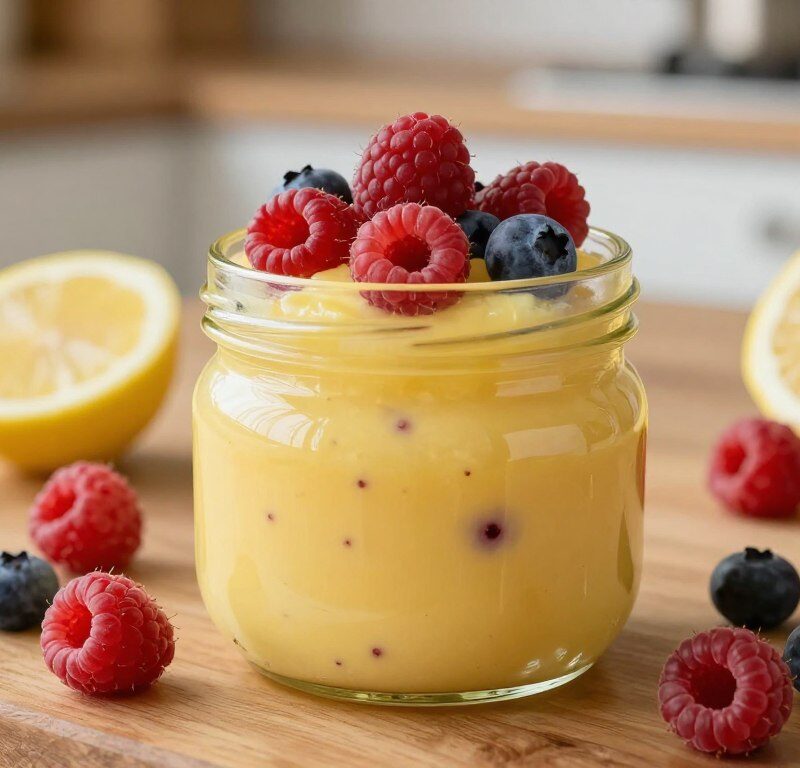
Adding a berry twist
For a vibrant colour and tang, fold in a spoonful of raspberry puree. Stir it through the warm curd to create a glossy, fruity spread that makes for an eye-catching filling.
This variation works brilliantly as a topping for scones or stirred into plain yogurt for a quick breakfast treat.
Vanilla bean infusion
Split a vanilla pod and scrape the seeds into the mixture during the final warmer stage. The gentle floral note complements lemon juice and balances butter and sugar for a more fragrant spread.
Tropical coconut blend
To make a tropical option, fold in a little coconut cream off the heat. It gives a creamy, exotic finish that pairs well with sponge cakes or as a pastry filling.
“A few simple changes let one base recipe become many memorable desserts.”
Serving Suggestions for Afternoon Tea
Serve this silky spread beside warm bakes to make a simple tea feel special.
Classic pairing: Offer a jar next to freshly baked scones for the traditional treat. A spoonful on a split scone is instantly comforting and crowd-pleasing.
On toast and crumpets: Spread a generous layer over warm toast or crumpets. The contrast between hot bread and chilled curd is delightful and keeps guests coming back for more.
As a filling: Use the preserve between layers of light sponge cakes to cut through the sweetness of cream. It also works brilliantly as a tartlet filling for party platters.
Other ideas: Serve small bowls as a dip for fresh fruit or spoon over delicate pastries. For a nod to the recipe source, try one or two of mary berry’s tartlet suggestions when entertaining friends.
Troubleshooting Common Curd Issues
If your curd misbehaves, calm hands and a few quick fixes usually restore the texture and flavour. Start by checking the heat: many lumpy batches happen because the pan was too hot. Always use gentle heat and keep whisking continuously to avoid scrambling the eggs.
If the mixture is too runny, return it to the double boiler and stir for a few more minutes until it thickens and coats the back spoon. Use a steady wooden spoon and avoid raising the temperature abruptly.
If you do scramble the egg, don’t panic. Pass the warm mix through a fine sieve to remove lumps; this often saves the batch. Strain your lemon juice before adding it to the bowl to stop seeds or pulp from causing texture issues.
For weak flavour, add a little extra zest or a splash of fresh lemon juice. Check seasoning at the end and balance with a touch more sugar or a small knob of butter. Finally, try a spoonful stirred into plain yogurt to judge sweetness and acidity before you jar the preserve.
Proper Storage and Shelf Life
How you store the finished preserve determines its shelf life and quality. Follow a few simple steps and your lemon curd will stay vibrant and safe to eat.
Fridge storage: Store your finished lemon curd in a sterilised, sealed jar in the fridge, where it will remain fresh for up to 2 weeks. Always let the jar allow cool completely before placing it in the refrigerator. This prevents condensation forming under the lid and keeps flavour intact.

Freezing for later use
If you have extra, freezing is an excellent option. Transfer the preserve to an airtight container and freeze for up to 3 months. Thaw overnight in the fridge and give it a good stir to restore the silky texture.
- Use fresh lemons when you make the batch; natural acidity helps preservation.
- If the curd becomes too firm after refrigeration, soften the jar in warm water for a few minutes.
- Keep jars away from strong odours in the fridge to avoid flavour transfer.
“Proper cooling and a good seal are the simplest ways to keep homemade preserves tasting fresh.”
| Storage method | Container | Max storage | Tip |
|---|---|---|---|
| Refrigerate | Sterilised sealed jar | Up to 2 weeks | Allow jar allow cool completely before refrigerating |
| Freeze | Airtight container | Up to 3 months | Thaw in fridge and stir before use |
| Short-term use | Small jar | Several days at cool temp | Use clean spoon to avoid contamination |
Conclusion
Conclusion — a strong, final thought: This mary berry take on the lemon curd classic shows how simple ingredients and steady technique create a glossy, zesty preserve. Follow the recipe and you will make lemon curd that outshines jars from the shop.
Use it on toast, as a filling for cakes or on warm scones. A little butter in the mix gives a silky finish that lifts every bite.
Store the jar in the fridge and be sure to allow cool completely before sealing. If you follow these tips, in just minutes you will have a homemade lemon curd and a bright berry lemon curd to enjoy.
FAQ
What makes this 15‑minute lemon curd so appealing?
Why is homemade curd better than shop‑bought?
What essential ingredients do I need?
What kitchen equipment is necessary?
How do I select the best citrus?
How should I whisk the eggs and sugar?
How does the double boiler method work?
How do I control the gentle heat?
How can I avoid scrambled eggs?
Why add butter and when should it go in?
How do I know when the consistency is perfect?
Should I strain the curd?
How do I sterilise glass jars properly?
Can I add other flavours to the curd?
How can I add a berry twist without affecting texture?
What are good serving suggestions for afternoon tea?
What common problems might I encounter and how do I fix them?
How should I store the curd and what is its shelf life?
Can I freeze the curd for later use?
Mary Berry 15 Minute Lemon Curd
This classic spread is smooth, tangy and buttery, delivering bright citrus flavour in a short space of time, ideal for bakers who need quick results.
Ingredients
- 2 large lemons — zest and juice
- 150g caster sugar
- 2 large eggs
- 100g unsalted butter
- 1 tbsp water (optional)
Method
- Wash the lemons thoroughly to remove any wax or residue.
- Zest the lemons using a fine grater, avoiding the bitter white pith.
- Juice the lemons and strain the liquid to remove pulp and seeds.
- In a heatproof bowl, whisk together the eggs and caster sugar until pale and silky.
- Add the lemon juice and zest to the egg mixture and blend until even.
- Set up a double boiler by placing the heatproof bowl over a saucepan of simmering water.
- Cook the mixture gently, stirring continuously, until it thickens and coats the back of a spoon.
- Gradually add the butter in small cubes, stirring until fully melted and incorporated.
- Taste the curd and adjust sweetness with more sugar if needed.
- Strain the curd through a fine sieve into a sterilised jar to achieve a smooth texture.
- Allow the curd to cool completely before sealing the jar.