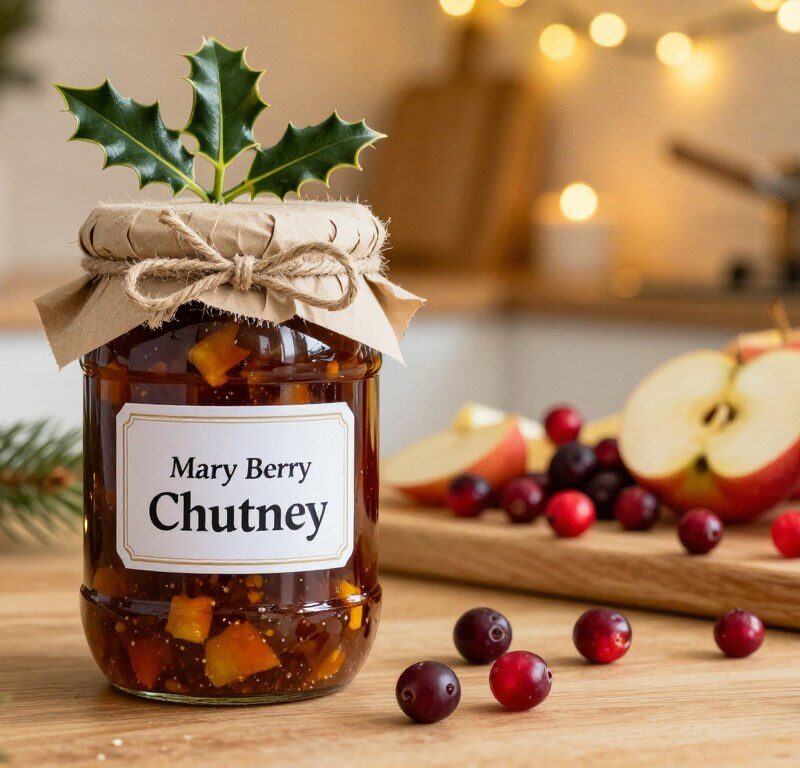
This classic preserve is a festive staple that lifts cheese boards and cold meats with ease.
Simple to make at home, the mary berry christmas method uses fresh fruit and spices to build a deep, balanced flavour. The steps are clear and suitable for novice preserve-makers, yet they yield professional-quality results.
The berry christmas chutney blends sweet and savoury notes, making it a thoughtful homemade gift or a reliable party addition. Careful selection of ingredients ensures the final jar tastes vibrant and robust.
Follow the approachable recipe and you will finish with a batch that pairs beautifully with a wide range of seasonal dishes and leftovers. Expect a preserve that feels both traditional and cheerfully modern.
Key Takeaways
- Accessible recipe for cooks of all levels.
- Pairs perfectly with cheese and cold meats.
- Uses fresh produce for vibrant flavour.
- Makes a thoughtful, homemade gift.
- Combines sweet and savoury for versatile use.
Why You Will Love This Mary Berry Christmas Chutney
The clever spice mix in this recipe builds layers of taste that bloom over weeks. The blend of warm spices and tangy fruit gives the preserve depth that shop jars seldom match.
Versatility is a major strength. Use it with cheese, cold meats or on toasted bread. Each jar complements many seasonal dishes and adds a homemade touch to entertaining.
The texture is intentionally chunky, creating a pleasing contrast with crackers and crusty loaves. As the flavours mature for a month, the profile becomes richer and more rounded.
Because the method is straightforward, you can focus on choosing top-quality fruit and spices. That simple approach produces a truly homemade result that stands out at any gathering.
- Versatile pantry staple for festive meals.
- Depth of flavour from a unique spice combination.
- Improves with age — best after a month.
Essential Ingredients for Your Festive Preserve
Gathering the right produce sets the foundation for a vibrant festive preserve. A clear ingredient list makes cooking simpler and helps the flavours develop evenly.

Vegetable Selection
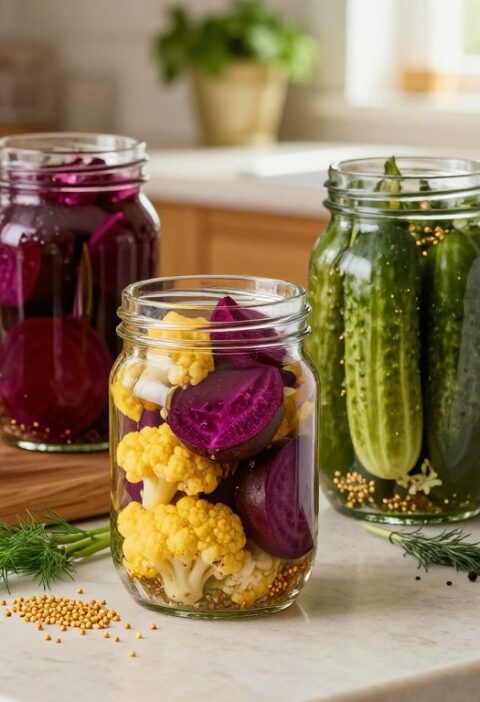
Start with 900g ripe tomatoes; they form the saucy base. Add 3 red peppers, 1 large aubergine and 1 green pepper for colour and texture.
Use 700g onions, peeled and fairly finely chopped, so they soften into the mix. Include 4 fat cloves of garlic, crushed to release aroma.
Spices and Aromatics
Balance sweetness and acid with 350g granulated sugar and 300ml white wine vinegar or distilled malt vinegar.
Season with 1 tbsp salt, 1 tbsp coriander seeds, 1 tbsp paprika and 2 tsp cayenne for gentle chilli heat. These amounts mirror the classic mary berry christmas flavour profile.
| Ingredient | Amount | Role |
|---|---|---|
| Tomatoes | 900g | Base, body and natural pectin |
| Peppers & aubergine | 3 red, 1 green, 1 large | Texture and colour |
| Onions & garlic | 700g onions, 4 fat cloves garlic | Sweetness and aroma |
| Sugar & vinegar | 350g sugar, 300ml vinegar1 | Preserve balance and shelf life |
| Spices | 1 tbsp salt, 1 tbsp coriander, 1 tbsp paprika, 2 tsp cayenne | Depth, warmth and chilli kick |
Preparing Your Fresh Vegetables
Take time to prepare the veg properly; it sets the stage for a rich, balanced base.
Begin by peeling the tomatoes. Prick each tomato with a sharp knife, cover with boiling water and then drain. The skins will slip off easily.
Next, chop the tomatoes and aubergine into uniform pieces. Seed and chop the peppers to match the size of the onion so everything cooks evenly.
Place the prepared vegetables into a large heavy-based pan. Add the finely chopped onions and crushed garlic, which will soften and sweeten as they cook.
Bring the mixture to a boil, then cover with a lid. Lower the heat and gently simmer for about one hour. Stir occasionally to ensure the onion and garlic soften perfectly.
“Careful prep and a steady simmer give you a tender, flavoursome base — the heart of the Mary Berry method.”
The Cooking Process for Perfect Consistency
With the base softened, tip in the sugar and vinegar and raise the pan to a steady boil. This is the point where the mixture moves from garden-fresh to shelf-ready.
Managing the Heat
After the initial simmer, add sugar, vinegar, salt, coriander, paprika and cayenne to the pan and bring to the boil over medium heat.
- Stir the mixture continuously until the sugar has dissolved, keeping the bottom of the pan clear to prevent burning.
- Continue to boil the chutney for about 30 minutes so surplus watery liquid evaporates and a chunky consistency appears.
- Managing the heat in the final minutes is crucial; keep a steady temperature so the mixture does not catch on the bottom.
- Use a large spoon to stir frequently. For this stage, do not use a lid — frequent stirring helps the chutney thicken evenly.
This final time on the hob is where flavours meld and the preserve becomes rich and rounded. Watch the pan, adjust the heat, and you will finish with a professional-quality chutney.

Sterilising Jars and Storage Requirements
Once the chutney is ready, transfer it straight from the pan into clean jars to lock in heat and flavour. Always ladle the mixture into sterilised or dishwasher-clean jars; Kilner jars are an ideal choice for long-term storage.
Seal the jars while the preserve is still hot. A hot seal helps create a vacuum and keeps the contents safe. This step is vital to prevent spoilage and preserve the texture you worked for.
Place the sealed jars in a cool, dark place and leave them to mature for at least a month. That resting time deepens the flavour and softens the edges of the spices.
- Use only spotless jars to fill from the pan; cleanliness reduces risk of contamination.
- Seal hot to form a vacuum and extend shelf life.
- Store jars in a cool, stable place — away from light — for at least a month before opening.
- Properly sealed jars will keep for several months in the right conditions.
Serving Suggestions for Your Homemade Chutney
A spoonful of the sauce can transform cold cuts and cheeses into memorable mouthfuls.
Presentation matters. Serve the preserve straight from the jars for a rustic look, or decant it into a small decorative bowl for the table. That small change lifts the whole spread.
Pairing with Cheese
This mary berry christmas chutney is an ideal match for a selection of fine cheese. The sweet-tart contrast works especially well with creamy brie and tangy goats’ cheese.
- Soft cheeses: add a dollop to balance creaminess.
- Hard cheeses: serve thin slices with a little relish for depth.
- Crackers & bread: pair with artisan crackers or fresh loaves.
Serving with Cold Meats
With cold meats, the preserve cuts richness and refreshes the palate. It complements turkey, ham or roast beef and brightens sandwich leftovers.
- Place a spoon beside sliced meats for guests to help themselves.
- Use it in sandwiches to turn leftovers into a tasty lunch.
- Offer small tasting spoons so people can mix and match flavours.
Expert Tips for Better Results
Get the timing and heat right in the final minutes and you’ll keep the sugar from burning while the mixture thickens.
Stir often towards the end of the cook so the bottom of the pan stays clean and the liquid reduces evenly. Control the heat for the last 30 minutes to avoid scorching and preserve the desired chunky consistency.
- Ensure your tomatoes are fully peeled and the onion is fairly finely chopped for even texture in the mixture.
- Measure spices carefully: 1 tbsp salt and 2 tsp cayenne give the classic balance; add coriander seeds and crushed garlic as directed.
- When you bring the pan to a boil, watch the sugar and vinegar balance — keep a steady heat so the liquid evaporates without burning.
- Fill hot jars straight from the pan and seal; use printable labels for gift messages to personalise presents.
- Allow jars to mature in a cool, dark place for at least a month before opening to deepen the flavour.
“Tending the pot closely in the final minutes rewards you with a glossy, well-balanced preserve.”
Conclusion
This recipe turns simple tomatoes and pantry spices into a versatile jar you will reach for all season. Making your own berry christmas preserve gives a sense of craft and a superior taste to many shop options.
The mary berry christmas method blends vinegar and sugar with aromatic seeds and malt notes so the mixture matures into a balanced relish. Allow at least a month for flavours to settle.
Serve the christmas chutney with cheese, cold meats or sandwiches. It makes thoughtful gifts and lifts party platters. Enjoy creating a batch that becomes a yearly favourite.
FAQ
What is the difference between chutney and jam?
How long does homemade chutney keep?
Do I need to peel vegetables like aubergine or peppers?
How do I achieve the right chutney consistency?
Can I adjust the spice level?
How should I sterilise jars?
Is malt vinegar necessary?
Can I make chutney ahead of time for the festive season?
My chutney is too runny — what can I do?
Which cheeses pair best with this chutney?
Can I use tomatoes in chutney?
How much sugar and vinegar should I use?
Are there vegetarian or vegan considerations?
Can I add garlic and coriander?
Is it safe to leave a lid on while cooking?
Mary Berry Christmas Chutney
This classic preserve is a festive staple that lifts cheese boards and cold meats with ease. Simple to make at home, the Mary Berry Christmas method uses fresh fruit and spices to build a deep, balanced flavour.
Ingredients
- 900g ripe tomatoes
- 3 red peppers
- 1 large aubergine
- 1 green pepper
- 700g onions, peeled and fairly finely chopped
- 4 fat cloves of garlic, crushed
- 350g granulated sugar
- 300ml white wine vinegar or distilled malt vinegar
- 1 tbsp salt
- 1 tbsp coriander seeds
- 1 tbsp paprika
- 2 tsp cayenne
Method
- Peel the tomatoes by pricking each with a sharp knife, covering with boiling water, and then draining.
- Chop the tomatoes and aubergine into uniform pieces. Seed and chop the peppers to match the size of the onion.
- Place the prepared vegetables into a large heavy-based pan along with the finely chopped onions and crushed garlic.
- Bring the mixture to a boil, then cover with a lid and lower the heat to gently simmer for about one hour, stirring occasionally.
- After the base has softened, add the sugar and vinegar and raise the pan to a steady boil.
- Stir the mixture continuously until the sugar has dissolved, keeping the bottom of the pan clear to prevent burning.
- Continue to boil the chutney for about 30 minutes until a chunky consistency appears, stirring frequently without a lid.
- Once ready, transfer the chutney straight from the pan into clean, sterilised jars while still hot.
- Seal the jars immediately to create a vacuum and store in a cool, dark place for at least a month before opening.