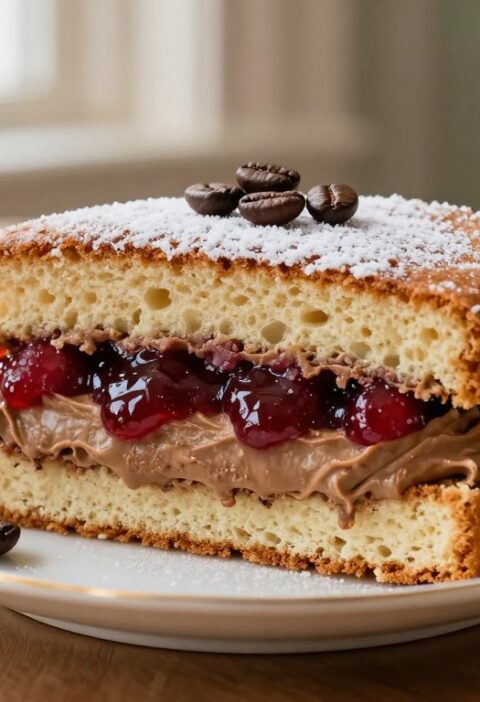
This classic British recipe delivers a light, moist and buttery sponge every time. The method uses a single bowl to bring together simple ingredients, making it ideal for afternoon tea or family gatherings.
Even a novice baker can follow the steps and achieve professional results with minimal fuss. The texture is consistently soft and fluffy, so the base works beautifully for jam and cream fillings or for more creative decorations.
As a dependable victoria sponge, this version is a staple in many UK homes. It offers a foolproof way to create a charming one cake that becomes the starting point for countless variations.
Key Takeaways
- Single-bowl method for easy preparation and fewer dishes.
- Produces a soft, moist sponge suitable for tea-time.
- Reliable results for both beginners and experienced bakers.
- Acts as a versatile base for jam, cream or decorative finishes.
- Rooted in classic British baking traditions and home comforts.
Why the Mary Berry All In One Cake is a Baking Essential
This simple method has become a go-to for home bakers who want fast, reliable results. It removes the need to cream butter and sugar separately, saving time and effort without skimping on quality.
Consistency is the big advantage. The all-in-one mixing approach delivers a tender sponge with a buttery flavour that many prefer. It works equally well for casual tea or special occasions.
Accessibility matters. The technique is forgiving for beginners exploring classic British cake recipes. With clear steps, even new cooks can achieve a light sponge cake that rivals fussier methods.
- Fast preparation with fewer bowls and less washing up.
- Reliable texture that suits jam, cream or simple icing.
- Versatile base for many recipes, from quick treats to victoria sponge cake variations.
Essential Ingredients for Your Sponge
Gathering the right pantry staples sets the foundation for a perfect sponge every time. Below is a clear split of the dry and wet components you’ll need to follow the recipe and get consistent results.
Dry Ingredients
225g self-raising flour gives structure and lift for a light, airy sponge. Use fresh flour for the best rise.
225g caster sugar provides even sweetness and a fine crumb. Add 2 tsp baking powder to boost the rise if your flour needs it.
Wet Ingredients
225g softened unsalted butter or a good-quality baking spread creates the rich flavour Mary Berry recipes are known for.
Stir in 4 large eggs, 2 tbsp milk and 1 tsp vanilla extract to bind and moisten the batter.
- Optional: 100ml double cream and 3 tbsp jam to finish the sandwich.
- Always check the expiry dates on flour and baking powder to ensure optimal rise.
| Ingredient | Amount | Purpose |
|---|---|---|
| Self-raising flour | 225g | Structure & lift |
| Caster sugar | 225g | Sweetness & crumb |
| Butter or baking spread | 225g | Flavour & texture |
Preparing Your Kitchen and Equipment
Preparation matters — lay out tins, tools and ingredients before the oven heats up. Begin by preheating your oven to 180°C (350°F) so it reaches the right temperature by the time the batter is ready.
Use two 20cm (8-inch) round tins for even layers. Grease line two tins carefully: lightly coat with butter or a professional cake release spray first.
Next, cut circles of baking paper to fit the bases and place them inside the greased tins. This makes removing the cakes clean and simple once baked.
- Position oven shelves in the centre for good heat circulation.
- Have a large mixing bowl, reliable spatula and scales on the counter.
- Keep a clean, organised work area to speed up the baking flow.
“A small step like lining tins saves time and prevents broken layers later.”

The All In One Mixing Method
Place all weighed ingredients into a large bowl and you are ready to mix. This method calls for about 2 minutes of beating until the batter feels smooth and slightly glossy.
Room temperature eggs and butter help the fats and liquids emulsify properly. This creates an even, airy sponge that rises well in the tins.
If time is tight, a baking spread straight from the fridge is an acceptable exception. However, where possible aim for room temperature ingredients for best results.
The practical steps
- Put flour, caster sugar, butter, eggs, milk and baking powder into the bowl.
- Use an electric mixer on medium speed and beat for roughly 2 minutes until creamy.
- Stop once to scrape down the sides with a spatula so no flour pockets remain.
“A well-emulsified batter gives a light, even crumb after baking.”
| Action | Timing | Purpose |
|---|---|---|
| Weigh all ingredients | Before mixing | Accurate ratios for rise |
| Mix with electric mixer | About 2 minutes | Aerate and bind |
| Scrape bowl | Halfway through | Ensure even incorporation |
| Use room temperature items | Prep step | Smoother emulsion and texture |
Achieving the Perfect Bake
Divide the batter carefully between your two prepared tins and smooth the tops gently with a spatula. This helps the sponge rise evenly and gives you two uniform layers ready for filling.
Bake in the preheated oven for 20–25 minutes or until the surfaces are a warm, uniform golden colour and springy to the touch. Avoid opening the oven door during the first 20 minutes; sudden cool air can cause the centres to sink.
To test for doneness, insert a skewer into the centre of each cake. It should come out clean with no wet batter attached. If crumbs cling but no raw batter remains, the sponge is done.
If you grease line two tins with baking paper, the layers should release easily after a few minutes of cooling. Proper monitoring in the final minutes prevents overbaking and keeps the sponge moist.
| Step | Timing | Indicator |
|---|---|---|
| Bake | 20–25 minutes | Golden colour & springy top |
| Doneness check | After baking | Skewer comes out clean |
| Cooling in tins | 5–10 minutes | Releases easily if greased and lined with baking paper |
Cooling and Preparing for Assembly
A calm five-minute wait in the tins prevents fragile sponges from breaking as you turn them out.
Using a Wire Rack
Carefully loosen the edges then lift the layers onto a wire rack. Cooling on a rack helps air circulate under the base and stops the sponge from going soggy.
Ensuring Complete Cooling
Let the cakes reach room temperature before you add any filling. Prepare your jam and whipped cream while the layers cool.
Cool completely before dusting with icing sugar or spreading buttercream. Applying toppings too soon will make them slide.
“Taking time to cool your cakes properly keeps the final dessert stable and neat.”
| Step | Timing | Why it matters |
|---|---|---|
| Rest in tins | 5 minutes | Prevents breakage when turning out |
| Cool on rack | Until room temperature | Prevents soggy base and condensation |
| Assemble | After cool | Jam and cream spread cleanly; icing sets |
Creative Filling and Topping Ideas
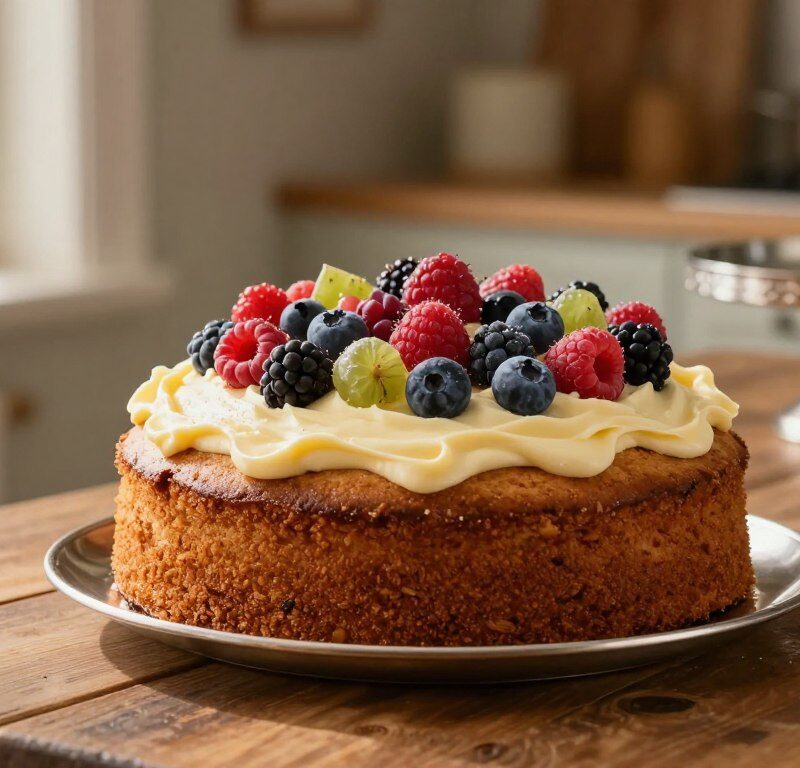
Try fillings that bring contrast to the sponge. A classic victoria sponge uses a good-quality strawberry jam and freshly whipped cream for a light, traditional finish.
For a richer option, use double cream whipped until soft peaks form. It gives a velvety mouthfeel that pairs well with the buttery sponge.
A neat dusting of icing sugar adds a crisp, professional look and a touch more sweetness. Slice strawberries between the layers for colour and freshness.
If you prefer simplicity, a thin layer of jam alone lets the sponge flavour shine. For seasonal twists, try lemon curd or chocolate ganache to change the character of the pudding.
“Apply fillings evenly to the bottom layer before topping to keep each slice balanced.”
| Filling | Texture | Best for |
|---|---|---|
| Strawberry jam + whipped cream | Light & fluffy | Traditional tea-time |
| Double cream (softly whipped) | Rich & velvety | Indulgent occasions |
| Lemon curd | Tangy & smooth | Summer or citrus lovers |
| Chocolate ganache | Dense & glossy | Decadent dessert |
Expert Tips for Flawless Results
Small adjustments at key points make the difference between a good sponge and a great one.
Avoiding overmixing: Beat only until the ingredients are just combined and the mixture is smooth. Overworking the batter traps too much air and develops gluten, which can create a dense outcome.
Avoiding Overmixing
If you use a mixer, stop as soon as the batter looks homogeneous. Scrape the bowl once to incorporate any pockets of flour or butter.
Testing for Doneness
Begin testing at 20 minutes. The surface should be springy and the edges will pull away from the tins. Insert a skewer; if it comes out clean, the cake is ready.
Levelling the Batter
Use a spatula to level the batter in the tins so each layer bakes flat. This makes assembly easier and gives neat slices for serving.
“Use fresh baking powder and a digital scale for reliable rises every time.”
| Tip | Why it matters | Quick action |
|---|---|---|
| Use a digital scale | Accurate measurement of flour and tsp baking powder ensures correct rise | Weigh ingredients before mixing |
| Softening butter | Room temperature butter emulsifies better for an even crumb | Soften briefly in the microwave if too hard; don’t melt |
| Cool on a wire rack | Prevents trapped steam so sponges remain light | Turn out after 5–10 minutes and cool completely |
Flavour Variations to Try
Bright citrus lifts a classic sponge; add the zest of one lemon and 2 tbsp lemon juice to the batter for a fresh victoria sponge twist.
For chocolate, replace 25g of the flour with high-quality cocoa powder. This makes a rich, deep sponge that works well with jam or a chocolate buttercream.

Stir 2 tbsp of cooled coffee into the bowl for a subtle, sophisticated note. Try almond extract instead of vanilla for a gentle, nutty aroma.
To reduce fat, substitute half the butter with Greek yoghurt and use wholemeal self-raising flour to add fibre without ruining texture.
- Tip: Always fold additions in carefully so flavours disperse evenly before dividing between tins.
- Serving: Dust with icing sugar or spread a thin layer of jam and softly whipped cream for a classic finish.
“Small swaps let you adapt recipes to taste while keeping reliable results.”
Storing and Freezing Your Sponge
A little attention to storage will help your cakes stay soft and ready to serve. Keep unfilled layers in an airtight container at room temperature for up to three days to maintain moisture and texture.
Freezing for Future Use
Wrap unfilled sponge layers tightly in cling film, then in foil. Label with the date and freeze for up to two months.
To thaw, move the wrapped layers to the fridge overnight. Bring them to room temperature before adding any frosting or decorations.
If you have a cake filled with fresh cream, store it in the fridge and eat within two days for safety. Avoid placing unfilled sponges straight in the fridge; cool, dry air can cause them to dry out and go stale.
- Warm a single slice for 10–15 seconds in the microwave for a fresh-baked feel.
- Alternatively, wrap a slice in foil and warm gently in the oven for a few minutes.
- Proper wrapping preserves sugar balance and keeps the crumb light.
“Good storage keeps your sponge tasting as if it was just baked.”
Conclusion
Mastering this straightforward method, taught here gives you a reliable skill that makes baking feel easy and rewarding.
Use room temperature ingredients and a wire rack so layers cool completely. These small steps — plus the right tsp of baking powder and a steady mixer speed — improve rise and texture.
Stick to the classic victoria sponge with jam and lightly whipped cream, or try new flavours. This recipe is a strong foundation for many British baking experiments.
Happy baking — enjoy sharing your sponge cake with friends. Keep exploring other recipes; simple technique often brings the best results.
FAQ
What is the all-in-one mixing method?
Do ingredients need to be at room temperature?
Which flour and sugar work best for a victoria sponge?
How do I grease and line my cake tins?
What oven temperature and baking time should I use?
How can I test if the sponge is done?
Why is avoiding overmixing important?
How do I cool the cake properly before filling?
What fillings and toppings work well for a victoria sponge?
How do I level the cake layers evenly?
Can I freeze the sponge or assembled cake?
Any tips for reducing sugar or making variations?
How much baking powder should I use?
Should I chill the cake before icing?
Mary Berry All In One Cake
This classic British recipe delivers a light, moist and buttery sponge every time. The method uses a single bowl to bring together simple ingredients, making it ideal for afternoon tea or family gatherings.
Ingredients
- 225g self-raising flour
- 225g caster sugar
- 225g softened unsalted butter or baking spread
- 4 large eggs
- 2 tbsp milk
- 1 tsp vanilla extract
- Optional: 100ml double cream
- Optional: 3 tbsp jam
Method
- Preheat your oven to 180°C (350°F).
- Grease and line two 20cm (8-inch) round cake tins with baking paper.
- In a large mixing bowl, combine the self-raising flour, caster sugar, softened butter, eggs, milk, and vanilla extract.
- Using an electric mixer, beat the mixture on medium speed for about 2 minutes until smooth and slightly glossy.
- Divide the batter evenly between the two prepared tins and smooth the tops with a spatula.
- Bake in the preheated oven for 20–25 minutes or until golden and springy to the touch.
- Check for doneness by inserting a skewer into the center; it should come out clean.
- Let the cakes cool in the tins for 5–10 minutes before transferring them to a wire rack to cool completely.
- Once cooled, fill with jam and whipped cream or your choice of filling, and dust with icing sugar if desired.