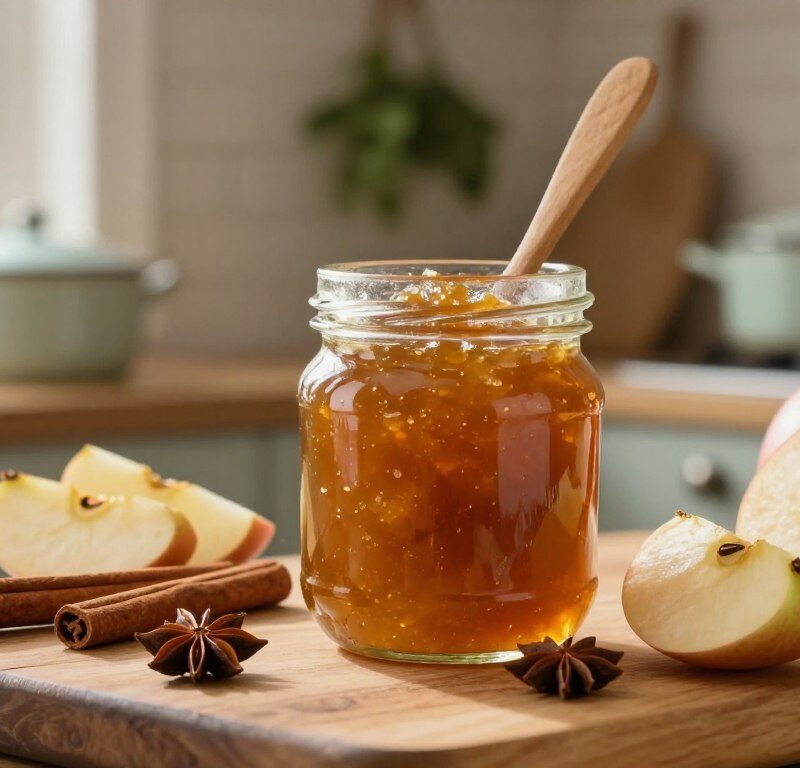
This classic preserve blends sweet and tangy notes to lift simple meals into memorable moments.
This easy-to-follow recipe yields a glossy, aromatic preserve that works with cheese, cold meats and sandwiches. The method is straightforward, so cooks of any skill can get reliable results.
The condiment’s sweet-tangy depth makes it a staple in many UK kitchens. It pairs well with simple cheese boards or a festive spread, and it keeps well for gifting across the holiday season.
Budget-friendly and thoughtful, this homemade storecupboard favourite outshines ready-made jars. With a few basic ingredients and clear steps, you can make a superior batch at home.
Key Takeaways
- Classic British preserve with balanced sweet and tangy flavours.
- Simple method suitable for novice and experienced cooks.
- Versatile accompaniment for cheese and festive meals.
- Better and more economical than many shop versions.
- Makes a tasteful, homemade gift during the holidays.
The Appeal of Mary Berry Apple Chutney
Few condiments can lift a simple plate of cold roast to something more memorable. This apple chutney brings a bright, tangy edge that cuts through rich meats and adds warmth to everyday meals.
The slow-cooked nature of the preserve allows flavours to meld. Each simmered spoonful gains depth that quick fixes cannot match. That gentle cooking also gives a glossy texture that looks as good as it tastes.
Home cooks value this recipe because it pairs beautifully with a mature cheese, such as a sharp cheddar, and provides an acidic contrast to turkey, ham or beef. It is also a reliable pantry favourite for sandwiches and cheese boards.
- Enhances cold meat and festive roasts
- Complements salty, mature cheeses
- Works as a quick flavour boost for snacks
| Pairing | Best Use | Texture | Flavour Match |
|---|---|---|---|
| Cheese board | Spread with crackers | Chunky-glossy | Sharp cheddar, blue |
| Cold roast slices | Accompaniment for sandwiches | Soft, spoonable | Roast beef, ham, turkey |
| Leftover roast | Quick meal enhancer | Sticky glaze | Balances rich, fatty cuts |
Essential Ingredients for Your Preserve
Good preserves start with careful choices at the market. Gather the listed ingredients before you begin. High-quality produce makes a clear difference to flavour and shelf life.
Selecting the Best Apples
Use 1kg of cooking apples for structure and tartness. Peel, core and chop them into even pieces so they break down at the same rate.
Include 250g raisins or sultanas and 2 finely chopped onions. The onions soften and melt into the fruit for a mellow base.
Choosing Your Vinegar
Pick 300ml malt vinegar or a milder cider or white wine option depending on the tang you want. The choice of vinegar defines the preserve’s brightness.
Balance the acidity with 250g light brown sugar, 1 tsp ground ginger, 1 tsp cinnamon and 1 tbsp salt. These spices and measures keep the recipe true to the mary berry style.
“Use the best ingredients you can find; they reward you in every jar.”
Preparing Your Fruit and Vegetables
Begin by preparing your fruit and veg so each piece cooks evenly and tastes its best.
Peel and core the apples, then cut them into small, even pieces. Uniform cuts help the fruit break down at the same rate and give a consistent texture to the apple chutney.

Make sure the onions are finely chopped so they melt into the mix rather than remaining as large, distracting chunks. This keeps the final preserve smooth and well-blended.
Add 1 tbsp of salt to the raw ingredients now to season the base and balance the sweetness later. Proper seasoning at this stage shortens cooking time and improves appearance.
- Even pieces: guarantee uniform cooking.
- Finely chopped onions: blend into the sauce.
- Measure salt: supports flavour balance.
- Careful prep: saves time during cooking.
The Cooking Process
To kick off cooking, add the apples, finely chopped onions and spices to a heavy-bottomed pan over medium heat. Stir in 150ml of malt vinegar now so the mixture begins to loosen as it warms.
Managing Heat Levels
Bring the pan to a gentle boil so the sugar dissolves fully, then lower the heat. Reduce to a steady simmer and keep the lid off for most of the time to concentrate flavour.
Cook for 45–60 minutes, stirring every few minutes to stop the chutney from catching on the base. If you prefer a slower approach, follow a 3-hour method: add the remaining vinegar and sugar after the first hour to thicken the mix.
- Use a large, heavy pan to distribute heat evenly.
- Keep an eye on the heat; too high and the fruit sticks.
- Season with 1 tbsp salt and the listed tsp measures of ginger and cinnamon for classic warmth.
| Stage | Action | Timing |
|---|---|---|
| Initial | Combine apples, onions, spices and 150ml malt vinegar | Bring to a gentle boil (few minutes) |
| Simmer | Reduce heat, stir regularly to prevent sticking | 45–60 minutes |
| Slow method | Add remaining vinegar and sugar after 1 hour for thicker glaze | Up to 3 hours total |
Achieving the Perfect Consistency
Gauging the right thickness transforms this preserve from loose sauce to a proud, spoonable relish. Start by bringing the mix to a gentle boil so the fruit breaks down quickly.
Once the initial boil has done its work, lower the heat and settle into a long, slow simmer. Stir often and watch the base of the pan.
You will know the chutney is ready when a spoon drawn across the base leaves a clear trail and the mixture holds its shape. If liquid still pools, continue cooking for an extra 10–15 minutes over low heat.
Sugar and vinegar are key to the final gloss and shelf life. They combine to thicken and preserve, but high sugar concentration can burn, so keep the heat gentle at the end.
“Patience matters: slow reduction gives depth, shine and a spoonable finish.”
- Begin with a brief boil to release juices.
- Simmer slowly until no liquid remains on the pan base.
- If still thin, add 10–15 minutes of low heat and watch for sticking.
| Test | Action | When to stop |
|---|---|---|
| Spoon test | Drag a spoon across the pan base | Mixture holds its shape |
| Watery mix | Simmer for extra 10–15 minutes | No pooling of liquid |
| Final shine | Balance sugar and vinegar, low heat | Glossy, thick texture |
Sterilising Jars for Long Shelf Life
Taking a few careful steps at the bottling stage protects both flavour and safety.
Cleaning Your Glass
Begin by washing your jars in hot, soapy water and rinsing thoroughly. Dry them on a clean towel so there is no residue.
Preheat the oven to 140°C and place the dry jars on a tray. Heat for 15 minutes to ensure they are sterile and warm before filling.

Sealing for Freshness
Fill each hot jar carefully, leaving a small headspace. Wipe the rims, apply lids and seal tightly to prevent air from entering.
Allow the jars to rest for 1-2 weeks before using. This short maturation time helps the flavours deepen and mellow.
- Sterilising your jars helps preserve the batch for up to 12 months when stored correctly.
- Work steadily; filling hot glass reduces cooling time and improves the vacuum seal.
- Store sealed jars in a cool, dark place and check lids before serving.
“Proper sealing prevents air from entering, which is the main cause of spoilage.”
Serving Suggestions for Your Chutney
Little jars of homemade preserve make a striking addition to any cheese platter.
This chutney is a classic accompaniment to a British ploughman’s lunch. It pairs beautifully with sharp cheddar and crusty bread for a reliable crowd-pleaser.
Serve a spoonful with cold roast meats such as turkey or ham. The sweet-tangy profile cuts through richness and refreshes the palate.
- Warm gently for 2–3 minutes on the stovetop or in short microwave bursts to loosen the glaze.
- Allow filled jars to rest for at least one week so flavours develop fully before serving.
- Once opened, refrigerate and use within six weeks for best quality.
- Each serving contains about 120 calories, making it a light, tasty addition to sandwiches or a cheese board.
| Serve With | Preparation | Timing / Storage |
|---|---|---|
| Sharp cheddar | Room temperature, spread on crackers | Consume within 6 weeks after opening |
| Cold roast meats | Spoon alongside slices | Reheat 2–3 minutes if preferred |
| Ploughman’s lunch | As part of a shared platter | Jars rest for ≥1 week before serving |
Creative Variations and Flavour Twists
Give the recipe a fresh twist by experimenting with a few bold, pantry-friendly swaps. Small changes can lift the preserve from familiar to memorable without adding fuss.
Adding Gentle Heat
Add a pinch of chilli flakes or a small chopped fresh chilli to introduce a warm, lingering heat. Start small; chillies intensify as the mixture cools.
If you like, fold in ground black pepper or a tiny dash of smoked paprika for a different smoky note.
Incorporating Dried Fruits
Stir in cranberries, apricots or 1 tbsp chopped dates to vary texture and colour. Dried fruits plump during cooking and add natural sweetness, letting you cut back on sugar.
For richness, swap the brown sugar for demerara or coconut sugar. These give a deeper, molasses-like flavour that pairs well with the spices.
Using Citrus Zest
Finely grate lemon or orange zest into the mix for a bright, aromatic lift. Citrus oils help balance rich spices like ginger and cinnamon.
For a tangier twist, replace part of the malt with white wine vinegar or a splash of balsamic. Each option subtly alters acidity and depth.
- Try a pinch of chilli for gentle heat.
- Use dried fruits to add texture and reduce added sugar.
- Swap malt for white wine vinegar for a brighter finish.
Conclusion
A well-made preserve rewards patience. Follow this mary berry style recipe and you’ll have a glossy apple chutney that shines on any cheese board.
Take care with the cooking so the apples reach perfect softness without turning to purée. Keep an eye on the heat during the final stage to stop the mix from burning.
Balance sugar with vinegar and allow time for the flavours to mellow. Sterilise your jars properly to keep the batch fresh for up to 12 months.
Enjoy the process — share jars with friends and enjoy the results across many meals.
FAQ
What makes this apple chutney recipe so popular?
Which apples work best for chutney?
How should I prepare the fruit and onions before cooking?
What type of vinegar is recommended?
How do I manage heat while cooking chutney?
How do I know when the chutney has the right consistency?
How should I sterilise jars for long shelf life?
What is the correct way to seal jars?
How long will the chutney keep once opened?
What are some easy serving suggestions?
How can I add gentle heat to the chutney?
Can I include dried fruit in the recipe?
Does citrus zest work in chutney?
Mary Berry Apple Chutney
This classic preserve blends sweet and tangy notes to lift simple meals into memorable moments. It pairs well with cheese, cold meats, and sandwiches, making it a staple in many UK kitchens.
Ingredients
- 1 kg cooking apples, peeled, cored, and chopped
- 250 g raisins or sultanas
- 2 finely chopped onions
- 300 ml malt vinegar (or cider/white wine vinegar)
- 250 g light brown sugar
- 1 tsp ground ginger
- 1 tsp cinnamon
- 1 tbsp salt
Method
- Prepare the apples by peeling, coring, and chopping them into even pieces.
- Finely chop the onions and add them to a heavy-bottomed pan with the apples.
- Stir in the spices, salt, and 150 ml of malt vinegar.
- Bring the mixture to a gentle boil to dissolve the sugar, then reduce the heat to a steady simmer.
- Cook for 45-60 minutes, stirring occasionally to prevent sticking.
- For a thicker glaze, add the remaining vinegar and sugar after the first hour and continue cooking for up to 3 hours.
- Check the consistency by dragging a spoon across the pan; it should hold its shape.
- Once ready, sterilize jars by washing them in hot, soapy water and drying them in the oven at 140°C for 15 minutes.
- Fill the hot jars with the chutney, leaving a small headspace, and seal tightly.