This classic tea-time recipe keeps the charm of an 18th-century favourite while making it simple enough for any home baker.
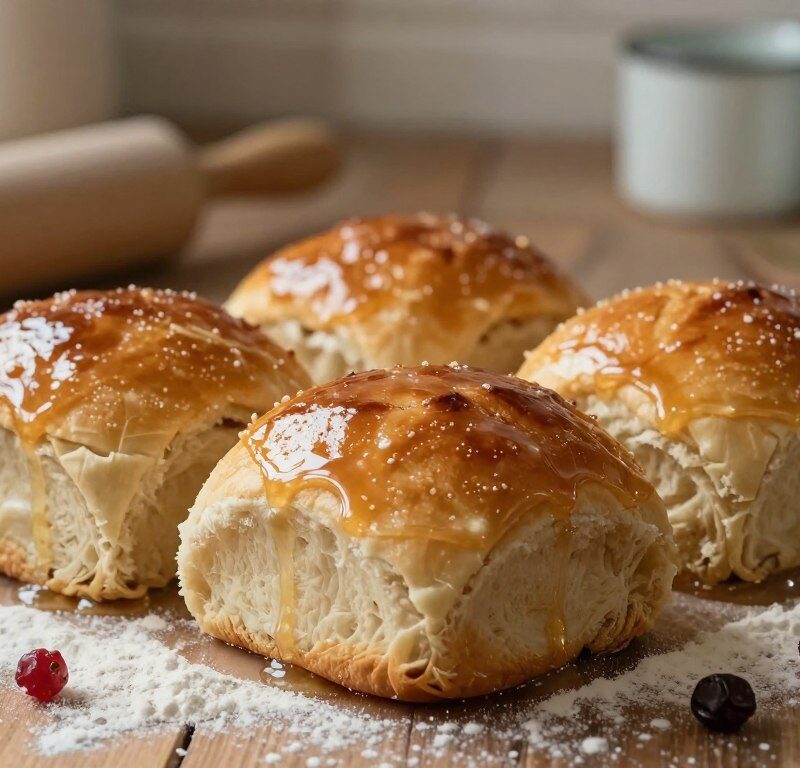
The version by mary berry pares back fuss without losing that sticky, golden finish. It uses an enriched dough — butter, egg and milk — to produce soft, pillowy buns that are packed with fruit.
Pulling a tray from the oven is a small ritual. The aroma and shine make them a welcoming table centre and a perfect make-ahead treat for busy mornings.
These rolls are forgiving to shape and quick to learn. You do not need long kneading time like for crusty loaves, so you will save time and still get impressive, tear-and-share results.
Key Takeaways
- The mary berry approach simplifies a historic chelsea bun while keeping traditional flavour.
- An enriched dough creates a soft, pillowy texture without long kneading.
- Sticky, golden buns make a comforting tea-time treat straight from the oven.
- They freeze well, so you can make ahead for quick breakfasts or snacks.
- Following this recipe gives consistent, fruit-packed results for home bakers.
The Timeless Appeal of Mary Berry Chelsea Buns
The classic chelsea buns are square and squishy rather than spiralled like a cinnamon roll. Their shape makes them ideal for baking tightly in a tin so they rise together and stay moist.
Soft-sided and pull-apart describes their main charm. You get a richer, more indulgent crumb than with a standard bread roll. The tight packing produces a dense yet airy texture that invites sharing.
Mary Berry’s method encourages upward rise instead of spreading outwards. The oven creates the steady warmth the enriched dough needs to expand and caramelise, forming a glossy, sticky finish.
- Pull-apart nature keeps slices moist longer than single rolls.
- Mixed spice and zesty lemon peel fill the kitchen as they bake.
- Packed into a tin, the buns develop a golden, shared crust.
A Brief History of the Traditional British Bun
A London bakery in the 1700s launched a small, spiced roll that would become a national favourite. The original Chelsea Bun House sold a sticky, fruit‑filled chelsea bun that drew hungry customers from across the city.
Over time, these buns became a pillar of traditional British teatimes. Home cooks across the country kept the recipe alive. One notable cook, mary berry, simplified the method so it fits modern kitchens and busy schedules.
The history maps the evolution from shop counter to family table. Today the chelsea buns still showcase rich dough, even fruit distribution and warm spice notes. They represent the best of British baking and a simple way to connect with the past.
- 18th‑century London origin at the Bun House
- Fruit, spice and glaze keep the classic profile
- Accessible for novice and experienced bakers
| Era | Feature | Cultural Role |
|---|---|---|
| 1700s | Sticky, fruit‑filled roll | Shop favourite in London |
| 1900s | Regional variations | Home teatime staple |
| Present | Simplified home recipes | Celebrated in traditional British baking |
Essential Ingredients for Your Baking Project
Before you mix, select ingredients that will give the dough strength, flavour and shine.

Selecting Quality Flour
Use 500g of strong white bread flour. This high-gluten flour creates the structure and chew you want in these buns.
Measure accurately. Good flour helps the dough hold fruit and filling while rising.
The Role of Yeast
Fast-action dried yeast (7g) is ideal. You can mix it straight into the flour for a reliable, even rise.
Combine this with 300ml warmed milk, 50g unsalted butter in the dough and 60g caster sugar. These enrichments make a tender crumb.
- 225g dried fruit for the classic texture
- 50g extra butter and apricot jam for the sticky finish
- A teaspoon mixed spice or a pinch of cinnamon plus lemon zest for flavour
Necessary Kitchen Equipment
Gathering the right kit before you start makes the whole baking session smoother and less stressful.
Mary Berry recommends a rectangular roasting tin, roughly 30x23cm, to force the rolls to rise upwards. This shape keeps the individual pieces snug so they bake evenly and stay soft.
Sharp tools and steady hands matter. A serrated knife will cut the soft log into equal slices without squashing the layers. A reliable rolling pin helps you roll the dough into a neat rectangle for even filling distribution.
- Rectangular roasting tin (about 30x23cm) for packed, upright rise
- Sharp serrated knife for clean slices
- Rolling pin and large mixing bowl to shape and mix the enriched dough
- Pastry brush to apply the warm apricot glaze
“Good equipment reduces stress and improves the finish — small tools make a big difference.”
These tools ensure your baking goes smoothly and that the final buns look as good as they taste.
Preparing the Enriched Dough
A calm, methodical start makes all the difference when preparing an enriched roll dough for tea-time treats.
Mastering the Kneading Technique
Combine 500g bread flour with sugar, yeast and a pinch of salt in a large bowl. Whisk warm milk, melted butter and an egg in a jug, then pour into the dry mix to form a soft dough.
Knead the dough for 10 minutes on a lightly floured surface. This develops the gluten so the dough becomes smooth, elastic and springy.
Place the dough in a lightly oiled bowl and cover with a damp tea towel. Leave it in a warm place for about 1 hour, or until the dough has doubled in size.
Tip: The dough should feel slightly tacky; resist adding extra flour during kneading. That tackiness helps the final rolls stay soft.
- Measure ingredients accurately to make chelsea buns reliably.
- Knead 10 minutes for a soft dough with good structure.
- Allow the first rise in a warm place until doubled in size.
| Step | Action | Why it matters |
|---|---|---|
| Mix dry | Combine bread flour, sugar, yeast, salt | Ensures even distribution for a steady rise |
| Mix wet | Whisk milk, melted butter, egg; add to dry | Forms enriched dough for tender crumb |
| Knead | 10 minutes on a lightly floured surface | Develops gluten; creates elastic, springy dough |
| First rise | Cover and place dough in a warm place ~1 hour | Allows dough to reach doubled size for light rolls |
Rolling and Filling the Dough
After knocking back the dough, roll it out to a 30cm x 45cm rectangle on a lightly floured surface. This gives an even base so the filling spreads without gaps.
Brush the rectangle with 50g of softened unsalted butter. Sprinkle an even layer of dried fruit, a little orange zest and a dusting of cinnamon and Demerara sugar for crunch.
Roll the dough tightly from the long edge, like a Swiss roll, to form a uniform sausage. Take care to roll dough tightly so the spiral holds its shape when cut.
Use a sharp serrated knife and cut the log into 12 equal slices, about 4cm each. Gentle handling keeps the soft dough light and prevents the spiral from being squashed.
- This step distributes the fruit and cinnamon filling and forms the classic spiral seen in a cinnamon roll or chelsea-style buns.
- Place each slice in the tin for the final rise, then finish the top with melted butter and apricot jam after baking for shine.
The Importance of the Second Rise
The final prove in the tin is where texture and flavour truly mature before the heat of the oven.
Arrange each slice cut-side up in a greased roasting tin, leaving about a 1cm gap so pieces can expand. Cover the tin and leave it in a warm place to prove for 45–60 minutes.
This second rise is vital. The dough will become puffy and the rolls should be touching each other before you bake. That contact creates the classic pull-apart result.
If you rush this stage the loaves will be dense and heavy. Letting the dough reach roughly doubled size gives a lighter crumb and deeper flavour as the yeast continues to work.
“A calm prove makes a huge difference — patience here rewards you with soft, glossy buns.”
- Place the slices cut-side up with 1cm gaps.
- Cover and prove in a warm place for 45–60 minutes.
- Avoid drafts so the dough can rise evenly and develop flavour.
| Action | Why it matters | Target result |
|---|---|---|
| Arrange slices with 1cm gap | Allows controlled expansion | Puffy, even-shaped buns |
| Prove 45–60 minutes in a warm place | Yeast develops flavours and lift | Soft crumb; pull-apart texture |
| Ensure pieces touch before baking | Creates shared crust and moist edges | Signature pull-apart finish |
Baking to Golden Brown Perfection
A bright, hot oven is the secret to a quick rise and a glossy, browned finish. Preheat to 200°C (180°C fan / Gas 6) so the enriched dough lifts fast and the top firms to a beautiful golden brown.
Place the tin in the centre of the oven and bake for 20–25 minutes. Check halfway to make sure the tops are colouring evenly. If they darken too fast, tent loosely with foil to protect the fruit and sugar filling.
To test, tap a bun lightly — a hollow sound shows the dough is cooked through. While the buns are still warm, brush them generously with melted apricot jam mixed with a knob of butter for that sticky, classic glaze.
Allow the tray to cool in the tin for 10 minutes. This short rest keeps the soft dough intact when you lift or pull the buns apart. The recipe from mary berry recommends this step to prevent the rolls from collapsing.
“A quick rest in the tin keeps the texture light and the glaze glossy.”
Troubleshooting Common Baking Issues
Baking problems often feel worse than they are — a few quick checks will usually set things right.

Fixing Dense Texture
If the dough is heavy, check the milk temperature first. Too-hot milk kills the yeast; aim for blood temperature before mixing.
Also avoid adding extra flour while kneading. Measure your bread flour accurately to keep the dough ratio correct.
Preventing Burnt Bottoms
Use a light-coloured tin or double-line the base with parchment to stop dark, burnt bases. Place the tray on the middle shelf of the oven for even heat.
If the tops are browning too fast, tent with foil so the inside cooks through without burning the sugar and butter.
Correcting Unravelled Spirals
Roll the roll dough tightly and pinch the seam to seal before cutting. A sharp serrated knife prevents squash and keeps the filling neat.
For an alternative finish, use a simple icing instead of apricot jam if you prefer a different glaze.
Tip: Small adjustments to temperature, handling and tools will rescue most trays and give golden brown results.
Creative Variations and Serving Suggestions
A few clever twists will let you serve these buns for breakfast, dessert or a savoury snack.
Swap currants for sultanas, cranberries or chocolate chips to change the texture and taste of the filling. For a festive touch, add orange zest and extra cinnamon, then finish with a light icing drizzle.
For crunch, fold chopped pecans or walnuts into the fruit mix. You can also try marzipan or chopped dried apricots for a richer, chewy centre.
- Savoury option: omit sugar and fruit and spread pesto and cheese before you roll the dough tightly.
- Refresh a day-old roll: microwave for 10 seconds to revive a soft dough texture.
- Storage: keep buns in an airtight container at room temperature and eat within 24 hours for best results.
Serve warm with a smear of melted butter or a pot of apricot jam. Try a side of fresh berries or a slice of sharp cheddar for classic British pairings.
“Experimenting with fillings makes each batch your own — small changes bring big flavour rewards.”
Conclusion
These fragrant, fruit‑filled rolls reward the small investments of time and careful handling. With a soft enriched dough and a patient second prove, you will get sticky, golden buns that smell of warm cinnamon and citrus zest.
Mastering the method — from using good bread flour to allowing the dough to reach doubled size — turns a simple recipe into a lasting part of traditional British baking. Enjoy them warm, save a few for brunch, or customise the filling with extra dried fruit and buttered slices of bread.
If you want a related classic, try this hot cross buns recipe for more seasonal inspiration. Happy baking — practice gives confidence and delicious rewards.
FAQ
What makes these Chelsea-style buns different from cinnamon rolls?
Can I use plain flour instead of bread flour?
How do I ensure the dough doubles in size during proving?
What dried fruits work best in the filling?
How tightly should I roll the dough before cutting?
My buns spread and lost their spiral — how can I prevent that?
Should I brush the buns with butter before baking?
What oven temperature and time are ideal for golden brown buns?
How can I avoid burnt bottoms?
Can I make the dough ahead and refrigerate overnight?
Are there suitable savoury variations of this recipe?
How should I store leftover buns and how long do they keep?
Can I add orange zest to the filling and where does it work best?
Why is my dough sticky and hard to handle?
Mary Berry Chelsea Buns
This classic tea-time recipe keeps the charm of an 18th-century favourite while making it simple enough for any home baker. The version by Mary Berry pares back fuss without losing that sticky, golden finish.
Ingredients
- 500g strong white bread flour
- 7g fast-action dried yeast
- 60g caster sugar
- 1 teaspoon mixed spice or a pinch of cinnamon
- 300ml warmed milk
- 50g unsalted butter, melted
- 1 egg
- 225g dried fruit
- 50g extra butter for greasing
- Apricot jam for glazing
- Zest of 1 lemon
Method
- Combine the bread flour, sugar, yeast, and mixed spice in a large bowl.
- Whisk the warmed milk, melted butter, and egg in a jug, then pour into the dry mix to form a soft dough.
- Knead the dough for 10 minutes on a lightly floured surface until smooth and elastic.
- Place the dough in a lightly oiled bowl, cover with a damp tea towel, and leave in a warm place for about 1 hour or until doubled in size.
- Roll the dough out to a 30cm x 45cm rectangle on a lightly floured surface.
- Brush the rectangle with 50g of softened unsalted butter and sprinkle with dried fruit, orange zest, and a dusting of cinnamon and Demerara sugar.
- Roll the dough tightly from the long edge to form a uniform sausage.
- Cut the log into 12 equal slices, about 4cm each, and place them cut-side up in a greased roasting tin.
- Cover the tin and leave in a warm place to prove for 45–60 minutes until puffy.
- Preheat the oven to 200°C (180°C fan / Gas 6).
- Bake the buns for 20–25 minutes until golden brown, checking halfway through.
- While warm, brush the buns generously with melted apricot jam mixed with a knob of butter.
- Allow the tray to cool in the tin for 10 minutes before serving.