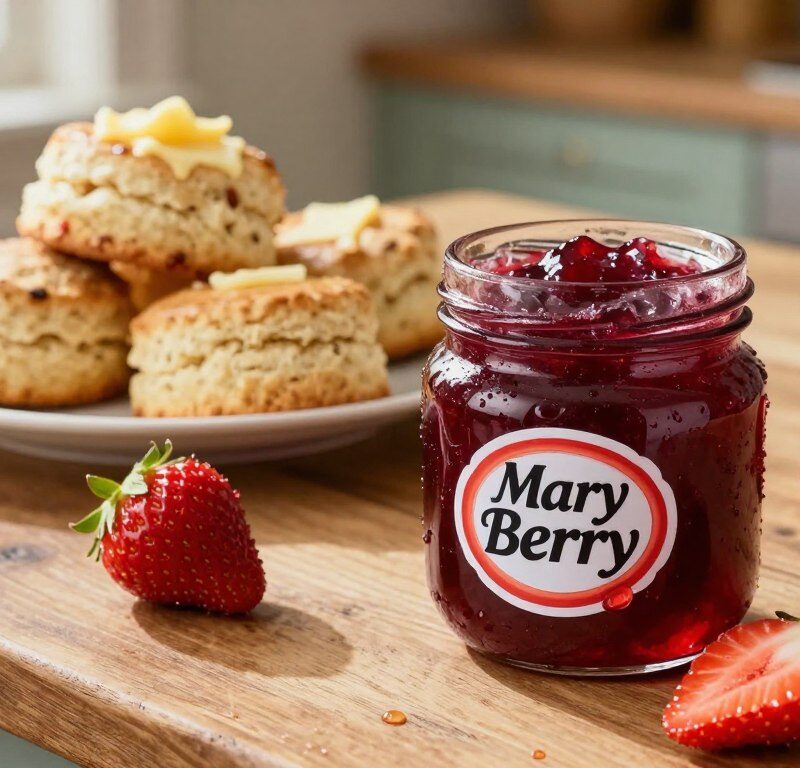
Craft a lovely, classic preserve at home in under 30 minutes. This simple recipe yields four generous jars and brings the bright flavours of a British summer to your breakfast table.
Even if you are new to preserve-making, you will find the steps easy to follow. The method is celebrated for its clarity and reliable results, so your toast and afternoon tea gain a delicious, homemade touch.
The approach is practical and friendly, using everyday ingredients and clear timing. Follow the trusted instructions and enjoy a sumptuous spread that tastes truly special.
Key Takeaways
- The recipe makes four jars in under 30 minutes.
- Easy steps suit beginners and seasoned cooks alike.
- Homemade preserves enhance toast and tea with fresh flavour.
- Simple ingredients and timing deliver consistent results.
- Trusted technique yields a delicious, classic spread.
Why You Should Make Mary Berry Strawberry Jam
Making a homemade preserve brings fresh flavour and control you won’t find in shop-bought jars. You choose ripe fruit, adjust sweetness and avoid additives for a cleaner taste.
Homemade quality beats supermarket alternatives. That better flavour lifts simple bakes into something special. It also gives you confidence to try other recipes and techniques at home.
Mary Berry is famed for traditional cakes, from chocolate cake to the classic victoria sponge. A high-quality strawberry jam is the vital link that holds the two light sponges together.
- Control ingredients for superior taste and texture.
- Connect with timeless baking traditions.
- Use this jam to enhance a sponge, crumble or tart.
It’s rewarding and versatile. Make a batch and you’ll find many ways to enjoy this preserve across afternoon tea and home baking.
Essential Ingredients for Your Preserve
Choose the right produce and store-cupboard staples to guarantee a clean, reliable preserve every time.
Selecting the Right Strawberries
To begin this recipe, you will need 1kg/2lb 4oz of fresh strawberries, washed, hulled and dried. Use berries that are slightly underripe for the best setting; underripe fruit contains more natural pectin and helps the set.
The Role of Pectin
Jam sugar is important because it has added pectin. This pre-mixed sugar simplifies the process and reduces guesswork when you cook fruit to a firm set.
- 1kg/2lb 4oz fresh strawberries, prepped.
- A splash of lemon juice to add acidity and aid pectin action.
- Jam sugar (with pectin) to ensure the preserve sets well.
“It’s best to have them slightly underripe.”
Gather these simple ingredients—strawberries, lemon and jam sugar—and you are ready to make a professional-quality preserve.
Preparing Your Jars for Success
Preparing containers carefully is the simple step that protects flavour and prevents spoilage.
Sterilisation Methods
Always start by washing your jars in hot, soapy water. Rinse well to remove any residue.
Place clean glass into an oven preheated to 100C and dry for about 15 minutes until completely bone dry. This oven method guarantees sterile, ready-to-fill containers.
As an alternative, run the jars through a hot dishwasher cycle. Both approaches use heat and steam to prepare your equipment.
Do not forget the lids. Boil lids in a pan of water for 10 minutes and then leave them to air dry on a clean cloth.
- Proper sterilisation keeps your jam safe for long-term storage.
- Oven: 100C for 15 minutes ensures dry, sterile jars.
- Dishwasher: convenient, effective hot cycle option.
- Lids must be boiled in water for 10 minutes and air-dried.
- These extra minutes prevent spoilage and protect flavour.
“Taking care with jars and lids is a small step that makes your preserve last.”
| Method | Time | Tip |
|---|---|---|
| Oven sterilisation | 15 minutes | 100C until bone dry |
| Dishwasher | Hot cycle | Use highest temperature setting |
| Boiling lids | 10 minutes | Air dry on a clean cloth |
The Cooking Process
Place the drained fruit and lemon juice into a large pan and heat gently so the berries begin to soften. Cook for a few minutes until the liquid turns clear and the fruit breaks down.
Once softened, add the sugar and stir steadily over low heat until the sugar dissolved fully. Use jam sugar with added pectin — this helps the preserve reach its setting point reliably.
When the sugar dissolved, bring the pan to a steady boil and let it bubble away for about six minutes. Keep a close eye on temperature and texture so the mixture reaches setting point without overcooking.
Tip: A steady boil for the correct minutes gives a good set while keeping bright fruit flavour.

“Watch the consistency — the mixture reaches setting point only when sugar and fruit have cooked for the right time.”
- Start with fruit and lemon juice in a large pan.
- Stir in jam sugar until it has dissolved.
- Boil steadily for about six minutes until the setting point is reached.
| Step | Action | Timing |
|---|---|---|
| Soften fruit | Heat drained strawberries with lemon juice in a wide pan | 2–3 minutes |
| Add sugar | Stir in jam sugar until sugar dissolved | 2–4 minutes |
| Boil to set | Boil steadily until mixture reaches setting point | Approx. 6 minutes |
Mastering the Setting Point Test
A quick, reliable way to check your preserve’s texture is to use a simple cold-plate test. This confirms whether the mixture reaches setting point before you bottle it.
The Ripple Test Technique
Spoon a small amount of the hot mixture onto a cold plate and chill it in the fridge for two minutes. Then press the cooled sample gently with your finger.
If the sample crinkles and separates without flowing back, the jam has reached the correct setting. If it does not wrinkle, boil for another minute or two and repeat the test.
- Perform the ripple test: spoon onto cold plate and chill for two minutes.
- Push with a finger — crinkle and separation show the set is achieved.
- If not set, return to the pan for one or two more minutes before testing again.
Cooling for Consistency
When the mixture reaches setting point, remove the pan from the heat and let it cool for at least 10 minutes. This pause helps the fruit settle so each jar has an even distribution in the final set.
Tip: Cooling also reduces steam and stops the sugar continuing to cook, preserving bright flavour and texture.
Storing Your Homemade Jam
Good storage is the final step that turns freshly cooked fruit into a pantry favourite.
After the mixture has cooled for 10 minutes, carefully ladle it into your sterilised jars, leaving a little headspace at the top. This prevents spillover and gives the preserve room to set.
Seal each jar with wax paper and a lid. Label them clearly with the date of preparation so you can monitor shelf life.
- Keep unopened jars in a cool, dark cupboard; the jars will stay good for up to a year.
- Once opened, store the jar in the fridge to preserve flavour and prevent spoilage — this is the recommendation from mary berry.
- If lids fail to seal, refrigerate and use the preserve within a few weeks.
“Label jars with the date — it helps you enjoy the best of the season later.”

| Action | Why | Timing/Note |
|---|---|---|
| Cool for 10 minutes | Prevents steam and over-thickening | 10 minutes |
| Fill sterilised jars | Maintains safe storage | Leave 1cm headspace |
| Seal and label | Tracks age and freshness | Use wax paper + lids |
| Store unopened | Best quality retained | Up to 1 year in cupboard |
For a different preserve to enjoy through winter, see the Mary Berry chutney recipe.
Conclusion
A small investment of time and patience delivers a homemade preserve that truly tastes of summer.
Creating your own mary berry preserve is simple and rewarding. Use fresh strawberries, a splash of lemon juice and jam sugar to achieve a reliable set in minutes.
Sterilise your jars, learn the ripple test for the setting point and you will get consistent results. The texture and flavour are far superior to shop-bought options.
Spread this preserve on toast or layer it into a victoria sponge cake for a classic finish. Try the recipe and enjoy the timeless pleasure of making your own delicious preserve.
FAQ
What are the essential ingredients for making this preserve?
How do I select the right fruit?
What is the role of pectin in setting the preserve?
How should I sterilise jars to store my preserve safely?
What are the main steps in the cooking process?
How do I test for the setting point?
What is the ripple test technique?
How should I cool the jars for consistent results?
How long will homemade preserves keep?
Can I use my preserve on baked goods like victoria sponge?
Why did my preserve not set properly and how can I fix it?
Do I need to add water when making preserve?
Mary Berry Strawberry Jam
Craft a lovely, classic preserve at home in under 30 minutes. This simple recipe yields four generous jars and brings the bright flavours of a British summer to your breakfast table.
Ingredients
- 1kg/2lb 4oz fresh strawberries, washed, hulled and dried
- A splash of lemon juice
- Jam sugar (with pectin)
Method
- Sterilise jars by washing them in hot, soapy water, rinsing well, and placing them in an oven preheated to 100C for 15 minutes.
- Place the drained strawberries and lemon juice into a large pan and heat gently for 2-3 minutes until the berries begin to soften.
- Stir in the jam sugar until it has fully dissolved, about 2-4 minutes.
- Bring the mixture to a steady boil and let it bubble for about 6 minutes until it reaches the setting point.
- Perform the ripple test by spooning a small amount of the mixture onto a cold plate and chilling it for 2 minutes. Check for crinkling.
- Once the setting point is reached, remove the pan from heat and let it cool for at least 10 minutes.
- Ladle the mixture into the sterilised jars, leaving a little headspace at the top.
- Seal each jar with wax paper and a lid, and label them with the date of preparation.
- Store unopened jars in a cool, dark cupboard for up to a year.