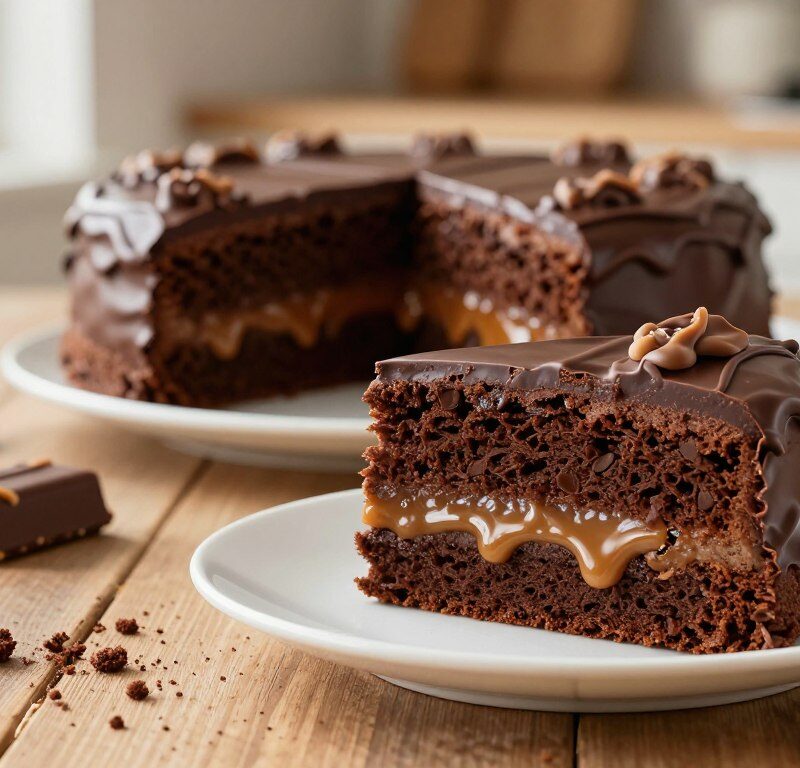
This classic fridge treat brings together gooey caramel and crisp biscuits for a no-fuss, no-bake dessert that always disappears fast at parties.
The recipe yields twelve generous portions, so it is ideal for afternoon tea or a casual get-together. It uses melted mars bar and butter to bind broken biscuits, creating a chewy, crunchy texture that children and adults enjoy alike.
Simple to make and easy to store, the method needs minimal equipment and sets in the fridge. Each slice has about 320 kcal, making it a truly indulgent, nostalgic chocolate cake option when you want something quick and satisfying.
Whether you are new to baking or prefer fuss-free recipes, this mary berry fridge recipe is reliable and rewarding. Read on to master the steps and serve a crowd-pleasing bar cake with confidence.
Key Takeaways
- The Mary Berry Mars Bar Cake is a beloved no-bake chocolate fridge treat that mixes melted mars bar with crunchy biscuits.
- It serves 12 and is perfect for sharing at afternoon tea or parties.
- The method is beginner-friendly and requires very little equipment.
- Each portion is about 320 kcal, offering a rich, nostalgic sweet bite.
- Prepare in minutes, chill until set, and enjoy a crowd-pleasing bar cake that vanishes quickly.
Why Everyone Loves the Mary Berry Mars Bar Cake
The simple, fridge-set treat delivers a crowd-pleasing mix of textures and deep flavour.
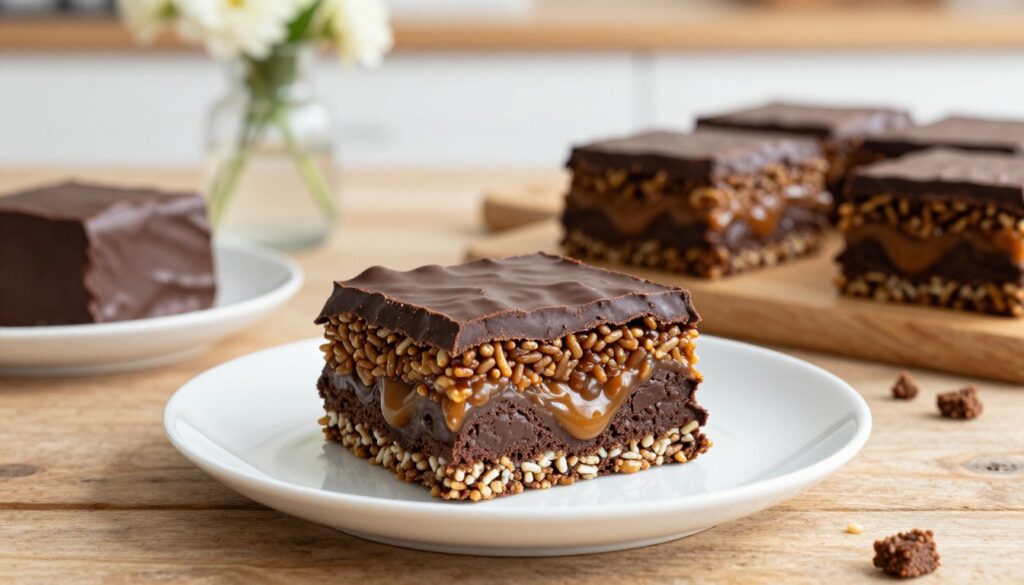
Gooey caramel meets crunchy biscuit, giving each square a satisfying contrast that appeals to all ages. The no-bake method saves time and stress, so you can prepare the bar cake in under 20 minutes and chill it while you get on with other tasks.
For many, this is a nostalgic chocolate offering. The berry mars bar combination brings back childhood memories and makes the recipe a staple at gatherings.
Beginners love it because it needs minimal equipment and straightforward steps. Once set, the slices cut neatly, making portions easy to share or gift.
- Fast to make and fridge-ready
- Balanced sweetness with crunchy texture
- Perfect for parties and simple gifting
| Feature | Why it works | Result |
|---|---|---|
| Gooey caramel | Rich, sticky centre | Indulgent mouthfeel |
| Crunchy biscuit base | Textural contrast | Clean slices |
| No-bake method | Simple for beginners | Quick prep, fridge set |
Essential Ingredients for Your Fridge Cake
Start by gathering quality components — they shape taste, texture and the final look of the slice. A few simple choices set you up for success with this no‑bake traybake.
Choosing the Right Biscuits
Use 200g of digestive biscuits for the base to give the proper crunch and structure. You can swap in rich tea or graham crackers if you prefer a lighter crumb.
Tip: Crush into chunky, uneven pieces so the mix binds but still has texture.
Selecting Quality Chocolate
Always pick 200g of good milk chocolate for the topping. High-quality milk chocolate melts evenly and gives a glossy finish.
If the chocolate is too low grade it may seize or taste flat. A smooth melt makes spreading quick and neat.
- 200g digestive biscuits for a sturdy, crunchy base.
- Crush biscuits unevenly for classic texture.
- 200g milk chocolate that melts cleanly for the topping.
- Use quality ingredients for superior flavour at teatime.
Preparing Your Kitchen and Equipment
Get organised before you melt anything: the right tin and parchment save time and stress.
Use a 20 cm square tin. This size gives the mary berry mars bar mixture the perfect depth so slices are neat and bite‑sized.
Line the base and sides with baking parchment. Ensure there is enough overhang to lift the bar cake out easily when set.
Have a saucepan and wooden spoon ready. These two simple tools make the melting and stirring step quicker and more controlled.
- Check your workspace is clean and dry so ingredients stay tidy.
- Press the mixture firmly into the prepared tin to secure a compact base.
- Confirm parchment overhang before filling — it really helps with removal later.
One final step: rehearse the sequence in your head. Knowing the next step keeps the process smooth during this easy baking task.
Melting the Mars Bars and Butter
For this crucial stage, place 6 chopped mars bars (about 230g) and 100g unsalted butter into a saucepan on the lowest setting. Use a wide pan so the heat spreads evenly.
Keep the heat low. Stir constantly with a wooden spoon. Gentle warming helps the bars butter to combine without scorching the caramel or separating the fats.
Maintaining Low Heat
When you melt mars bars and butter, patience pays. The mixture must become completely melted smooth before you fold in the crushed biscuits.
- Begin with chopped mars bars and butter in the pan.
- Use a saucepan low heat and stir until glossy and uniform.
- Once melted smooth, remove from the heat and proceed straightaway to the next step.
| Ingredient | Quantity | Tip |
|---|---|---|
| Chopped bars | 6 (approx. 230g) | Chop small for even melting |
| Unsalted butter | 100g | Slowly melt to create a glossy base |
| Heat | Low | Prevents burning or splitting |
Incorporating the Crunchy Biscuits
Gently folding in the crushed biscuits is the moment your fridge treat gains structure and texture.
Remove the pan from the heat and add the crushed biscuits. Stir until each piece is evenly coated.
Keep some chunky crumbs. The berry mars bar mixture depends on those irregular pieces for satisfying crunch. That contrast with the smooth caramel is what makes this mars bar cake so appealing.
“Fold the biscuits carefully so they stay textured — this preserves the crunch and helps the mix bind.”
Incorporating the biscuits is a key step in this mary berry mars recipe. When the crushed biscuits are evenly coated, the bar cake will hold together when pressed into the tin.
- Work quickly while the mix is warm so the chocolate and caramel cling to the crumbs.
- Fold gently to avoid turning crumbs into dust.
- Check that pieces are evenly coated for consistent bites.
Pressing the Mixture into the Tin
With the filling ready, focus on packing the base tightly to ensure neat slices later.
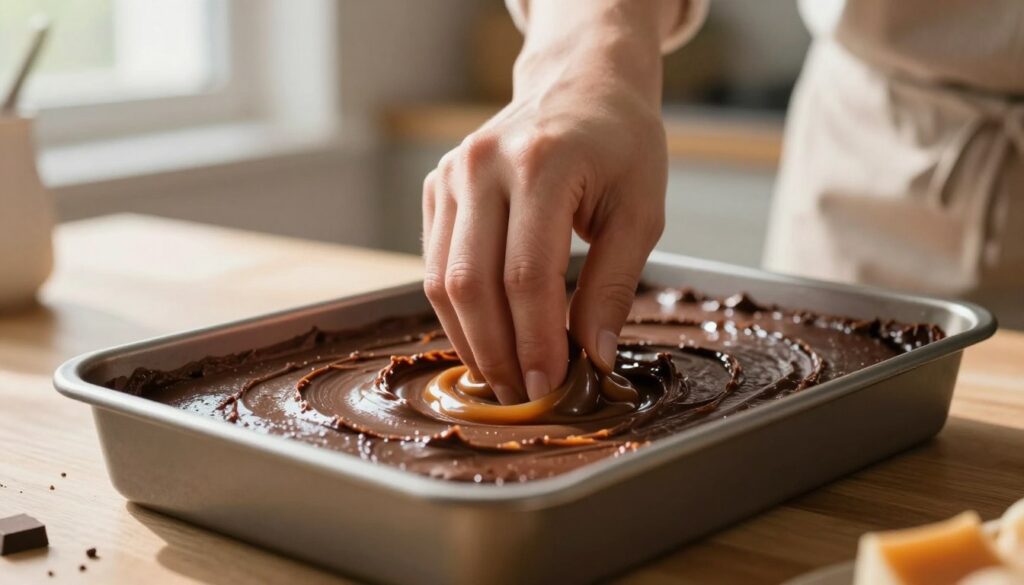
Spoon the mixture prepared into your lined tin. Use the back of a spoon to press firmly and spread an even, compact layer.
A well-pressed base stops the bar cake from falling apart when you slice it.
When the mixture prepared sits in the tin, push into each corner so the shape is uniform. Take your time to make the berry mars bar base level.
Press firmly across the surface and leave no gaps. A tightly packed base makes clean squares and helps the topping sit flat.
- Spoon in the mix and press firmly with steady pressure.
- Work into corners for a professional finish.
- Ensure the mixture prepared is level before chilling.
Once done, the tin is ready to chill. This step sets the structure and is the simple secret behind a tidy mary berry mars slice.
| Action | Why it matters | Tip |
|---|---|---|
| Spoon mixture into tin | Ensures even depth | Keep mix warm for easier packing |
| Press firmly | Prevents crumbling | Use back of a spoon or a flat scraper |
| Level surface | Helps topping spread evenly | Check corners and edges |
Creating the Smooth Chocolate Topping
A smooth chocolate layer transforms the fridge slice into a show-stopping teatime treat.
Start by melting 200g of good milk chocolate gently. Use a small pan on low heat or microwave in short 20‑second bursts, stirring between each burst. Keep the heat low to prevent the chocolate topping from splitting or turning grainy.
Achieving a Glossy Finish
Ensure the melted chocolate is completely smooth before you pour melted chocolate over the chilled biscuit base. A glossy melt gives a professional sheen and a firm, even set.
“Use low heat and steady stirring — patience here makes all the difference to the final gloss.”
Spreading Evenly
Pour melted chocolate over the packed base and spread quickly with an offset spatula or the back of a spoon. Work from the centre to the edges so the chocolate topping sits level.
- Pour melted chocolate in one steady stream for even coverage.
- Spread before it starts to set to avoid streaks.
- Chill straight away once the surface is smooth.
| Action | Why it matters | Quick tip |
|---|---|---|
| Melt milk chocolate | Creates the glossy chocolate topping | Use low heat and stir constantly |
| Pour melted chocolate | Ensures full coverage of the base | Pour centrally and spread outwards |
| Chill promptly | Sets the smooth chocolate | Place in fridge for 30–60 minutes |
Chilling and Setting the Dessert
Cooling for a couple of hours is the key step that makes cutting neat squares simple. Place your mary berry mars bar bar cake in the fridge for at least 2 hours to allow the chocolate topping to set and the base to firm up.
Chilling is vital. A cold base becomes easier to handle and the topping will harden to a satisfying snap when you bite into the slice.
When fully chilled, the traybake holds its shape and yields clean edges. While it sets, prepare a sharp knife and a clean board so you can cut with confidence.
- Refrigerate for a minimum of 2 hours for a stable base and set chocolate topping.
- The chilled bar cake slices more neatly and looks tidy on a plate.
- Best served cold to show contrast between the gooey centre and crisp chocolate layer.
“Proper chilling is the secret to a perfect mars bar cake that holds its structure and looks beautiful on a plate.”
For more no‑bake inspiration, see this mary berry coconut cake recipe while the dessert sets.
Expert Tips for Perfect Slices
A few simple slicing tricks will turn a rich fridge slice into perfect, uniform squares every time. These steps protect the glossy chocolate topping and help you portion for guests with ease.
Warming the Knife
Dip a large, sharp knife in hot water, then dry it before you cut squares. Warming the knife melts the thin chocolate layer as you slice.
This prevents cracking and keeps edges smooth.
Achieving Clean Edges
Let the tray sit at room temperature for 10 minutes before cutting. Use steady, single strokes and wipe the blade between each cut.
“A warm, clean blade is the easiest way to get tidy, professional-looking edges.”
Portioning for Parties
Decide your portions beforehand. Small squares serve more guests and suit a rich mars bar cake.
- Mark faint lines on the topping to guide your cuts.
- Cut uniform squares so each guest gets a neat piece.
| Tip | Why it helps | Quick action |
|---|---|---|
| Warm knife | Prevents topping from cracking | Dip and dry between cuts |
| Room rest | Makes slicing easier | Leave 10 minutes |
| Smaller portions | Feeds more guests | Cut more, smaller squares |
Customising Your No-Bake Treat
Small swaps and add-ins instantly refresh the classic recipe and add new layers of texture. Try folding chopped nuts or mini marshmallows into the crushed biscuits mix for extra bite and chew.
If you prefer less sweetness, swap the milk for dark chocolate on top. A dusting of sea salt over the set topping balances the sugar from the mars bars butter base.
For a different crunch, replace some biscuits with crispy cereal. You can also swirl in peanut butter for a nutty twist or stir in dried fruit for chew and colour.
Adjust the mars bars butter ratio to make the base firmer or softer to suit your taste. Adding extra chocolate or a few chocolate chips lifts the flavour while keeping the easy no‑bake method intact.
- Try nuts, marshmallows or cereal for texture.
- Use dark chocolate to reduce sweetness.
- Sprinkle sea salt to balance flavours.
Store in an airtight container in the fridge for up to 5 days. For more no‑bake ideas, see this no-bake cheesecake.
Conclusion
strong, Finally, keep things simple: quality bars and patient chilling are the secrets to success.
This chocolate treat is a simple, crowd-pleasing no‑bake dessert that delivers big flavour with very little effort required.
Follow this guide and you can easily make mary berry mars bar cake at home for parties or afternoon tea. Use good ingredients and chill fully for clean slicing.
As a classic recipemary berry mars creation, the bar is rich, gooey and crunchy — a chocolate cake everyone asks for again.
Enjoy experimenting with small tweaks, and serve cold for the best contrast between the soft centre and the crisp topping.
FAQ
What is the easiest way to melt the chocolate and Mars bars without burning them?
Which biscuits work best for the fridge cake base?
How can I achieve a glossy, smooth chocolate topping?
Is there a no‑bake method for this bar-style dessert?
How long should the slice chill before cutting into squares?
Can I add nuts or dried fruit to the mixture?
How do I store the finished squares and how long will they keep?
What is the best way to cut clean edges on each portion?
Can I use alternative chocolate like dark or white chocolate for the topping?
Any tips for pressing the mixture evenly into the tin?
Mary Berry Mars Bar Cake
This classic fridge treat brings together gooey caramel and crisp biscuits for a no-fuss, no-bake dessert that always disappears fast at parties.
Ingredients
- 200g digestive biscuits
- 230g Mars bars (about 6 bars), chopped
- 100g unsalted butter
- 200g milk chocolate
Method
- Crush the digestive biscuits into chunky, uneven pieces.
- Melt the chopped Mars bars and unsalted butter in a saucepan over low heat, stirring constantly until smooth.
- Remove the pan from heat and fold in the crushed biscuits until evenly coated.
- Press the mixture firmly into a lined 20 cm square tin to create a compact base.
- Melt the milk chocolate gently and pour it over the chilled biscuit base, spreading evenly.
- Chill in the fridge for at least 2 hours until set.
- Once set, use a warm knife to cut into squares for serving.